This post may contain affiliate links. If you make a purchase through these links, I may earn a small commission at no extra cost to you. Thank you so much for your support.
If you’re looking for fabric scraps ideas, these 25 sewing projects turn your leftover prints into useful accessories, thoughtful gifts, and pieces you can offer in a handmade collection.
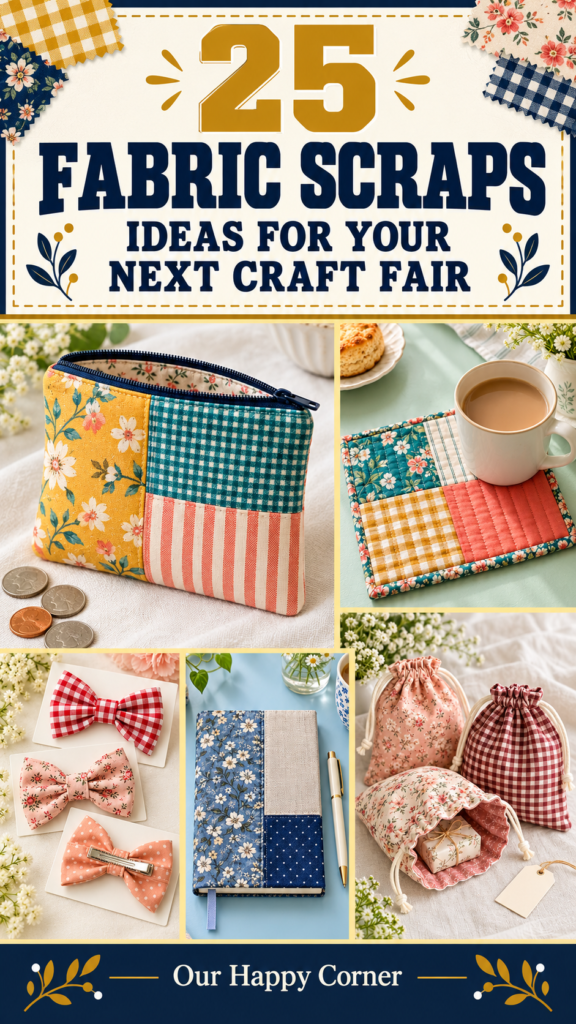
You know that little floral piece you keep moving from one pile to another? It might be just enough for a bow, a bookmark, or the front of a small pouch.
You don’t need every fabric to match perfectly. A repeated color, a quiet background print, and neat stitching can bring very different leftovers together.
The 25 projects below include quick makes for small scraps and larger patchwork pieces for the fabric you have more of. Choose something you would actually enjoy making again, especially if you plan to offer it for sale.
Choose the Right Scraps for Your Project
Start by sorting your scraps into narrow strips, small pieces, and larger cuts. Strips suit wristlets and ties, while small pieces work well in bookmarks, coasters, and patchwork panels.
For most of these projects, woven quilting cotton is a useful starting point. Pair fabrics with similar weights so one section doesn’t stretch or sag more than the next.
Wash and press washable fabrics before cutting, particularly when combining leftovers from different projects. Set aside pieces with damaged edges or stains, and keep each patchwork piece’s grain running consistently where possible.
Your basic supplies are a sewing machine, thread, fabric scissors or a rotary cutter and mat, a ruler, pins or clips, an iron, and a hand-sewing needle. Individual projects also use small amounts of elastic, interfacing, batting, lining fabric, or hardware.
Use a 1/4-inch seam allowance for piecing patchwork unless your chosen pattern specifies otherwise. Assembly seams vary by project, so include their allowance when cutting rather than assuming every measurement is a finished size.
Larger fabric scrap sewing projects usually need an extra piece of lining or backing fabric. You can still make the most of your leftovers without forcing tiny scraps into every layer.
Make Your Sewing Projects Worth Selling
Start with a small collection rather than making all 25 items at once. A few coordinated scrunchies, a pouch, and a glasses sleeve can give your table or shop a clear style.
Time yourself making a complete item, including pressing, finishing, and packaging. Scraps may already be in your sewing basket, but thread, zippers, hardware, labels, selling fees, and your time still belong in the cost.
Set a price that covers those costs and pays you for the work. Then compare similar handmade products for size, materials, and finish before deciding whether the project makes sense for your customers.
Check seams, closures, and fit on each finished piece. Use your own product photographs, list actual dimensions, and include fabric care information that matches every component.
If you use someone else’s pattern, check its terms for selling finished items. Keep your first batch small so you can learn which colors and products people choose before cutting a whole pile of fabric.
Fabric Scraps Ideas to Sew and Sell
1. Floral and Gingham Scrunchies
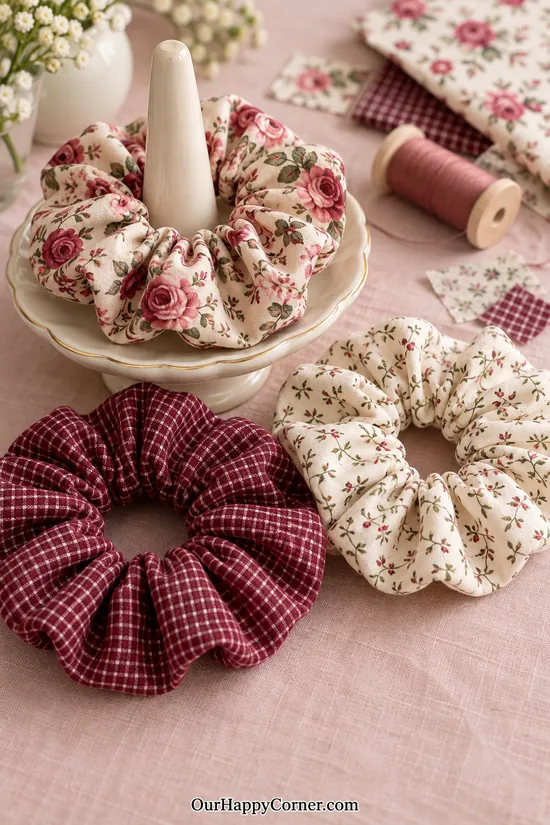
Scrunchies are a satisfying starting point when you have long, narrow leftovers. A small floral print and a gingham can become a coordinated pair without using the same fabric twice.
Choose soft cotton that gathers easily rather than a stiff upholstery scrap. Joining shorter strips is fine, but press the joining seams well so they don’t create bulky spots around the elastic.
Try selling two or three as a set with one shared color. You can also use offcuts from a larger bag project to make a matching accessory instead of adding them back to the scrap pile.
Supplies: Cotton strips, 1/4-inch elastic, thread, a safety pin or bodkin, and a hand-sewing needle.
1. Piece a strip approximately 4 inches wide by 20 inches long, then fold it lengthwise with right sides together. Sew the long edge with a 1/4-inch allowance, leaving the short ends open.
2. Turn the tube and thread through about 8 inches of elastic, holding both ends securely. Adjust the fit, overlap the elastic ends by 1/2 inch, and stitch the overlap firmly.
3. Turn one fabric end inward, tuck the other end inside it, and close the opening with small hand stitches. Spread the gathers evenly around the ring.
2. Botanical Knotted Headband
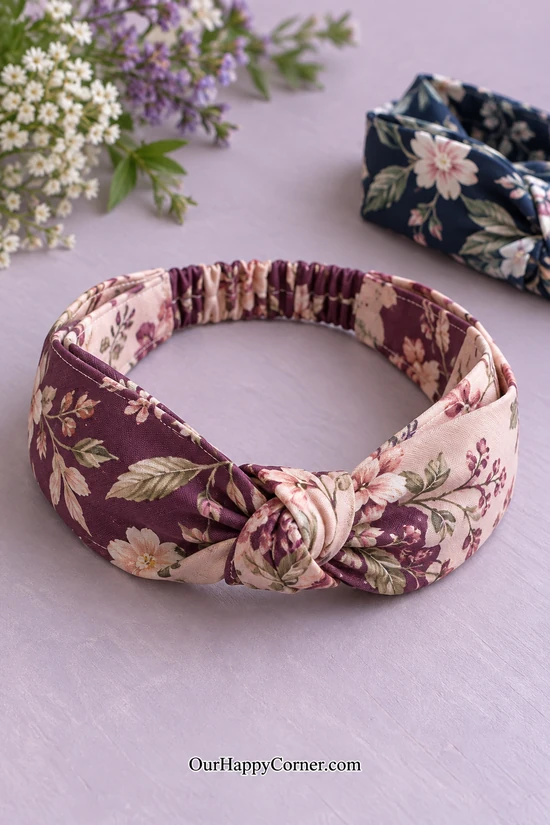
A knotted headband gives a larger botanical scrap room to stand out. The elastic section at the back helps the band fit comfortably without making the front look gathered.
Keep the knot soft so it doesn’t create a hard lump against your head. A lightweight woven fabric is easier to knot neatly than thick canvas or heavily quilted material.
Make your first headband to fit before cutting several more. For a small collection, offer different finished sizes and explain how much the elastic section stretches.
Supplies: A long cotton strip, a smaller strip for the elastic casing, narrow elastic, thread, and a headband pattern or a fitted sample.
1. Sew and turn a long fabric tube for the main band, using your pattern’s width and length. Tie a loose knot at its center and arrange the fabric so both sides lie smoothly.
2. Make a narrower fabric casing and thread elastic through it. Stitch the elastic securely at both ends of the casing.
3. Fit the band, then tuck the casing ends into the main tube’s turned-under ends. Stitch each join securely, keeping the elastic section at the back.
3. Fabric Hair Bows
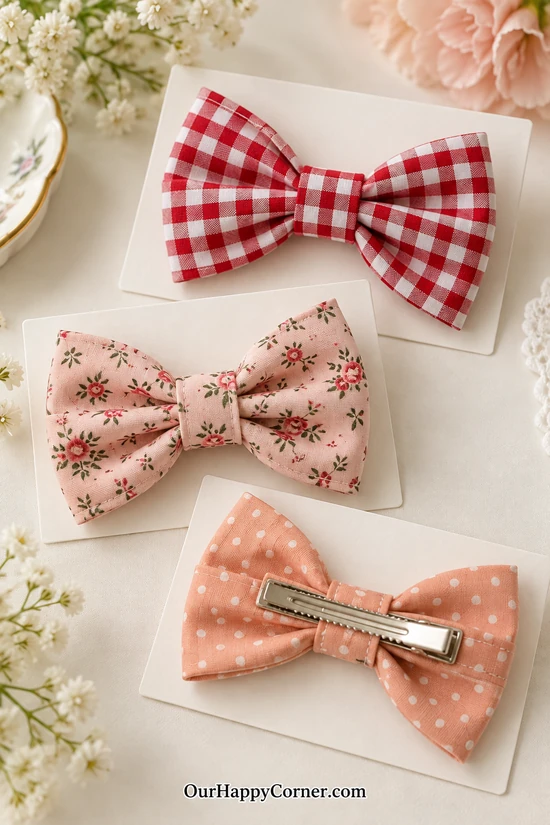
Hair bows let you use a pretty print that is too small for most accessories. A narrow center band gives the shape definition without requiring elaborate folds.
Use lightweight interfacing if the cotton feels too floppy to hold its shape. Keep the back tidy because clips are handled and turned over every time someone wears them.
Offer a few coordinated prints rather than a large bundle of unrelated fabrics. A matching scrunchie and bow can also make a thoughtful gift for someone who likes changing their hairstyle.
Supplies: Cotton rectangles, small strips for the centers, optional lightweight interfacing, metal hair clips, thread, and a hand-sewing needle.
1. Sew two matching rectangles right sides together, leaving a turning gap. Turn, press, and close the gap to create a flat fabric rectangle.
2. Pinch the middle into even folds and secure them with a few stitches. Sew and turn a narrow center strip, then wrap it around the pinched section.
3. Stitch the center band closed at the back and secure the clip beneath it. Check that the clip opens freely and that the bow cannot slide off.
4. Floral Wristlet Key Fob
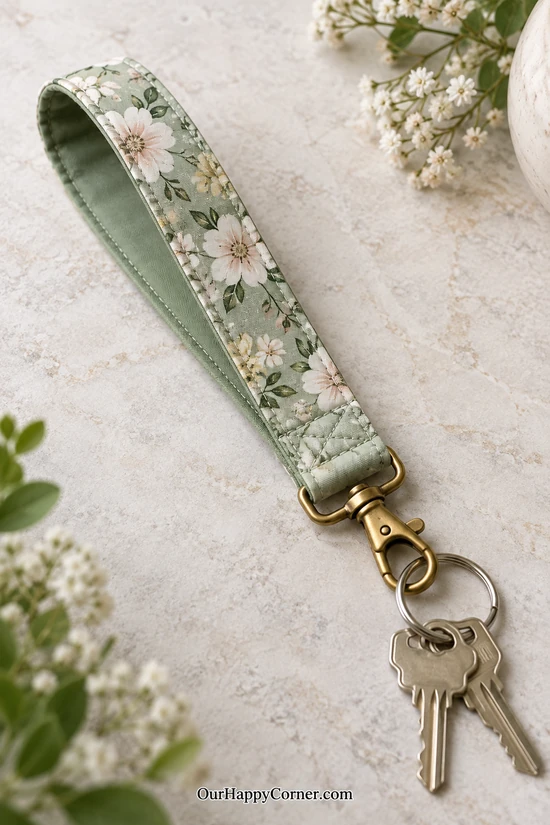
A wristlet makes your keys easier to find at the bottom of a bag. It is a useful project for a long strip of fabric that has been waiting for the right job.
Interfacing gives lightweight cotton enough structure for daily handling. Choose hardware that fits the finished strap width so the fabric doesn’t bunch at the attachment.
You can sell wristlets individually or coordinate them with a coin pouch. The reinforced join matters more than decorative stitching, so give that small area your full attention.
Supplies: A cotton strip, fusible interfacing, a swivel clasp with a suitable strap opening, a split key ring, and strong thread.
1. Cut a strip four times your intended finished width, adding enough length to form a comfortable wrist loop and an overlapped join. Fuse interfacing, fold both long edges to the center, then fold again and topstitch both sides.
2. Thread the strap through the clasp opening and overlap its ends to form the loop. Position the join close to the hardware and stitch a reinforced box with an X through it.
3. Slide the clasp to the joined end and stitch across the strap behind it to limit movement. Add a split ring and check the attachment with a firm pull.
5. Patchwork Coin Pouch
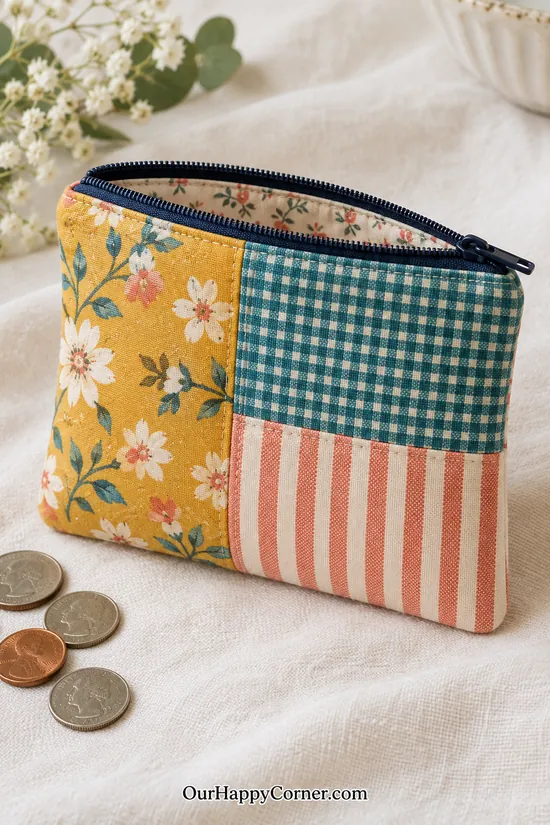
A coin pouch gives those bright scraps a practical place in someone’s bag. A simple flat shape keeps the sewing manageable while the patchwork provides the personality.
Use a zipper that opens wide enough for fingers to reach inside comfortably. A smooth lining keeps coins from catching on the patchwork seam allowances.
Repeat one fabric from another accessory if you want to build a small gift set. This is also a good project for testing a new color combination before committing to a bigger bag.
Supplies: Cotton scraps, lining cotton, lightweight interfacing, a nylon zipper, thread, and a zipper foot.
1. Piece and press two outer panels, then cut matching lining panels. Interface the outer fabric and trim all four pieces to the same dimensions.
2. Sew each zipper tape between an outer panel and its lining, with right sides arranged toward the zipper. Press the fabric away from the teeth and topstitch.
3. Open the zipper halfway, place the outer panels together and the lining panels together, and sew their edges, leaving a turning gap in the lining. Turn, close the gap, and tuck the lining inside.
6. Quilted Makeup Bag
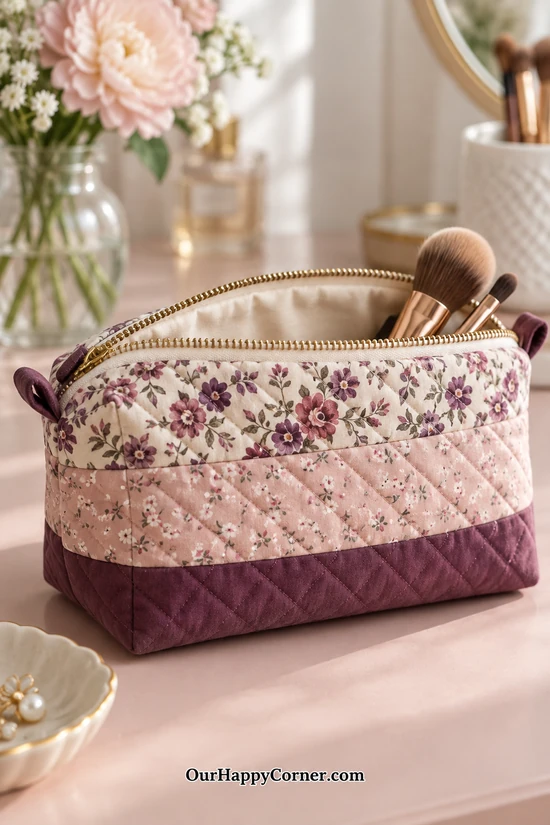
A boxed makeup bag gives you more room than a flat pouch. The quilted exterior makes small floral pieces feel like part of a carefully chosen design.
Thin batting adds softness without making the zipper area difficult to sew. A washable lining is helpful for an accessory that may sit beside makeup brushes and cosmetic bottles.
Keep the patchwork at a comfortable scale instead of filling the bag with tiny seams. List the finished width, height, and depth if you sell it so buyers can judge what will fit inside.
Supplies: Cotton scraps, lining fabric, thin batting, a nylon zipper, thread, and a boxed-pouch pattern.
1. Piece the outer panels, layer them with batting, and quilt simple lines. Trim the quilted panels and cut the lining according to your pattern.
2. Install the zipper between the outer and lining layers, then topstitch beside it. Sew the outer side and bottom seams and the lining seams, leaving the zipper open and a turning gap in the lining.
3. Box all four lower corners to the same depth using your pattern’s measurements. Turn through the lining gap, close it, and settle the lining into the corners.
7. Two-Print Glasses Sleeve
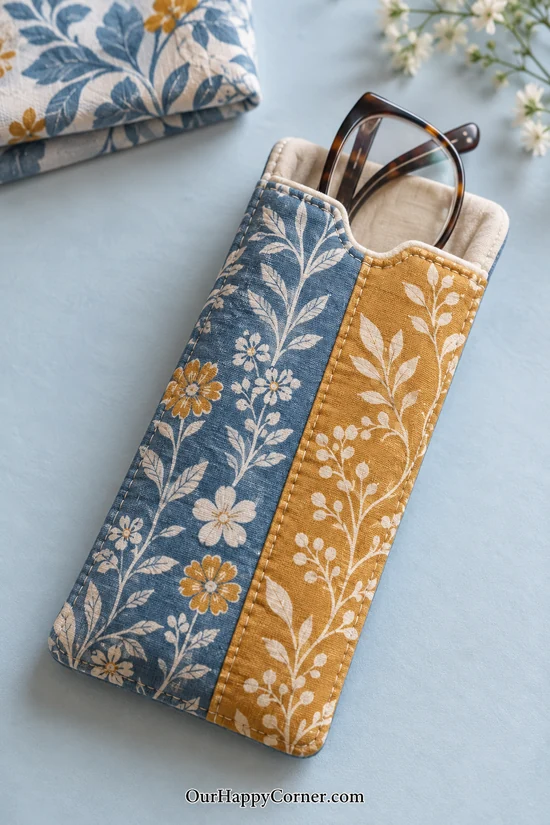
A glasses sleeve is handy for keeping folded frames from rubbing against other items in a bag. It offers a little cushioning, although it doesn’t replace a rigid protective case.
Two contrasting strips are enough to make the front interesting. Choose a soft lining and check the opening against the actual glasses you intend it to hold.
The sleeve should let the frames slide in without forcing the seams outward. A matching bookmark makes a lovely pairing for someone who enjoys a quiet afternoon with a book.
Supplies: Cotton scraps, soft lining fabric, thin batting, thread, and a pair of glasses for checking fit.
1. Piece a front panel and cut a matching back panel, adding seam allowances and room around the folded glasses. Cut corresponding lining and batting pieces.
2. Baste the batting to the outer panels, then sew the outer sleeve’s sides and bottom. Sew the lining in the same way, leaving a turning gap near its bottom.
3. With right sides together, join the outer sleeve and lining around the opening. Turn through the gap, close it, tuck the lining inside, and topstitch the opening.
8. Patchwork Fabric Bookmarks
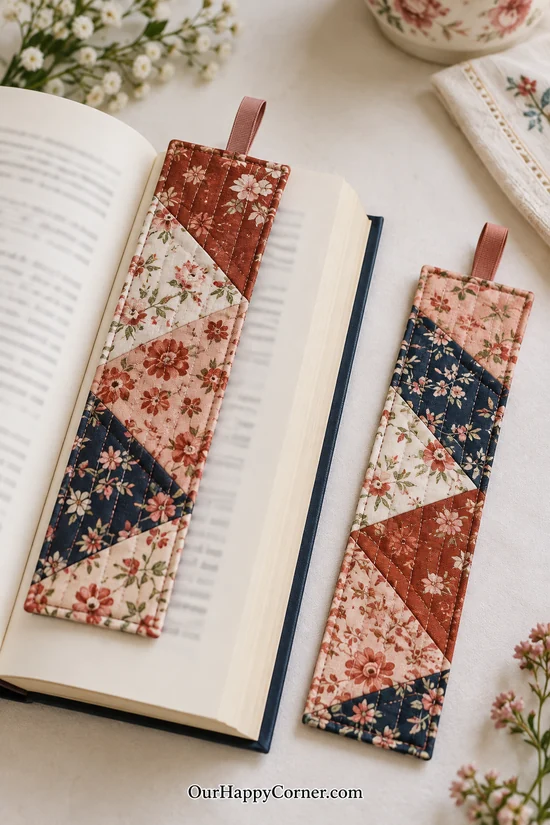
Bookmarks are one of the easiest fabric scraps ideas to make from small offcuts. Even a narrow triangle of floral cotton can become part of a useful little gift.
Choose interfacing instead of thick batting so the bookmark sits comfortably between pages. A short ribbon tab makes it easier to find without adding much bulk.
Try making several from one group of scraps and changing how the pieces are arranged. You can sell them individually or add one to a fabric-covered notebook for a coordinated present.
Supplies: Small cotton scraps, plain backing fabric, lightweight interfacing, ribbon, and thread.
1. Piece a narrow rectangular front and press the seams flat. Cut matching backing and interfacing, then fuse the interfacing to the front.
2. Place the front and backing right sides together, trapping a folded ribbon tab at the top with its loop pointing inward. Sew around the perimeter, leaving a small turning gap.
3. Turn and press carefully, then topstitch around the edges to close the gap. Keep the finished bookmark flat and trim any loose threads.
9. Quilted Mug Rug
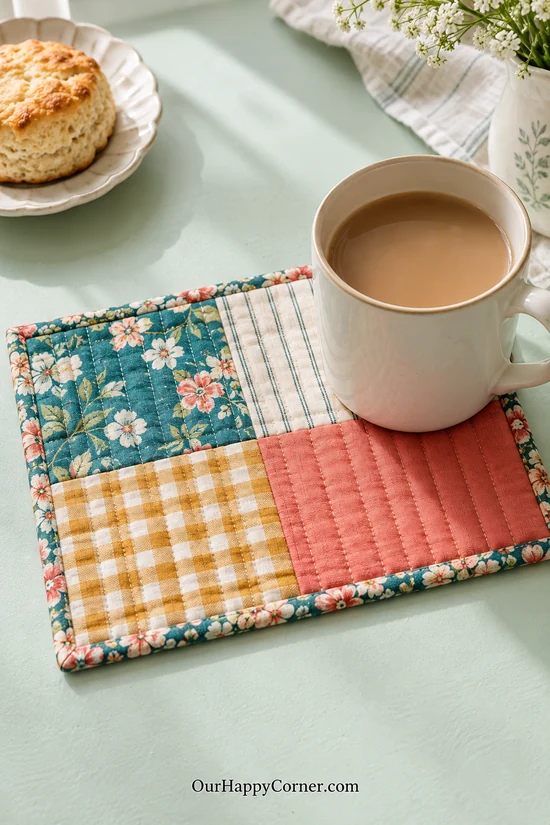
A mug rug leaves room for your cup and a small snack on the same little mat. It is a manageable way to practice patchwork and quilting without starting a full quilt.
Mix one lively floral with quieter checks or stripes so the design feels balanced. Low-loft batting helps the cup sit steadily rather than tipping on a puffy surface.
Make a pair for a shared coffee table or a single mat for a desk. Give it washable fabric and secure quilting so it can handle the occasional splash of coffee.
Supplies: Cotton scraps, cotton backing, low-loft batting, binding strips, and thread.
1. Piece a rectangular top large enough for a mug and a small plate. Press the seams and layer it with slightly larger batting and backing pieces.
2. Baste the layers and quilt evenly spaced straight lines. Trim the quilted rectangle square without cutting too close to the stitching.
3. Attach binding around the edges, folding the corners neatly and securing the binding on the back. Press lightly and check that the mat lies flat.
10. Coordinated Patchwork Coasters
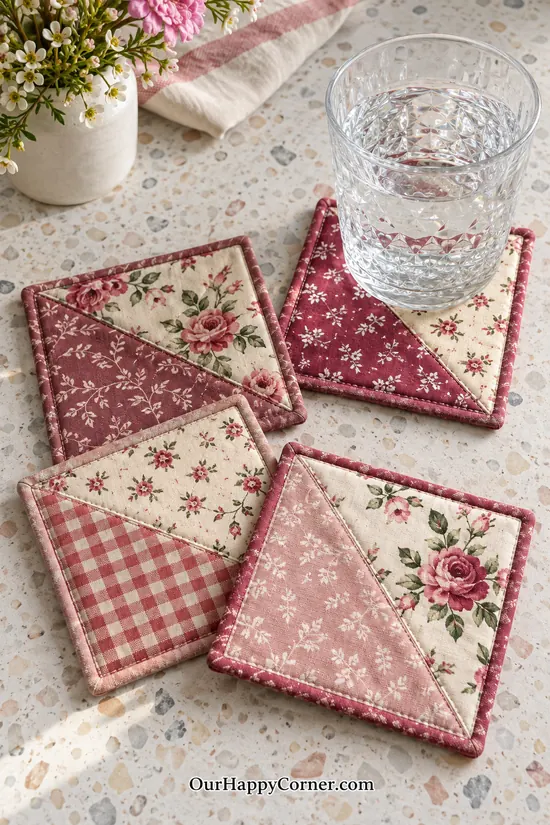
Coasters are a useful home project when most of your scraps are small. Make the set feel coordinated by repeating two or three fabrics across different layouts.
The tops don’t need to be identical to look like a set. Consistent size, binding, and quilting do much of the work of bringing them together.
Choose cotton layers and light padding that sit flat beneath a glass. These are drink coasters rather than hot-pan pads, so describe their intended use clearly.
Supplies: Cotton scraps, backing cotton, thin batting, narrow binding, and thread.
1. Piece four square tops slightly larger than your intended finished size. Layer each with batting and backing and baste the layers together.
2. Quilt a simple line pattern through each sandwich. Trim all four to matching squares, approximately 4 1/2 inches across if that suits your glasses.
3. Bind the edges and secure the corners neatly. Stack the finished coasters to check that their sizes match before packaging them as a set.
11. Lined Fabric Storage Basket
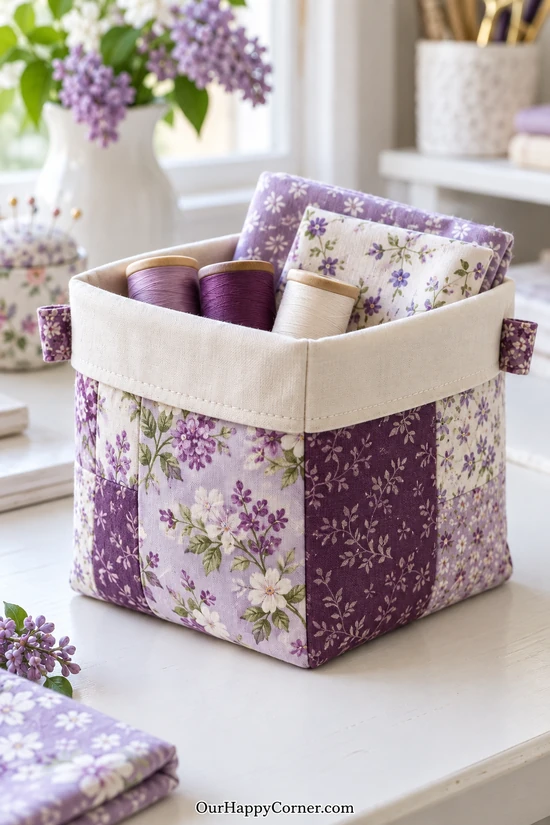
A little fabric basket gives sewing supplies somewhere to land between projects. It also works beside a vanity or on a shelf for everyday items that tend to spread out.
Use larger scraps for the outside and a plain lining for a calm contrast. Medium-weight interfacing helps the sides hold their shape while keeping the basket soft.
Match the basket’s depth to what you plan to store. If you offer several sizes, photograph them beside a familiar item so buyers understand the difference.
Supplies: Cotton scraps, lining fabric, medium-weight fusible interfacing, thread, and a rectangular fabric-basket pattern.
1. Piece the outer panels and apply interfacing according to its instructions. Cut the outer and lining pieces to your pattern, allowing extra lining height if the design includes a turned cuff.
2. Sew the outer side and bottom seams, then box the lower corners. Assemble the lining with matching corner depth and leave a turning gap in its bottom seam.
3. Join the outer basket and lining at the upper edge with right sides together. Turn, close the gap, topstitch the rim, and fold the cuff outward if included in your pattern.
12. Reusable Drawstring Gift Bags
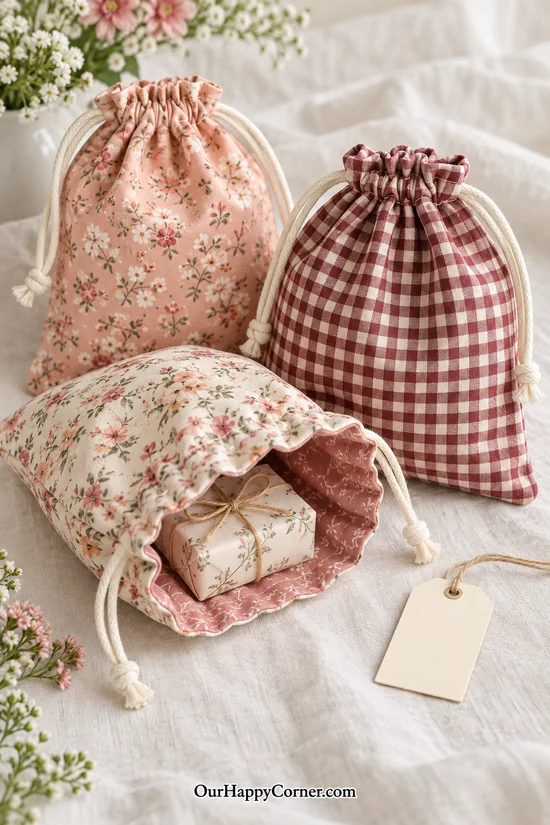
A fabric gift bag becomes part of the present instead of being thrown away after opening. Floral prints work year-round, while gingham gives the bag a simple, familiar look.
Make the bag slightly roomier than the gift so the drawstring can gather comfortably. A lining gives small bags a tidy interior and helps hide the construction seams.
For holiday presents, pair your bag with our free printable Christmas gift tags. You can also browse our Christmas gift wrapping ideas for coordinating ribbons and finishing touches.
Supplies: Cotton scraps or pieced panels, lining cotton, cord or narrow fabric ties, thread, and a safety pin.
1. Cut two outer panels and two lining panels. Mark a drawstring channel near the top and leave small openings in the outer side seams at the channel’s ends.
2. Sew the outer bag and lining separately, leaving a turning gap in the lining. Join their top edges right sides together, turn, and close the lining gap.
3. Stitch two parallel rows around the bag to form the channel. Thread two cords in opposite directions, knot each cord’s ends together, and pull both loops to close the bag.
13. Lavender Sachets
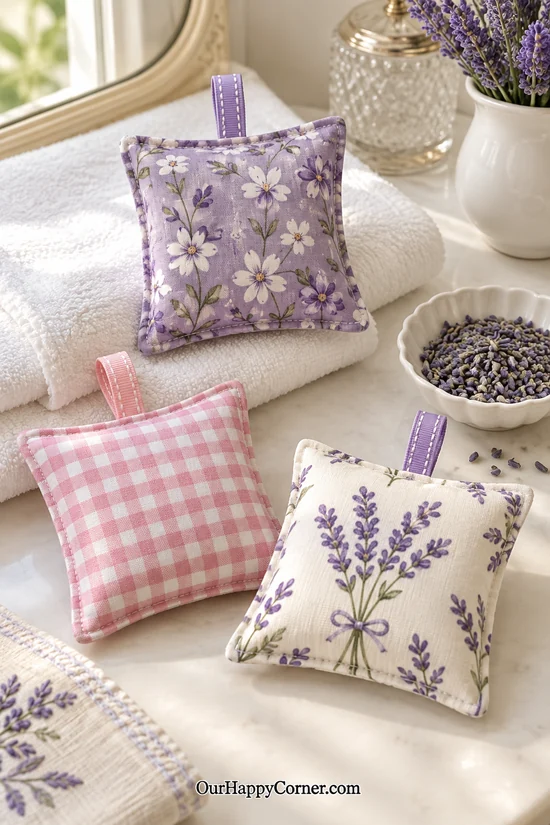
Lavender sachets are a gentle way to add scent to a drawer or linen cupboard. Small floral fabrics suit the idea, but a simple check can look just as lovely.
Use completely dried lavender buds so the filling stays dry inside the pouch. Leave the sachet softly filled rather than packing it into a hard little block.
A short ribbon loop makes it easy to lift out of a drawer or hang from a hook. If you sell them, identify the lavender filling clearly and keep scented products separate from unscented fabric accessories.
Supplies: Small cotton squares, dried lavender buds, narrow ribbon, thread, and a funnel or folded paper cone.
1. Place two cotton squares right sides together, positioning a folded ribbon loop inside the upper seam. Sew around the edges, leaving a small filling gap.
2. Turn the pouch and press it before adding the filling. Spoon dried lavender through the gap until the sachet feels softly padded.
3. Turn the gap’s edges inward and hand-stitch it closed with small, secure stitches. Label the filling if the sachet will be a gift or a sale item.
14. Floral Needle Book
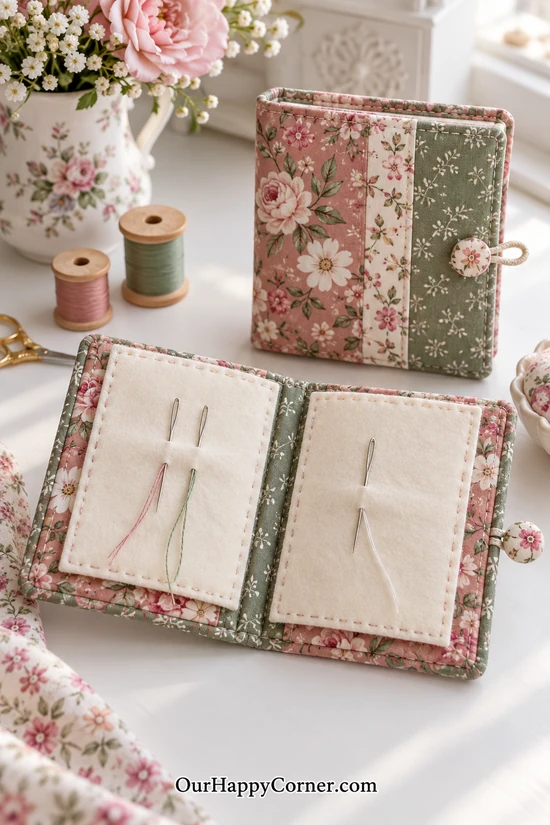
A needle book keeps your hand-sewing needles together in a small, portable place. Felt pages let you organize different needle sizes without needing separate compartments.
Piece the outside from two or three prints and keep the inside simple. Thin padding is enough to give the cover some body without making it difficult to fold shut.
This makes a thoughtful gift for someone who enjoys embroidery or mending. Include empty pages if you sell it, allowing the buyer to add the needles they prefer.
Supplies: Cotton scraps, lining cotton, thin batting, felt, a small button, narrow elastic or cord for the closure, and thread.
1. Piece a rectangular outer cover and cut matching lining and batting. Sew the cover and lining right sides together with the batting against the wrong side and a closure loop caught in one short edge.
2. Leave a turning gap, then turn, press, and topstitch the cover. Cut felt pages slightly smaller than the folded cover and stitch them through their centers along the book’s spine.
3. Sew the button onto the opposite outer edge where the loop reaches comfortably. Check that the needle tips stay within the cover when the book closes.
15. Round Patchwork Pincushion
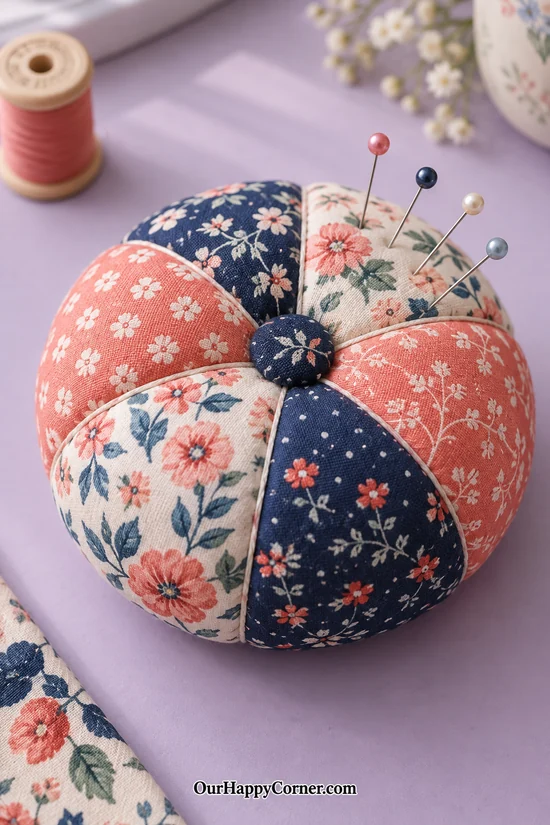
A round pincushion makes even a handful of small prints feel special. Alternating light and dark sections helps each curved panel stand out.
This project takes a little more patience than sewing a flat square. Choose a curved-panel pincushion pattern so the pieces join into a smooth shape instead of guessing the curves.
Keep the filling firm enough to hold pins without distorting the seams. It can become a useful centerpiece for a small sewing gift set with a needle book and tool roll.
Supplies: Cotton scraps, a round segmented pincushion pattern, polyester fiberfill, strong thread, and a hand-sewing needle.
1. Cut the curved panels from your chosen prints using the pattern’s template and seam allowance. Arrange them in order before sewing.
2. Join the panels into sections, then sew the sections into the full shell, leaving the specified turning opening. Clip curves where needed without cutting the stitches, and turn the shell right side out.
3. Add fiberfill gradually, distributing it into every section. Close the opening with strong, small ladder stitches and check that no loose filling remains outside.
16. Patchwork Cushion Cover
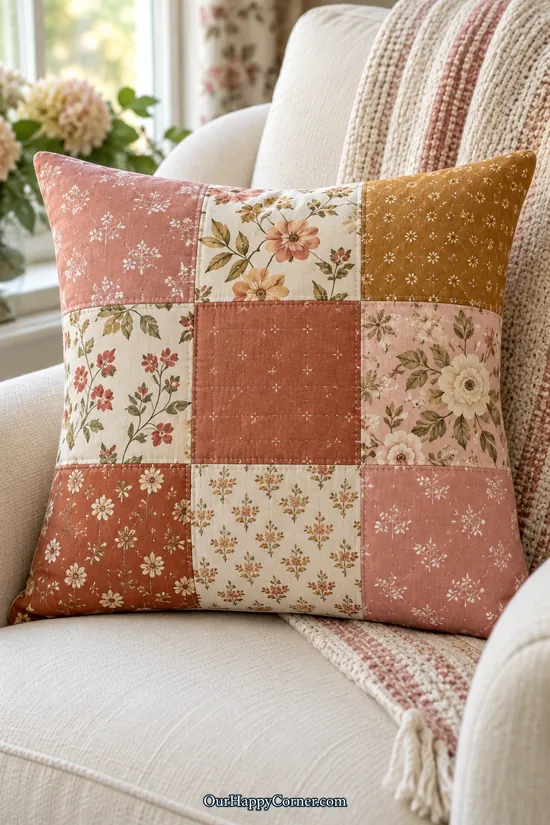
A patchwork cushion cover uses the larger pieces that are too pretty to cut into tiny accessories. Soft rose, cream, and mustard can bring different floral prints into one warm palette.
Plan the arrangement on a flat surface before joining the squares. A plain envelope back keeps the construction straightforward and makes the cover removable for washing.
Choose the finished cover size around the insert you already have. If you sell the cover without an insert, make that clear and give its finished measurements.
Supplies: Cotton scraps, backing fabric, a cushion insert, optional lightweight interfacing, and thread.
1. Cut equal squares with seam allowances included, then join them into rows. Press the row seams in alternating directions and join the rows into a front panel.
2. Trim the front to the required size and cut two backing panels that will overlap generously across the center. Hem the edges that form the envelope opening.
3. Lay the backing panels over the front with right sides together and their hemmed edges overlapping. Sew around the outer perimeter, finish the seam allowances, turn, and insert the cushion.
17. Patchwork Notebook Cover
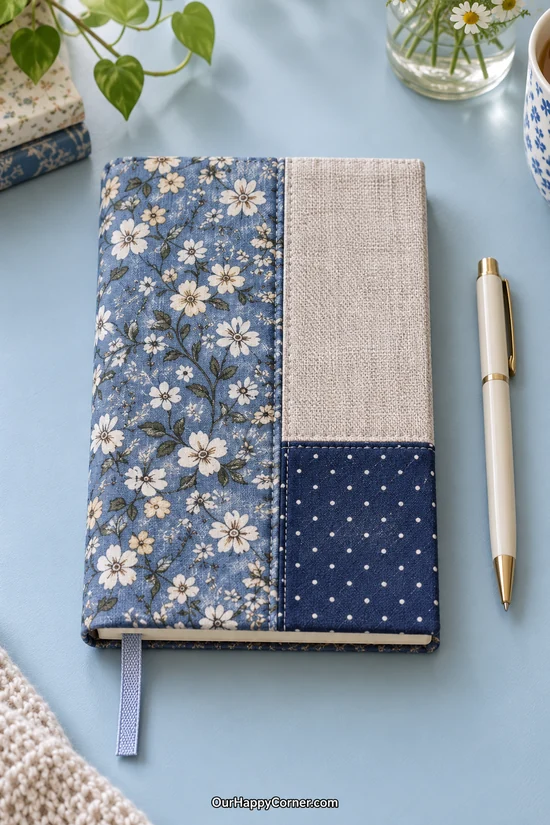
A removable notebook cover lets a favorite fabric stay in use after the pages are filled. The blue floral panel adds personality while the plain and dotted pieces give the cover balance.
Measure the notebook open and flat, including its spine, before cutting. The inside sleeves need enough depth to hold the covers securely without making the notebook difficult to close.
This is a lovely project for readers, list makers, or anyone who keeps a journal nearby. If you sell the cover separately, list the notebook dimensions it fits instead of calling it a universal size.
Supplies: Cotton scraps, lining cotton, lightweight interfacing, ribbon, thread, and the notebook you want to cover.
1. Measure across the notebook’s back, spine, and front while it lies open, then measure its height. Add fitting ease and seam allowances, and piece the outer panel to those dimensions.
2. Cut a matching lining and two folded inner sleeves. Arrange the sleeves against the lining’s ends and a ribbon bookmark at the top of the spine, then sandwich them with the outer panel right sides together.
3. Sew around the perimeter, leaving a turning gap away from the sleeves. Turn, press, close the gap, and slide the notebook covers into the sleeves to check the fit.
18. Snap-Closure Cord Keepers
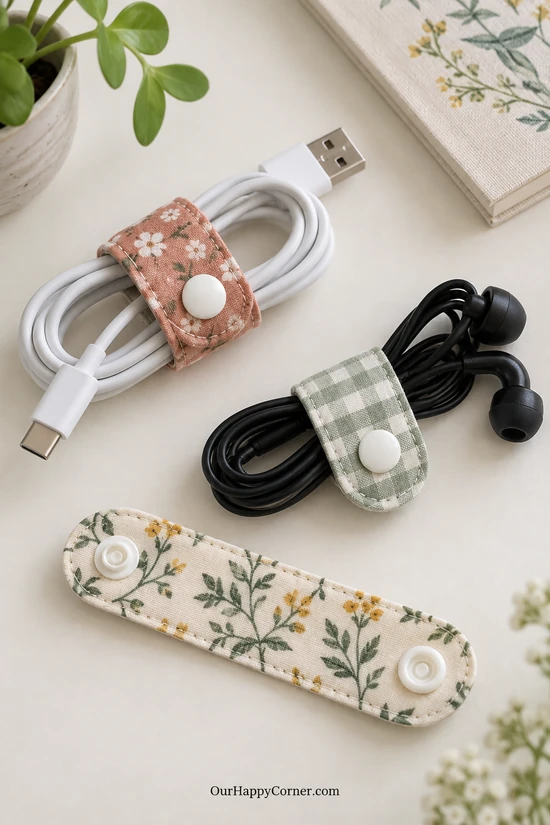
Cord keepers are useful fabric scraps ideas for pieces too small to turn into a pouch. A short strap wraps around a coiled charging cable and keeps it together inside a bag.
Give the snap area a little extra reinforcement so frequent opening doesn’t pull on a single thin layer. A rounded end is attractive, but a simple rectangle works if you prefer straight sewing.
Make a few lengths to suit different cable thicknesses. You can offer a small set for a travel bag, desk drawer, or family charging station.
Supplies: Cotton scraps, lightweight interfacing, plastic snaps with their setting tool, thread, and a small strap template.
1. Cut two matching strap shapes and reinforce the snap positions with interfacing. Sew right sides together, leaving a turning gap.
2. Turn, press, and topstitch around the strap. Wrap it around a coiled cable to mark where the ends should overlap.
3. Install complementary snap halves according to the snap manufacturer’s instructions, orienting them to meet when wrapped. Check the fit without pulling the strap tightly around the cable.
19. Soft Patchwork Sleep Mask
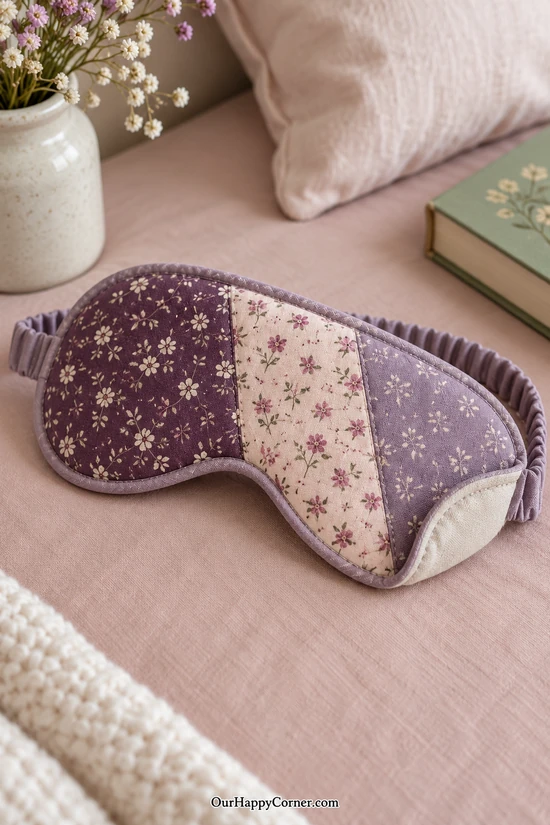
A sleep mask is a small sewing project with a useful everyday purpose. The patchwork stays on the front while a smooth backing rests against your face.
Use an opaque backing and a comfortable elastic band rather than relying on thick padding to block light. Keep seam allowances trimmed so the curved edges feel soft.
Different faces need slightly different fits, especially around the nose. Make and adjust a sample before producing a batch, and choose washable components that can share the same care instructions.
Supplies: Cotton scraps, soft opaque backing cotton, thin batting, elastic, fabric for its casing, bias binding, and a sleep-mask template.
1. Piece the front and cut the mask shape using a template. Cut matching backing and batting, then make a fabric casing for the elastic strap.
2. Baste the front, batting, and backing together with the right sides facing outward. Attach the strap ends at the sides, keeping the elastic untwisted and checking its length for comfort.
3. Bind the mask’s perimeter, enclosing the raw edges and strap attachments. Secure the binding and strap joins neatly, then check that the mask lies softly against the face.
20. Fabric Card Holder
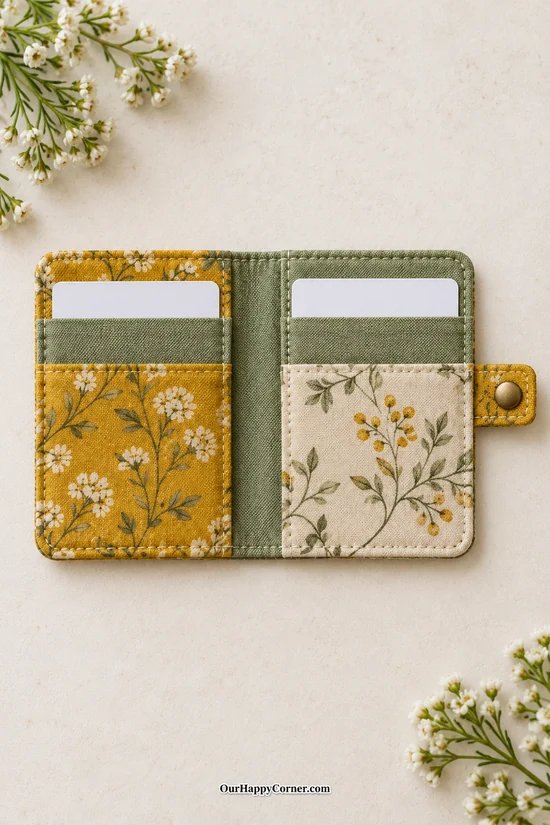
A compact card holder keeps your essential cards together without taking up much bag space. Small botanical and plain cotton scraps are enough to create distinct pocket layers.
Use interfacing to support the fabric, especially behind the snap. Each pocket needs enough ease for a card to slide in comfortably while still sitting securely.
Check the fit using actual card dimensions before sewing the final side seams. A wristlet in one matching print can turn the wallet into a coordinated accessory set.
Supplies: Cotton scraps, lightweight interfacing, a snap and its setting tool, thread, and a folding card-wallet pattern.
1. Cut the outer, lining, pocket, and closure-tab pieces from your pattern, then apply interfacing where required. Fold and press the pocket tops to make smooth finished edges.
2. Stack the pockets on the lining and baste the sides and bottoms, leaving their top openings free. Position the closure tab, join the lining and outer right sides together, and leave a turning gap.
3. Turn, press, and topstitch the perimeter. Insert cards, mark the snap position with the wallet folded, and install the closure through reinforced fabric.
21. Roll-Up Sewing Organizer
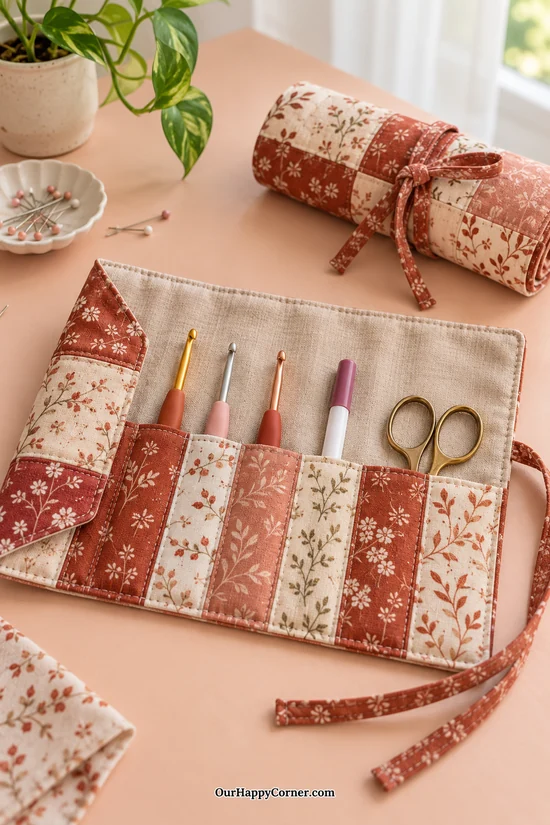
A tool roll keeps your small sewing or crochet supplies together when you move between rooms. Individual pockets stop hooks, markers, and scissors from collecting in one tangled pile.
Vary the pocket widths to suit the tools you actually use. The patchwork outside can be decorative while a plain lining makes the contents easier to find.
Two fabric ties let you close the roll without adding metal hardware. You can offer versions for different hobbies, but measure the intended tools before deciding on the organizer’s height.
Supplies: Cotton scraps, plain lining, optional lightweight interfacing, fabric strips for ties, thread, and the tools you want to store.
1. Piece a rectangular outer panel and cut a matching lining. Make a pocket panel about half the organizer’s height, hem its upper edge, and lay it across the lower lining section.
2. Mark and stitch the vertical pocket divisions, leaving space around each tool. Baste the pocket’s outer edges and the two tie ends at one side, then sew the lining and outer right sides together with a turning gap.
3. Turn, press, and topstitch the perimeter. Fill the pockets with the tools pointing upward, roll from the opposite side toward the ties, and tie closed.
22. Pocket Tissue Holders
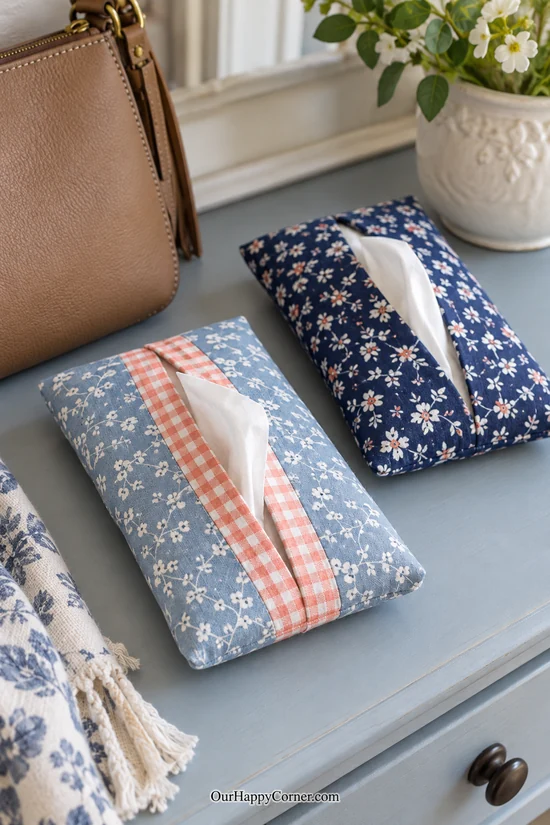
A pocket tissue holder makes an ordinary bag essential feel a little more personal. The overlapping opening lets you pull out a tissue while keeping the folded stack inside.
Choose smooth cotton and keep the opening’s seams low in bulk. A contrasting strip beside the opening is a good place to use a narrow gingham offcut.
Check the finished size against the tissue packet you use, because brands vary. This small item can sit beside glasses sleeves and cord keepers in a useful travel accessory collection.
Supplies: Cotton scraps, lining cotton, thread, and a pocket tissue packet for measuring.
1. Make a lined rectangular fabric panel with all edges enclosed by sewing right sides together, turning, and closing the gap. Size it to wrap around the packet with room for seams and a slight center overlap.
2. Place the panel lining-side up and fold its opposite ends inward so they overlap slightly at the center. Check that the packet fits underneath without stretching the fabric.
3. Stitch across both open ends of the folded holder and secure the starts and finishes. Turn the holder right side out and insert the tissues through the central opening.
23. Quilted Patchwork Table Runner
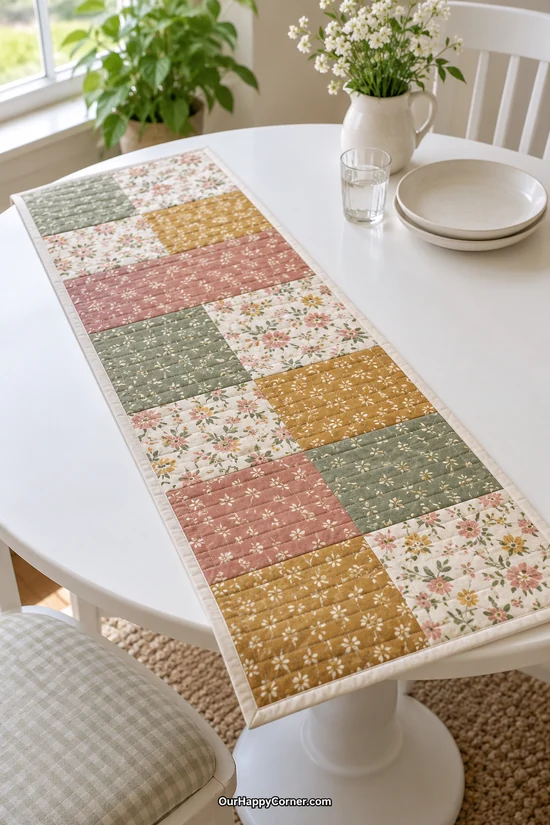
A table runner gives larger fabric scraps a place in your everyday decor. Simple rectangles make the piecing approachable while different prints add interest along the length.
Measure your table before deciding how long the runner should be. A shorter version can sit fully on the tabletop, while a longer one can drape at the ends.
Use similar-weight cottons and light batting so the finished runner lies smoothly. It is a decorative textile, so use a separate suitable trivet beneath hot cookware.
Supplies: Cotton scraps, backing cotton, low-loft batting, binding strips, thread, and a quilting ruler.
1. Arrange rectangles into rows until the runner reaches your intended size, allowing for seams. Join the pieces, press the seams, and straighten the completed top.
2. Layer the top with slightly larger batting and backing and baste thoroughly. Quilt straight lines from the center outward to help keep the layers smooth.
3. Trim the edges square and attach the binding. Finish the corners neatly and check the runner on your table before making another in the same size.
24. Reusable Fabric Bunting
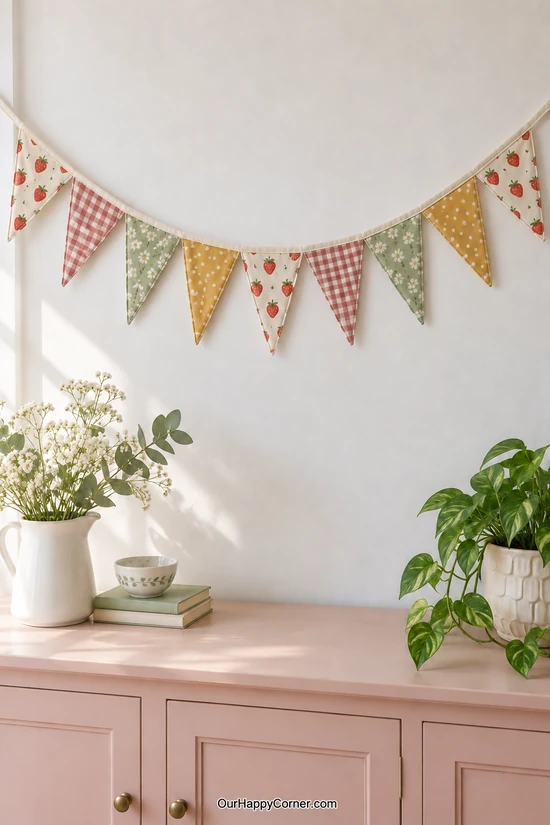
Fabric bunting uses small pieces in a way that feels cheerful and intentional. Repeating four prints along one strand gives the flags a rhythm without making every triangle identical.
Double-sided flags look finished from both sides and tuck the raw edges away. Cotton binding holds their tops together more neatly than attaching each flag with a single loose stitch.
Change the prints for birthdays, holidays, or a craft room decoration you can leave up. If you enjoy making seasonal decorations, our Valentine’s Day crafts for adults offer more ideas for a handmade celebration.
Supplies: Cotton scraps, a triangular flag template, cotton binding or bias tape, thread, and pins or clips.
1. Cut two matching triangles for each flag with seam allowances included. Sew each pair right sides together along the sloping sides, leaving the top open.
2. Trim the points, turn, and press the flags. Arrange them in a repeating order and space them along the binding, leaving enough binding at both ends for hanging.
3. Enclose every flag’s top edge inside the folded binding and stitch continuously along it. Secure the ends and check each flag’s attachment before hanging.
25. Patchwork Tote Bag
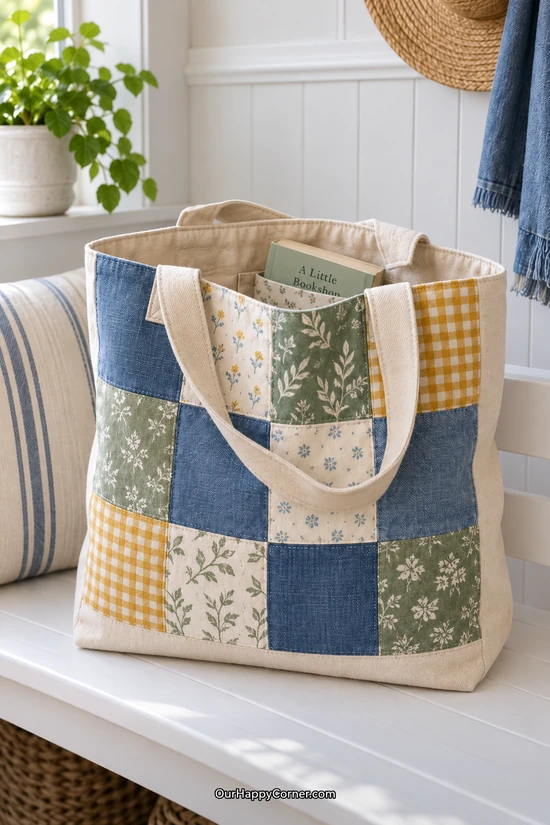
A patchwork tote is one of the larger fabric scraps ideas in this collection. It gives your favorite leftover prints room to become something you can carry every day.
Pair the pieced front with sturdy canvas for the back, base, and handles. A lining covers the patchwork seam allowances and gives you a place to add a useful inside pocket.
Keep the bag’s size sensible for its construction rather than treating it like a heavy grocery carrier. Reinforced handle attachments and well-finished seams are essential for a tote you intend to sell.
Supplies: Cotton scraps, canvas, lining fabric, suitable interfacing, strong thread, and a lined tote pattern with a boxed base.
1. Piece and press the front panel, then reinforce it with interfacing if needed. Cut the canvas back, base sections, lining, handles, and pocket according to your pattern.
2. Sew the pocket to the lining before assembling the inner bag. Assemble the outer bag, form its base, and attach the handles with reinforced box-and-X stitching through suitably supported fabric.
3. Join the outer bag and lining at the upper edge with right sides together, leaving a turning opening in the lining. Turn, close the opening, topstitch the rim, and check the handle joins and base seams.
Final Thoughts
You don’t need a perfect fabric collection to make something worth keeping or giving. Start with one of these fabric scraps ideas that suits the pieces you already have, then let the finished project guide what you make next.
If you want to sell your sewing, choose a small range you can make neatly and price fairly. Thoughtful fabric choices, useful details, and a reliable finish give your leftovers a much better chance of becoming someone’s favorite handmade purchase.