This post may contain affiliate links. If you make a purchase through these links, I may earn a small commission at no extra cost to you. Thank you so much for your support.
Fridge organization ideas can make everyday meals easier by giving fresh produce, leftovers, drinks, and snacks a place you can actually reach.
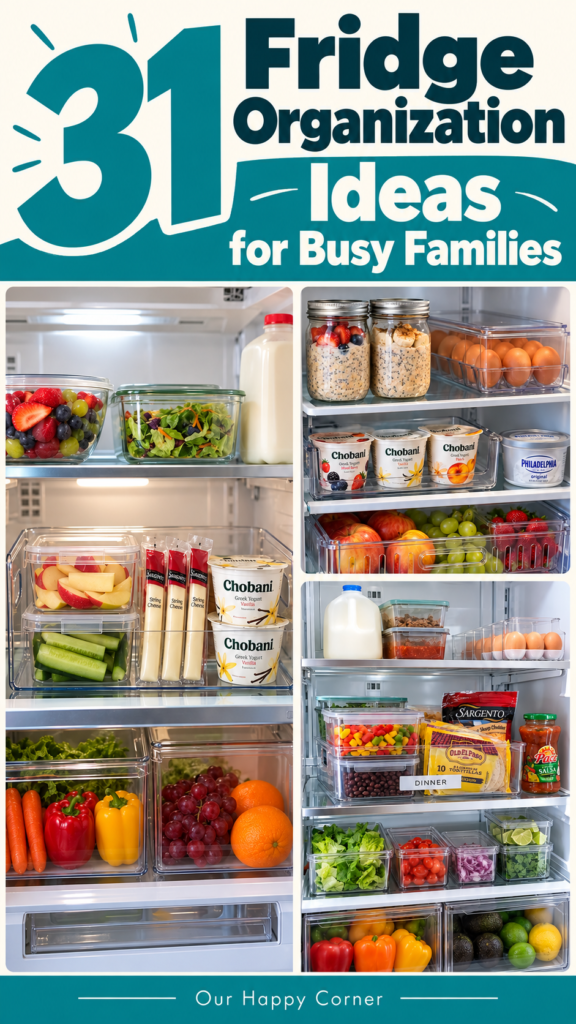
The best setup fits your groceries and the way your household uses them.
You do not need to transfer every product into a new container. Keep packaging that seals well and carries useful information, then use organizers where they improve access or prevent small items from getting lost.
These 31 ideas combine whole-fridge layouts with smaller changes you can make one shelf or drawer at a time. Choose the ones that solve a real problem in your kitchen.
Choose Organizers That Fit Your Fridge
Measure shelf width, depth, and height before buying bins. Include the space needed to grip handles, open lids, and pull drawers forward.
Start with a few food-safe containers, a handled bin, and removable labels. Add produce keepers, dividers, or a shelf riser only where they make the space easier to use.
Keep useful package information when food is transferred, including storage instructions and opening dates. A clear bin can also group original packages without requiring extra decanting.
Start With a Clean Fridge and Sensible Food Zones
Wipe shelves and drawers, discard food that should no longer be kept, and group what remains. Keep foods requiring refrigeration chilled while you work, using a cooler if needed.
Keep the fridge at 40°F or below and leave space for air to circulate. Store covered raw meat separately on the lowest suitable shelf, with ready-to-eat food above it.
Use the door for suitable condiments and drinks, and keep milk and eggs on interior shelves.
Adjust produce drawer settings and shelf positions using your refrigerator manual.
Fridge Organization Ideas to Try
1. Create a Balanced Everyday Layout
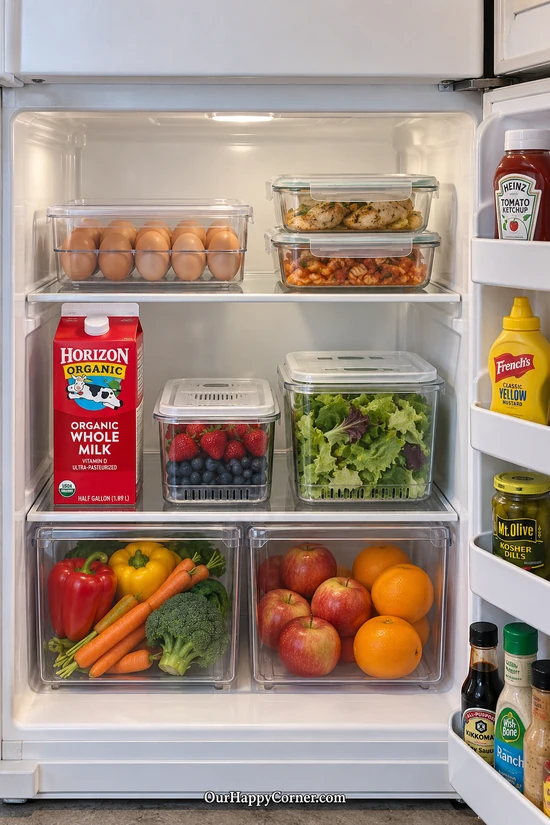
A useful fridge layout gives each food group a place without squeezing everything into identical boxes. Start with the foods your household reaches for most often.
Keep everyday dairy on an interior shelf and group covered leftovers where they are easy to spot. Use the crisper drawers for produce that would otherwise scatter across the shelves.
Choose a few containers that solve different problems rather than buying a large matching set immediately. This makes the arrangement easier to adjust after your next grocery trip.
What you’ll need: Clear produce keepers, shallow leftover containers, and a compact egg-storage area.
How to set it up:
1. Arrange the larger items first, then fit smaller containers around them.
2. Leave enough clearance to lift lids and slide bins forward.
2. Give Eggs a Compact Storage Spot
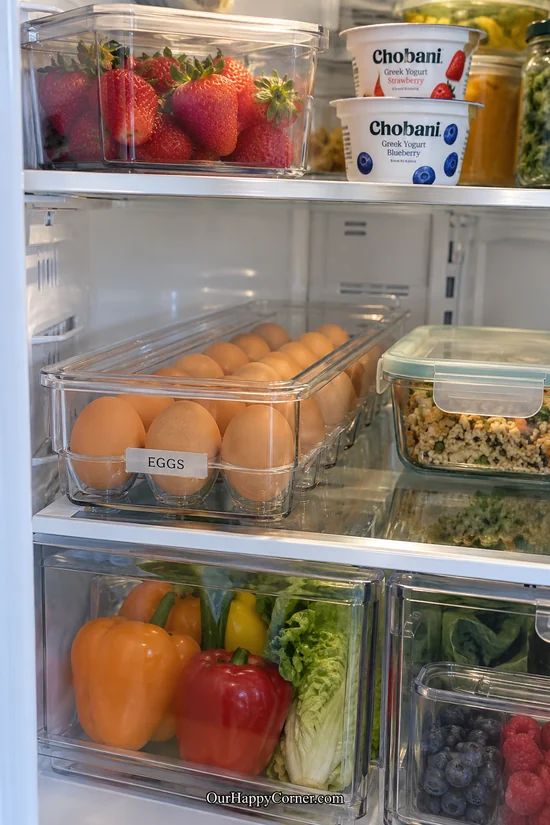
A low egg-storage area can keep breakfast supplies together while leaving the surrounding shelf usable. Measure the available depth before choosing a tray or bin.
A covered organizer has a tidy appearance and helps separate eggs from nearby containers.
For everyday storage, reserve a compact spot for that carton or place it inside a handled bin that fits. Keep the purchase information visible and avoid mixing older and newer batches.
What you’ll need: An interior shelf area or handled bin sized for the original egg carton.
How to set it up:
1. Measure the carton and choose a spot that allows easy removal.
2. Keep it away from the refrigerator door.
3. Use Basket-Insert Containers for Berries
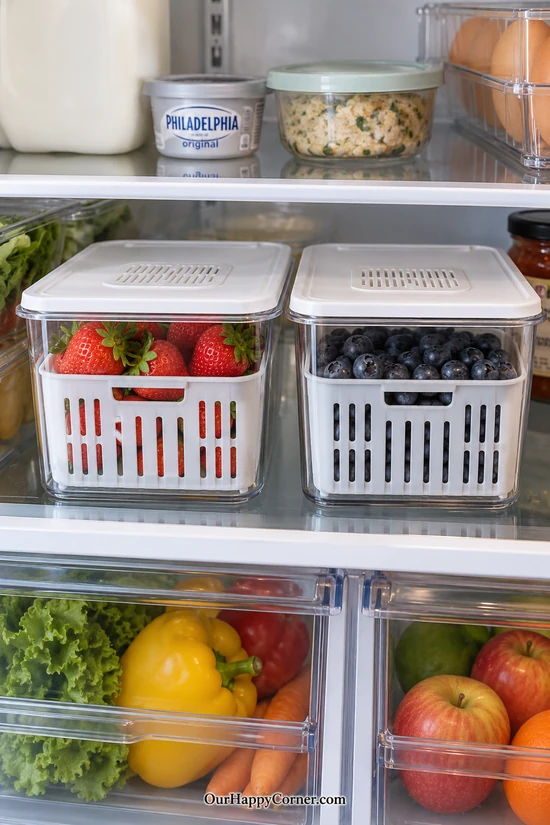
Berries are easier to find when their containers sit near the front of a shelf. A removable basket insert also makes it convenient to lift out the fruit.
Choose a produce keeper with a vented lid and follow its instructions for your particular fruit. Keep strawberries and blueberries in separate compartments so each can be checked easily.
Discard damaged berries before putting the rest away. Wash berries close to serving time unless your storage routine includes drying them thoroughly after washing.
What you’ll need: Two small produce keepers with removable basket inserts.
How to set it up:
1. Choose containers that fit side by side with room between them.
2. Avoid packing the fruit so tightly that the lid presses on it.
4. Divide a Vegetable Crisper
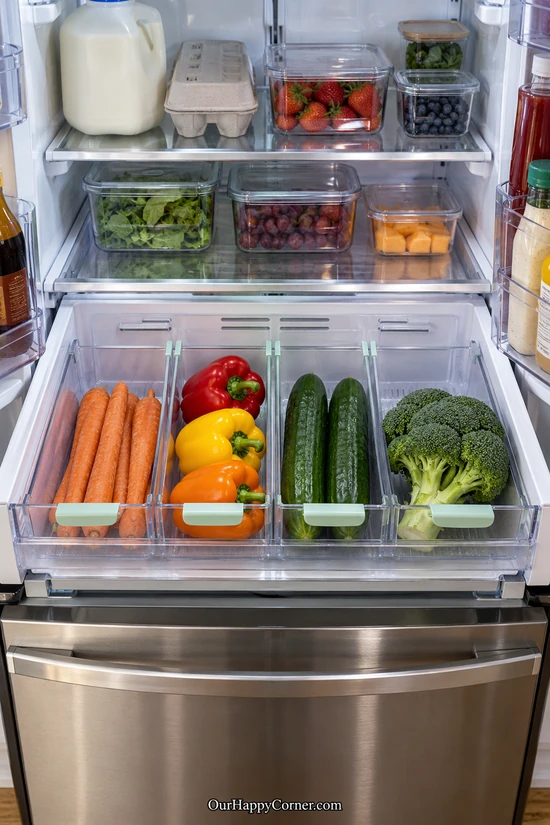
A divided crisper keeps long carrots from disappearing beneath peppers and other bulky vegetables. Small sections make the drawer easier to scan before cooking.
Use low dividers that suit the drawer rather than containers that rise above its edges. Check that the drawer closes smoothly after the vegetables are added.
Group similar items together and keep the quantities manageable. Adjust the refrigerator’s humidity controls according to its manual and the produce you store.
What you’ll need: Low crisper dividers or small washable baskets.
How to set it up:
1. Sort the vegetables into a few practical groups.
2. Set the dividers around those groups while keeping the drawer mechanism clear.
5. Add an Under-Shelf Snack Drawer
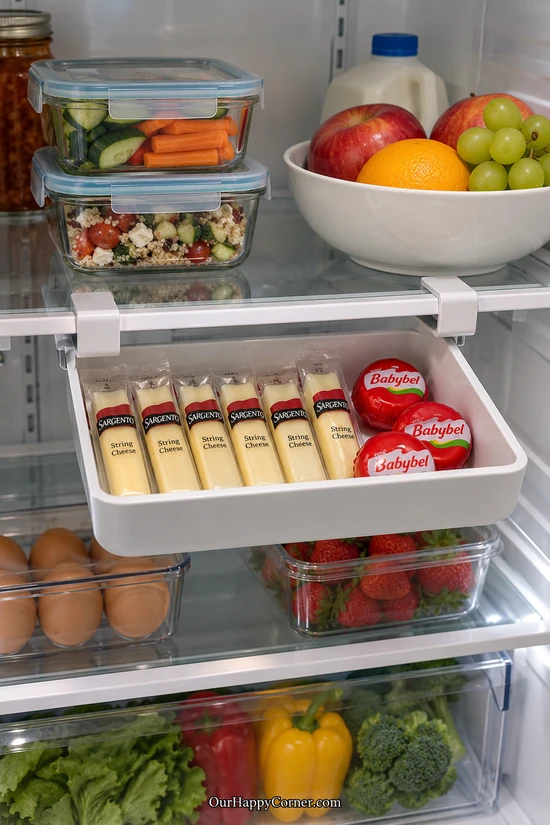
A shallow drawer can use the small gap beneath a shelf for individually wrapped snacks. It is especially helpful for packets that slide behind larger containers.
Choose an organizer designed for your shelf thickness and refrigerator dimensions. The drawer should attach securely without interfering with the door or nearby bins.
Keep heavier food on the main shelf rather than loading the hanging drawer. Wrapped string cheese and small cheese rounds are easy choices for this compact spot.
What you’ll need: A refrigerator-compatible under-shelf drawer.
How to set it up:
1. Check the attachment requirements and load limit before installing it.
2. Fill it with small snacks and test that it slides and closes freely.
6. Put a Low Shelf Riser to Work
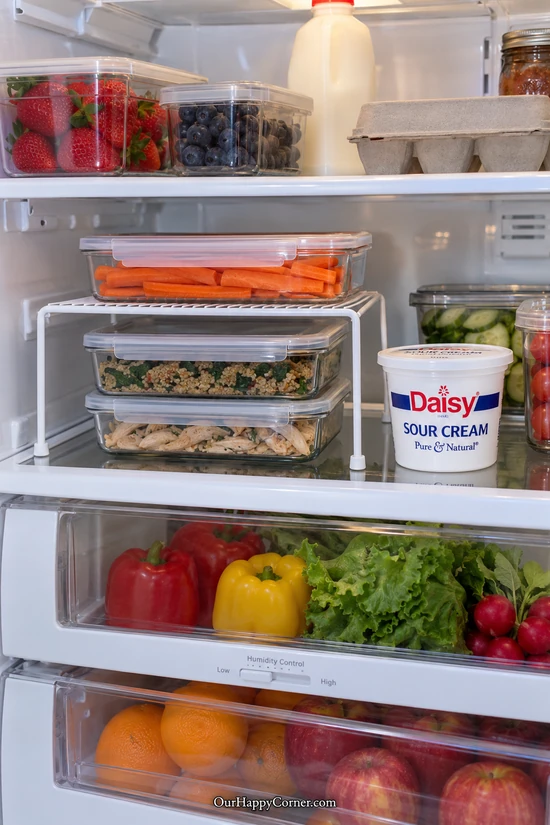
A short riser makes a tall shelf opening more useful when you store flat containers. It creates a second level without changing the refrigerator’s built-in shelves.
Look for a stable, washable riser with feet that sit securely on glass. Measure both the riser height and the containers that will go above and below it.
Keep the upper container small enough to remove without tilting it. Leave nearby space for taller tubs that do not fit beneath the riser.
What you’ll need: A low washable shelf riser and shallow lidded containers.
How to set it up:
1. Place the riser on a level shelf and slide low containers underneath.
2. Check the combined height before adding anything on top.
7. Gather Condiments on a Turntable
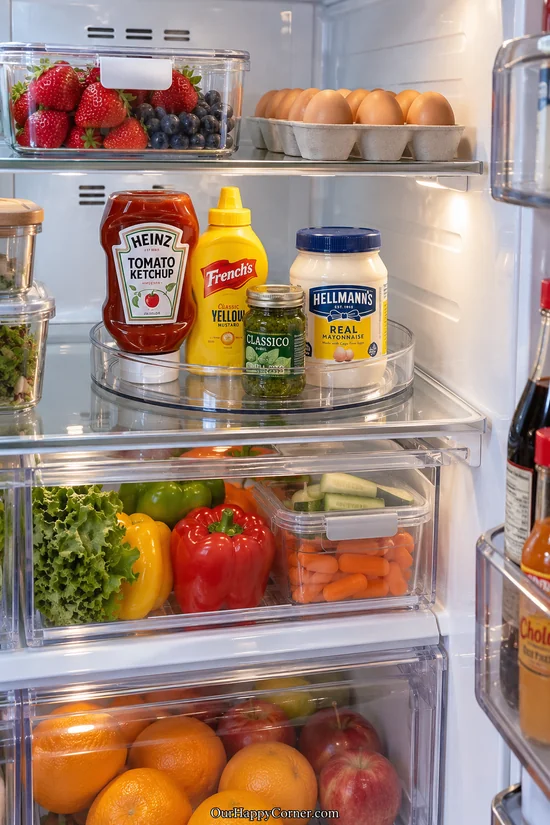
A small turntable helps you reach jars that usually hide at the back of a shelf. It works best for a handful of frequently used condiments.
Choose a diameter that leaves space around the edge for rotation. A low rim helps keep bottles together without hiding their labels.
Arrange the tallest bottles toward the center and smaller jars where you can see them. Keep the selection limited so the turntable remains easy to turn.
What you’ll need: A washable refrigerator turntable with a low rim.
How to set it up:
1. Set it on a shelf with enough headroom for the bottles.
2. Rotate it once after loading to check that nothing catches on adjacent containers.
8. Make a Use-First Tray
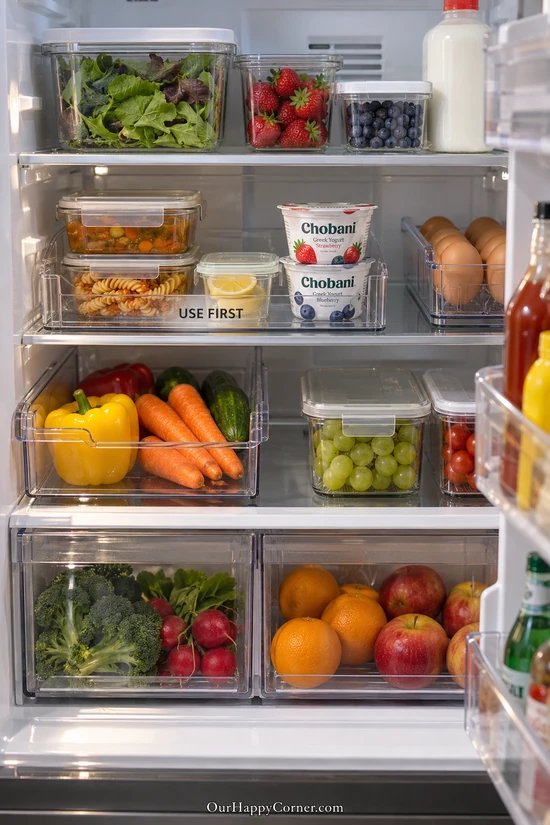
A use-first tray gives opened food and older leftovers a clear place at the front. It helps you decide what to eat before reaching for something newly purchased.
Add only a few items so the tray stays easy to review. A small covered portion of pasta, an opened ingredient in a sealed container, and yogurt can share the space.
Check the tray daily and follow storage limits for each food. A use-first label helps with rotation but does not extend the time food can be kept.
What you’ll need: A shallow handled tray and a removable label.
How to set it up:
1. Place the tray where it is visible as soon as you open the door.
2. Move newly prepared leftovers behind older ones and record their preparation dates.
9. Build a Produce-Forward Fridge
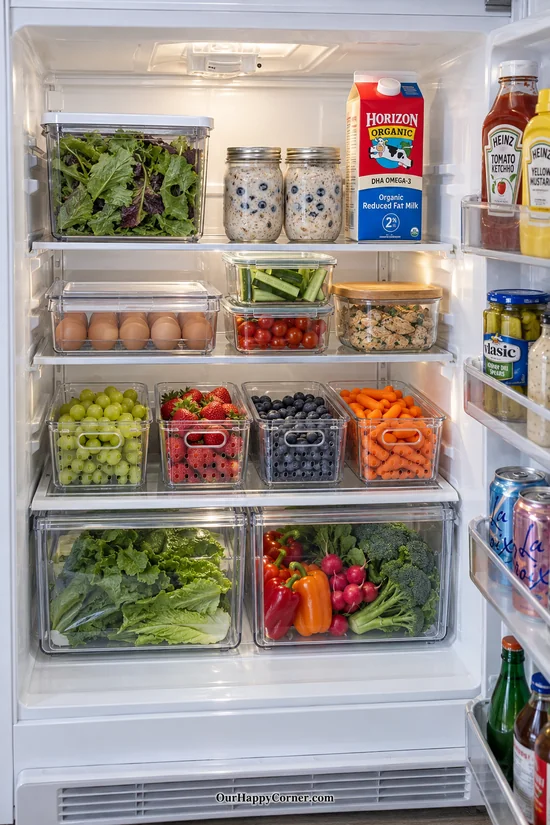
If fresh produce takes up most of your grocery list, give it a generous share of the fridge. Clear keepers make small fruits and vegetables easier to notice.
Use several modest containers instead of one oversized box that becomes difficult to move. Keep leafy greens and bulky vegetables in the drawers when their storage needs suit that space.
Leave an interior shelf area for dairy and other everyday foods. These fridge organization ideas work best when the layout reflects what you actually eat.
What you’ll need: A few produce keepers in different sizes and covered food containers.
How to set it up:
1. Group the produce by storage needs rather than color alone.
2. Position the most frequently used containers where they can be reached directly.
10. Keep Drink Cans in Slim Lanes
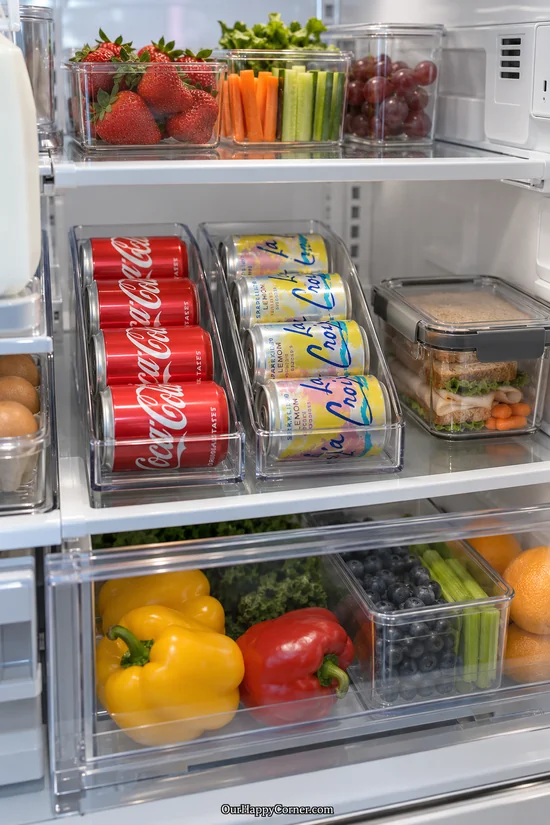
Slim can organizers keep drinks from rolling around and spreading across a shelf. Each lane gives one drink type a predictable place.
Measure the organizer depth with the front retaining lip included. Choose a design that fits your usual can size rather than assuming every can will work.
Store a manageable number of drinks and keep extra shelf-stable cans elsewhere until needed. This leaves room in the fridge for food and prepared meals.
What you’ll need: One or two low can organizers sized for your drinks.
How to set it up:
1. Place the lanes beside each other on a level shelf.
2. Load them according to the product instructions and keep the front opening accessible.
11. Create an Interior Zone for Tall Bottles
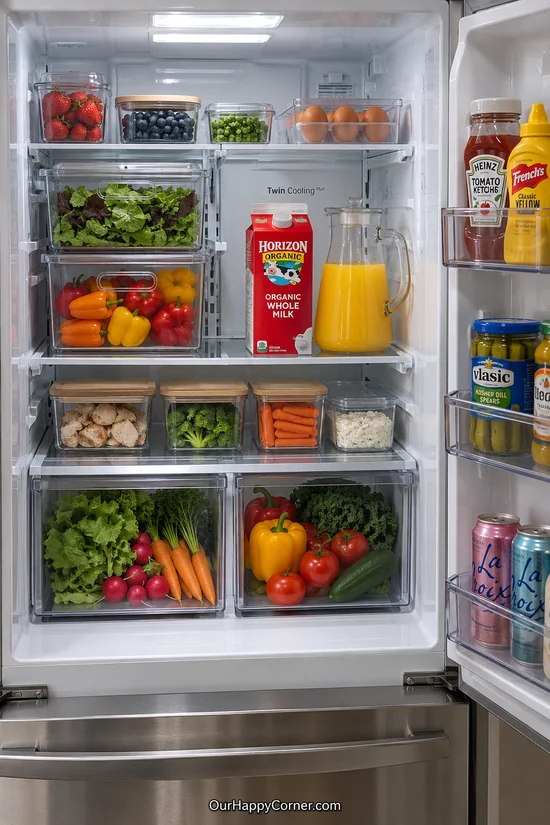
Tall cartons and pitchers often need more height than ordinary containers. A retractable or adjustable shelf can create that clearance inside the fridge.
Use only the adjustments built into your refrigerator and follow its manual. Keep each remaining shelf section supported as intended.
Group tall drinks together so shorter containers can use the other side. Keep milk on an interior shelf and choose a covered pitcher for poured drinks.
What you’ll need: A refrigerator with an adjustable or retractable shelf.
How to set it up:
1. Check the required bottle height before adjusting the shelf.
2. Test that the carton and pitcher can be removed without bumping the shelf above.
12. Stack Shallow Leftover Containers
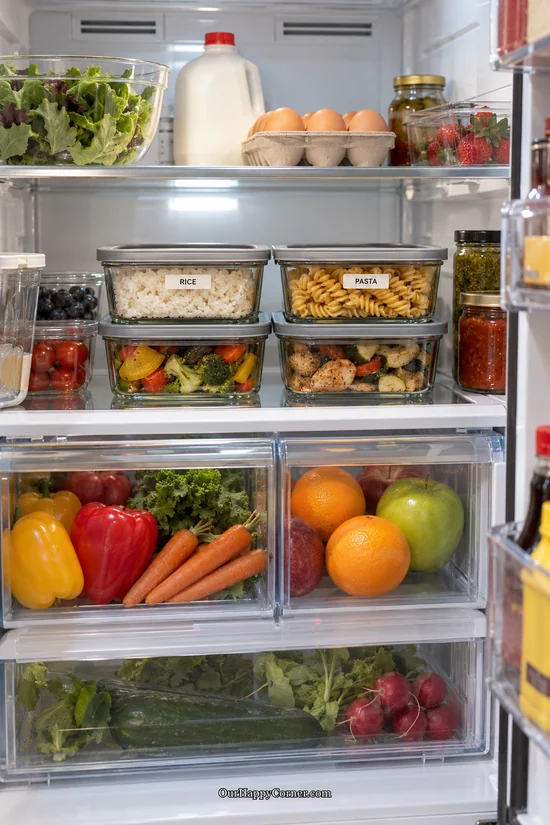
Shallow rectangular containers make leftovers easier to stack and identify. Their straight sides leave fewer awkward gaps than a collection of large round bowls.
Choose a few compatible sizes with secure lids rather than making every portion fit the same box. Two short stacks are usually easier to use than one tall tower.
Label the preparation date and bring older meals forward. Most cooked leftovers should be used within three to four days, with food-specific limits checked when needed.
What you’ll need: Shallow stackable food containers and date labels.
How to set it up:
1. Divide leftovers into suitable portions and refrigerate promptly.
2. Stack only where the lids and bases sit securely together.
13. Use a Keeper for Salad Greens
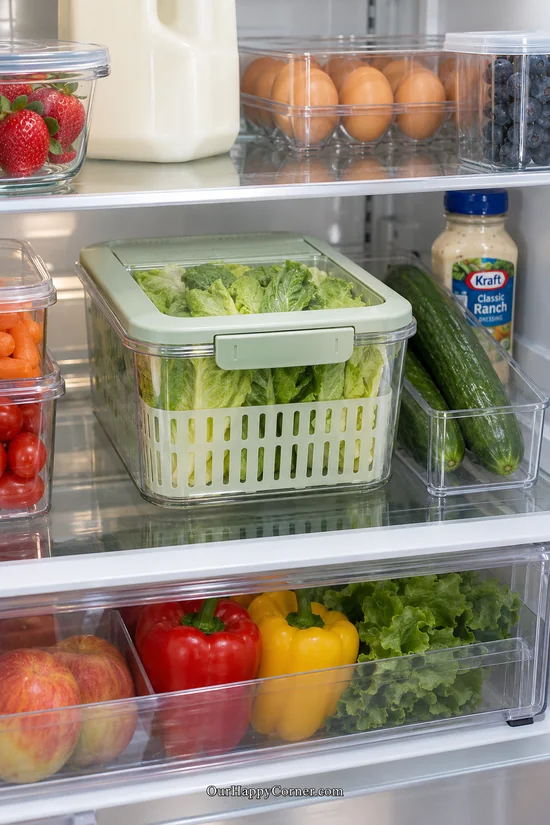
A dedicated greens keeper gives delicate leaves room without letting them spread across a shelf. A basket insert also makes it easier to lift out the contents.
Select a container large enough for the amount you usually buy. Follow its ventilation and moisture instructions rather than treating all produce keepers the same way.
If you wash greens before storing them, dry them well and remove damaged leaves. Check packaged ready-to-eat greens for any instructions that should remain with the food.
What you’ll need: A produce keeper suited to leafy greens.
How to set it up:
1. Fill the basket loosely and close the lid without compressing the leaves.
2. Set it where it can be removed without unstacking several other containers.
14. Give Fresh Herbs Their Own Keeper
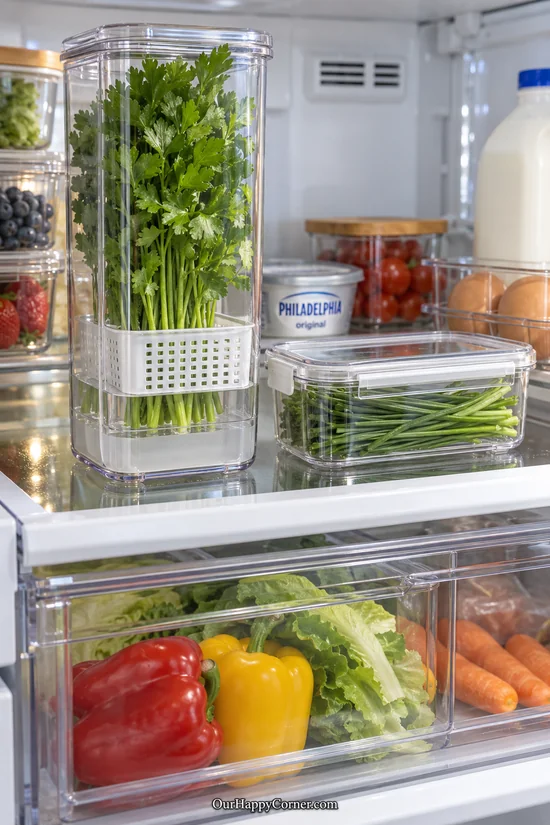
Fresh herbs are easy to overlook when they are tucked behind taller groceries. A dedicated keeper makes them visible when you are choosing ingredients.
A tall container suits parsley and cilantro when the product is designed to hold their stems in water. A shallow covered container can be more practical for shorter herbs.
Follow the keeper’s directions for water level and maintenance. Check storage needs by herb, since basil does not belong in the same refrigerator routine as every other variety.
What you’ll need: A fridge-sized herb keeper or a suitable covered herb container.
How to set it up:
1. Trim and arrange the herbs according to the keeper instructions.
2. Choose a shelf with enough height to remove the container comfortably.
15. Separate Cheese and Deli Foods
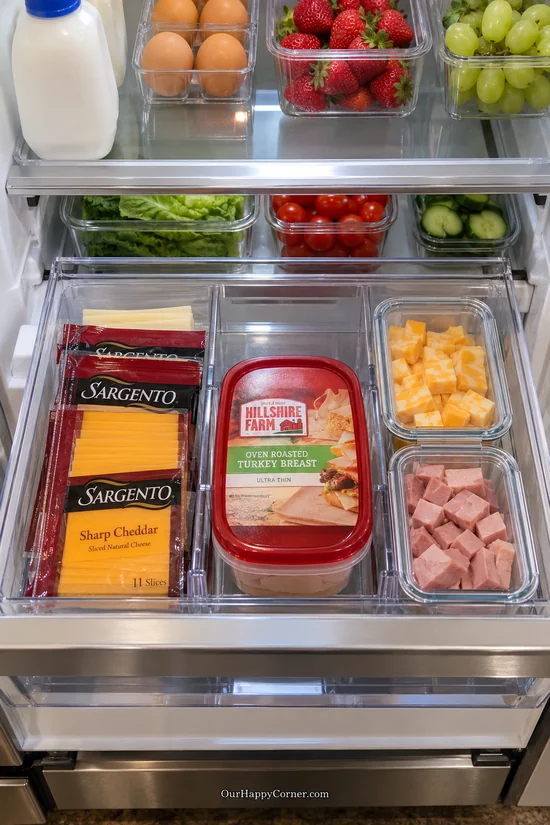
A deli drawer becomes easier to use when cheese and sliced meats have separate sections. Dividers prevent small packets from sliding into one crowded pile.
Keep resealable packaging when it still works well for the food. Use a food-safe covered container for items that need a better seal after opening.
Record opening dates when transferring food out of its package. Keep a modest supply in the drawer so older food stays visible.
What you’ll need: Washable drawer dividers and small covered containers.
How to set it up:
1. Create one section for cheese and another for deli foods.
2. Check that the dividers do not interfere with the drawer lid or closing path.
16. Set Up a Family Snack Station
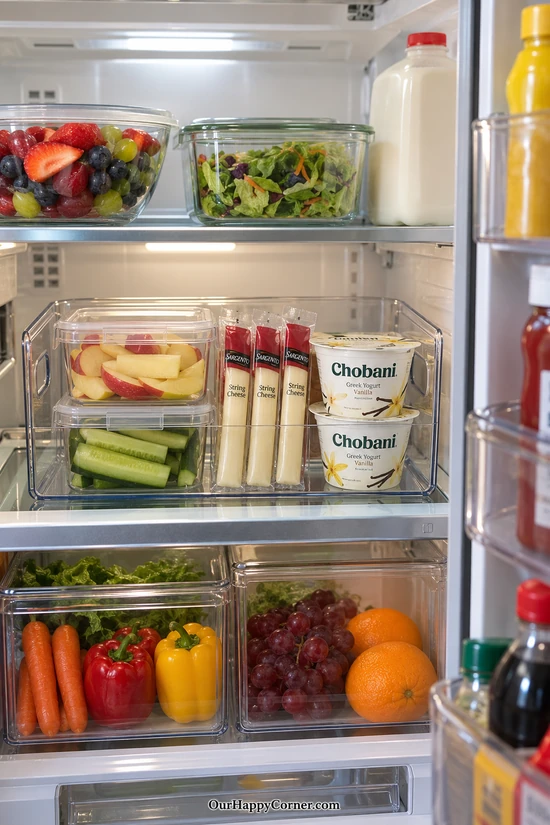
A snack station brings several everyday choices into one easy-to-reach spot. Covered fruit, vegetable sticks, cheese, and yogurt can sit together without losing their separate storage needs.
Choose a bin that can be pulled out by its handle. Keep cut produce in sealed containers rather than loose beside wrapped snacks.
Restock the bin in small amounts and rotate older food forward. Place it at a comfortable height for the family members who use it.
What you’ll need: A handled bin, small lidded containers, and your usual refrigerated snacks.
How to set it up:
1. Group snacks in the bin with the lids and wrappers intact.
2. Leave enough space to remove one item without lifting everything else.
17. Use Dividers on the Door Shelves
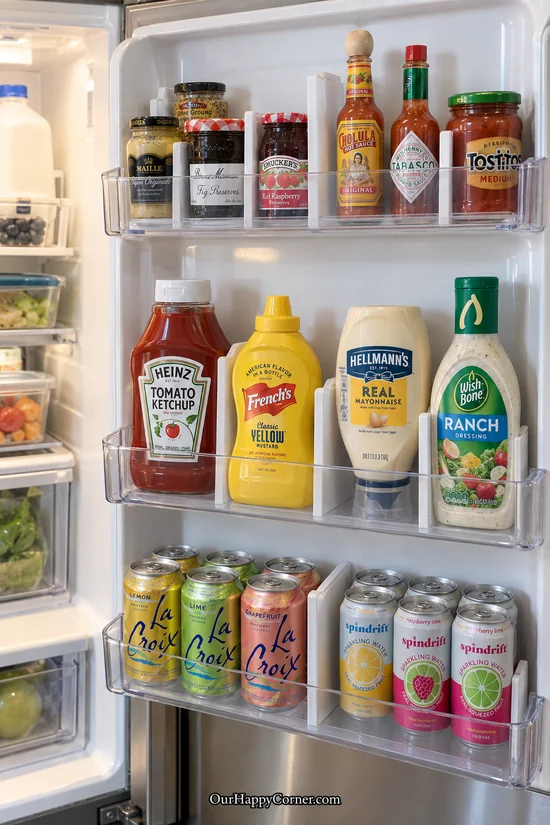
Door dividers keep small jars from shifting each time the fridge opens. They also help separate sauces, preserves, and chilled drinks.
Choose dividers that fit the door bin securely without forcing the plastic sides apart. Leave enough room around each bottle for easy removal.
Keep product labels facing forward when possible. Reserve the door for suitable condiments and drinks, while milk and eggs stay on interior shelves.
What you’ll need: Door-bin dividers compatible with your refrigerator.
How to set it up:
1. Group similar bottles and jars before placing the dividers.
2. Close the door slowly to check that tall items clear the interior shelves.
18. File Reusable Food Bags Upright
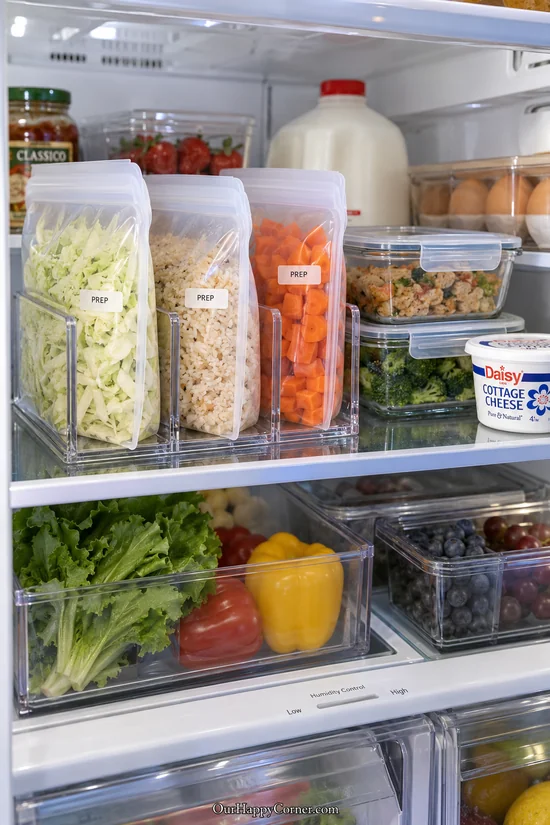
Flat reusable bags can hold prepared ingredients without taking up the height of rigid tubs. An upright rack keeps several bags from collapsing into a pile.
Choose bags designed for food storage and check their care instructions. Seal them fully before placing them beside other groceries.
Label the contents and preparation date so similar ingredients remain easy to identify. Use a separate containment arrangement for raw meat rather than adding it to a ready-to-eat prep rack.
What you’ll need: Reusable food-storage bags and a slim upright organizer.
How to set it up:
1. Fill bags in modest portions and press out excess air before sealing.
2. Arrange them so the labels remain visible and each bag can be lifted out.
19. Make a Covered Vegetable Prep Box
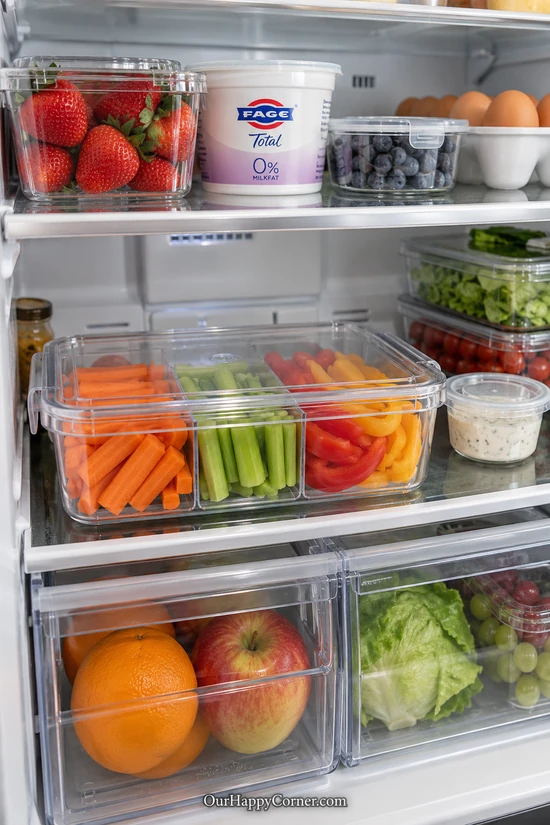
A divided prep box keeps several cut vegetables ready for lunches and snacks. Separate compartments make it easy to choose a portion without mixing everything together.
Use a container with a secure lid and removable sections if that makes cleaning easier. Keep dips in their own sealed pots.
Prepare quantities you will use soon rather than filling a large box for appearance. Label the preparation date and refill only after washing and drying the container.
What you’ll need: A divided lidded food container and small covered dip pots.
How to set it up:
1. Wash and cut the vegetables, then portion them into the compartments.
2. Close the lid and place the box on a shelf that is easy to reach.
20. Gather Ingredients for One Dinner
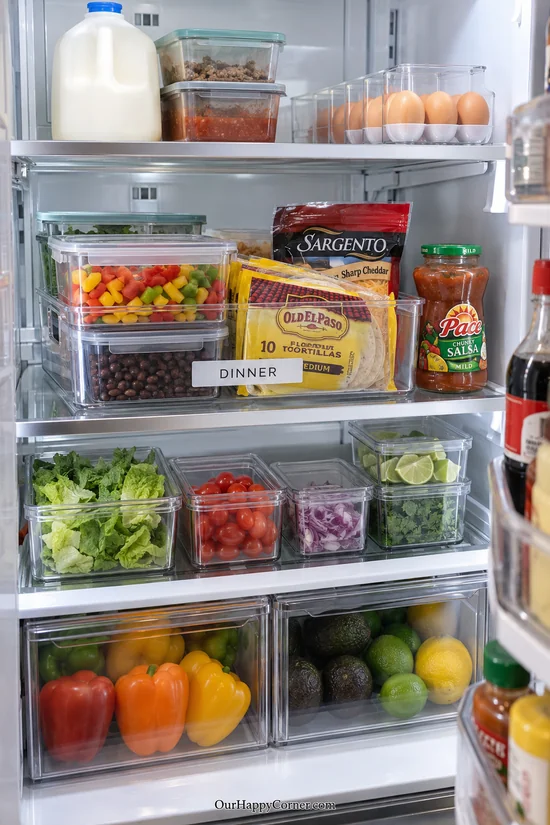
A dinner bin keeps the refrigerated parts of one meal together. It can make a busy evening easier when the ingredients are already grouped.
Combine prepared vegetables, cooked beans, and cheese in appropriate sealed containers or original packages. Keep raw meat separately contained on the lowest shelf until cooking.
Choose a bin only as large as the meal needs. Pair this habit with a simple weekly plan using our free printable floral planner pages.
What you’ll need: A handled meal bin and covered containers for prepared ingredients.
How to set it up:
1. Label the bin with the meal name and gather its refrigerated ingredients.
2. Keep pantry ingredients nearby in a separate kitchen spot.
21. Bring Breakfast Foods Together
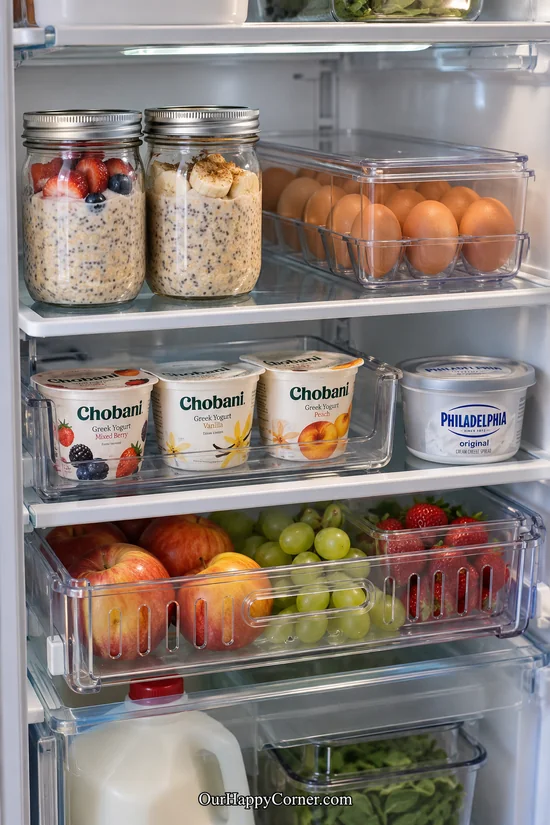
A breakfast zone gives morning staples a predictable home. Overnight oats, yogurt, and a small tub of spread fit neatly into a shared shelf area.
Use closed jars for prepared breakfasts and a narrow bin for individually packaged yogurt. Keep the egg carton on an interior shelf nearby.
Prepare only the portions that fit your household’s schedule. Leave space to lift each jar out instead of lining them up several rows deep.
What you’ll need: Small lidded jars and a narrow dairy bin.
How to set it up:
1. Group the breakfasts your family uses most often.
2. Add preparation dates to homemade portions and rotate older items to the front.
22. Lift Fruit Out in Crisper Baskets
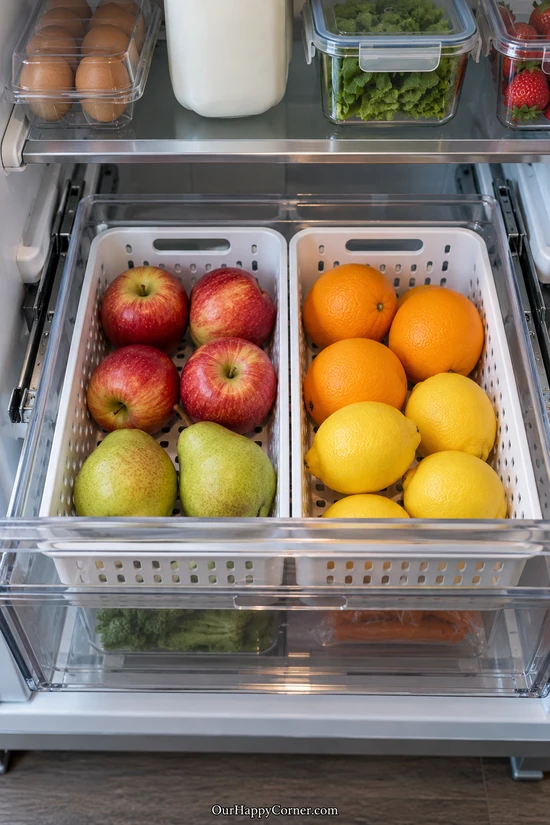
Removable baskets make a fruit drawer easier to empty and clean. They also keep loose apples and citrus from rolling into a mixed pile.
Choose shallow baskets that allow the drawer to close with fruit inside. Separate groups according to their storage needs and ripeness.
Remove retail netting when it prevents you from checking individual fruit. Keep the baskets lightly filled so damaged pieces are easier to notice.
What you’ll need: Small ventilated baskets sized for the crisper.
How to set it up:
1. Fit the empty baskets first and test the drawer.
2. Add the fruit in manageable quantities without piling it above the drawer edges.
23. Contain Raw Meat on the Lowest Shelf
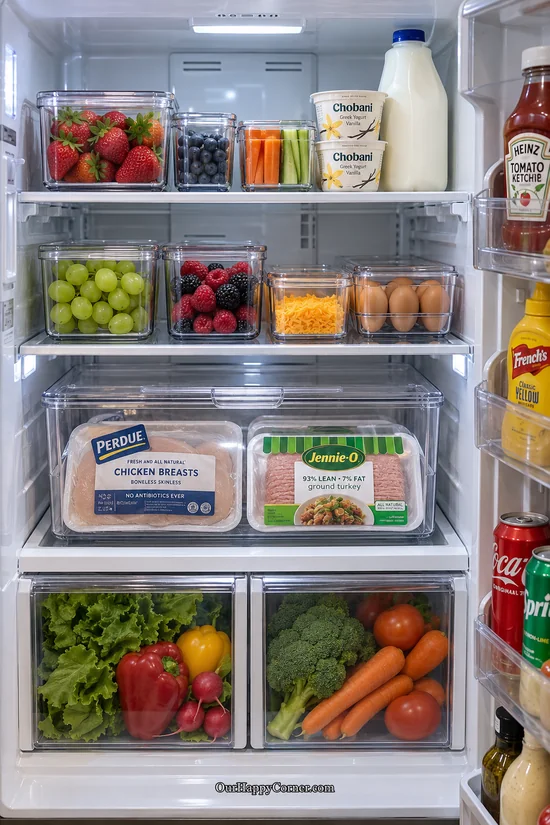
A dedicated containment bin keeps raw meat packages separate from ready-to-eat food. Its purpose is to contain possible leaks as well as group the packages.
Keep the retail packs sealed and place the covered bin on the lowest suitable shelf. Check that the lid closes without pressing on the packaging.
Follow storage limits for the particular meat and freeze it when you will not cook it in time. Wash the bin thoroughly after leaks and before reusing it.
What you’ll need: A washable leak-resistant container with a lid.
How to set it up:
1. Choose a box that holds the packages flat without overcrowding.
2. Keep it below ready-to-eat food and within the refrigerator shelf’s load limit.
24. Adjust Bin Compartments to Your Groceries
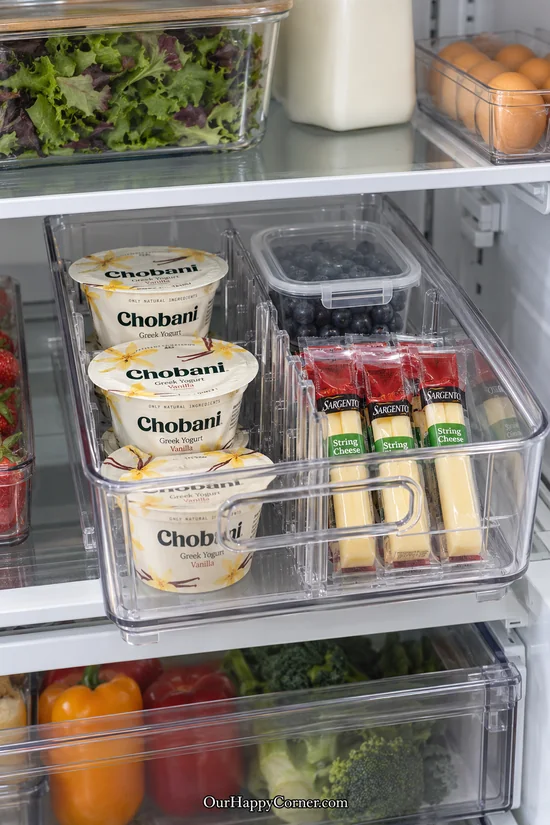
Adjustable dividers let one bin hold foods of different shapes without wasting as much space. You can change the sections when your usual groceries change.
Give yogurt cups enough width to lift out cleanly. Use a narrower section for wrapped cheese or other small refrigerated snacks.
Avoid filling every compartment just because it is available. A little spare room makes the bin easier to restock and keeps items from being squeezed together.
What you’ll need: A handled refrigerator bin with movable dividers.
How to set it up:
1. Place your usual groceries in the empty bin before setting the divider positions.
2. Check that the handle remains accessible after the bin is loaded.
25. Keep Bottles Steady in a Cradle
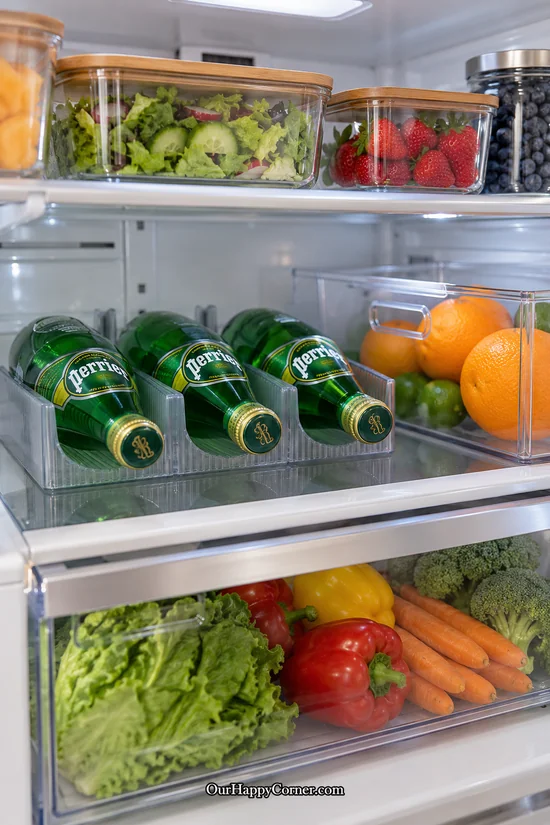
A bottle cradle prevents sealed drinks from rolling across a glass shelf. Horizontal storage can also use a low shelf opening that is awkward for upright bottles.
Choose a holder sized for the bottles you actually buy. A secure front edge or shaped groove should keep each bottle in place.
Keep the caps tightly closed and the labels visible enough to identify the drinks. Use only the stacking arrangement the holder is designed to support.
What you’ll need: A washable bottle cradle or purpose-built bottle rack.
How to set it up:
1. Test the fit with one bottle before filling the rack.
2. Position it where bottles can slide out without hitting nearby food containers.
26. Label Homemade Food With Its Prep Date
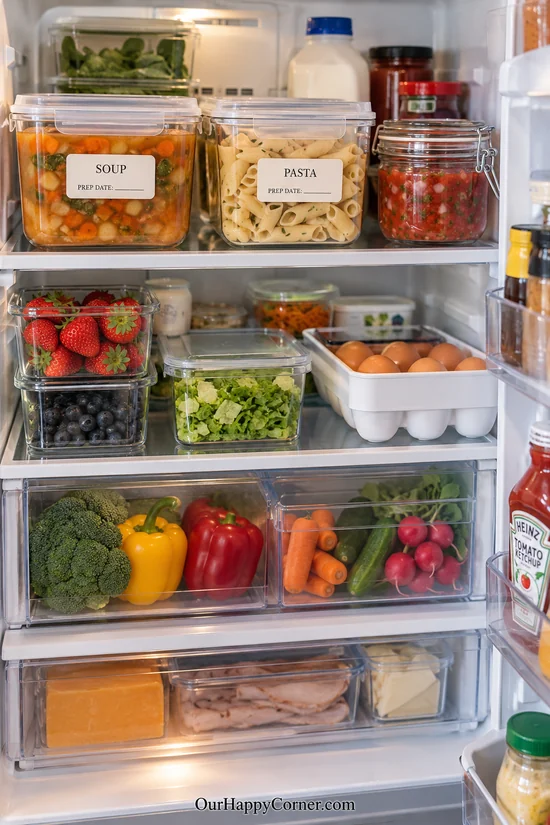
Contents labels help distinguish soup, pasta, and sauces at a glance. A preparation date makes food rotation much more useful than a label alone.
Choose washable or removable labels that tolerate refrigerator moisture. Write the date when the food goes into storage rather than trying to remember it later.
Use the cold food storage chart to check food-specific limits. Clear labels are especially helpful when the food has been transferred out of its original package.
What you’ll need: Refrigerator-friendly labels and a suitable pen.
How to set it up:
1. Add the food name and preparation or opening date to each container.
2. Keep the label on a surface you can read without unstacking everything.
27. Keep a Small Apartment Fridge Simple
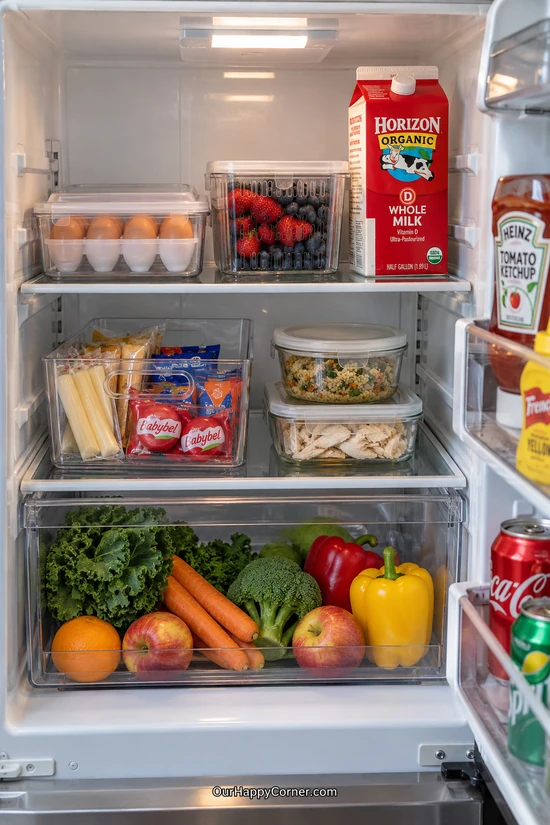
A small fridge benefits from a few carefully chosen organizers. Too many bins can consume the space they are supposed to save.
Choose low containers that suit the shelf openings and reserve one area for taller dairy cartons. A single snack bin can keep packets together without dividing the entire fridge.
Use the crisper for suitable loose produce and keep shelves lightly stocked. These small-fridge organization ideas are easiest to maintain when grocery quantities match the available space.
What you’ll need: A compact snack bin and a few correctly sized food containers.
How to set it up:
1. Measure the usable shelf space with the door open.
2. Start with your largest regular groceries, then add only the organizers that improve access.
28. Choose Narrow Bins for a Side-by-Side Fridge
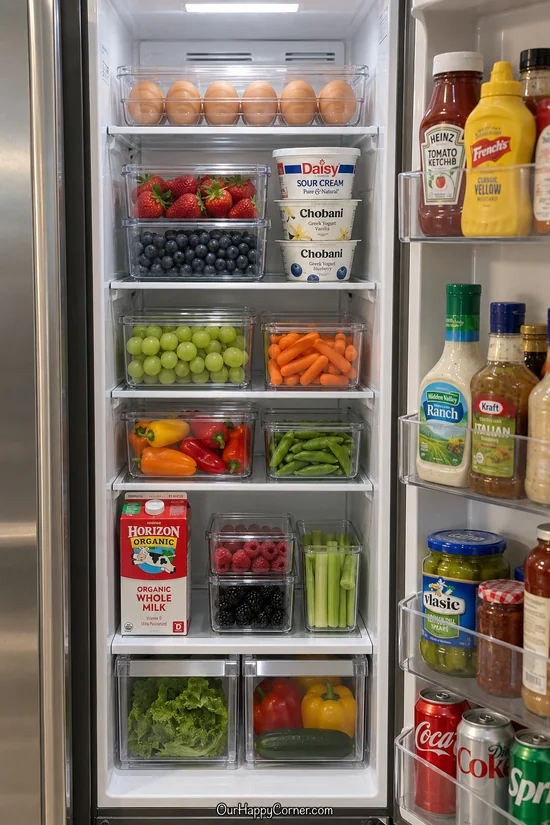
The refrigerator side of a side-by-side model often has narrow shelves. Slim containers make better use of that shape than broad tubs that block access.
Use front-to-back storage only when the bin can be pulled forward safely. Keep the shelf height suited to the food instead of forcing the same spacing everywhere.
Place frequently used items near the front and leave tall clearance for milk on an interior shelf. Keep the smaller produce drawers from becoming overfilled.
What you’ll need: Narrow handled bins and containers suited to the shelf width.
How to set it up:
1. Measure between the shelf supports rather than the outer refrigerator walls.
2. Test each bin with the door fully open before buying several.
29. Bring Deep-Shelf Jars Forward in One Bin
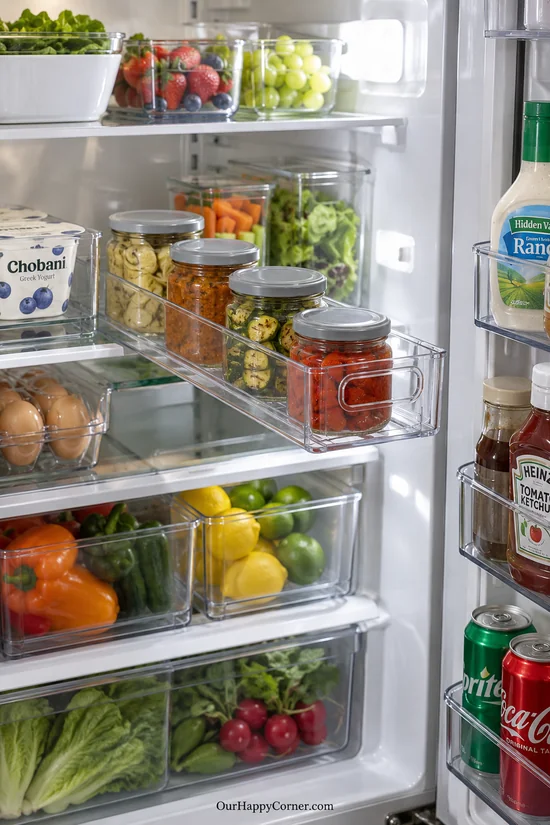
A long handled bin can bring several small jars forward together. It reduces the need to reach around taller food at the back of a shelf.
Choose a bin that fits the shelf depth and does not scrape against the door. Keep jars small enough that the loaded bin remains comfortable to lift.
Return the bin fully onto the shelf after using it. Keep older jars toward the front so the whole row rotates naturally.
What you’ll need: A slim handled bin and securely closed jars.
How to set it up:
1. Arrange jars in a single accessible row.
2. Pull the bin only as far as it remains supported, or lift it out with both hands when needed.
30. Reserve Space for the Next Grocery Trip
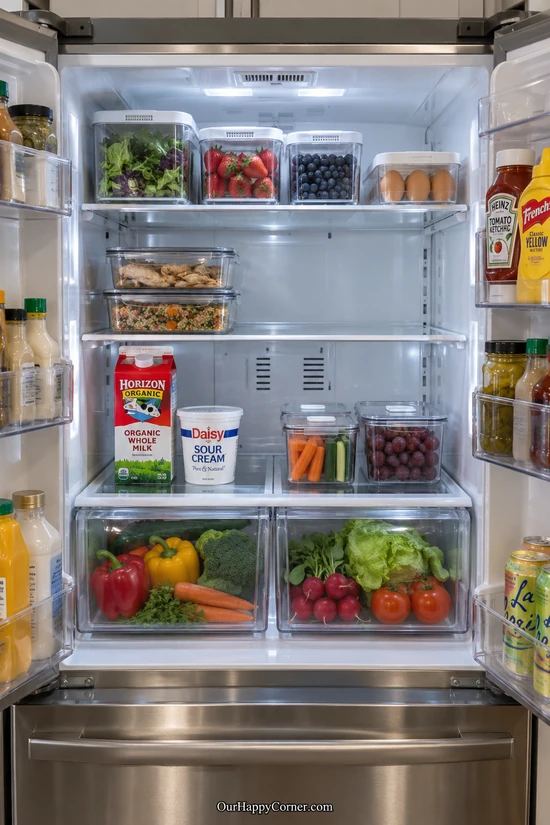
A tidy fridge needs some empty space as well as organized food. An open shelf section gives groceries somewhere to go without dismantling the layout.
Keep the reserved area clear of spare bins that have no current purpose. Use nearby containers for the food already in regular rotation.
Before shopping, check what remains and plan around it. This simple habit makes fridge organization ideas easier to maintain from one week to the next.
What you’ll need: An intentionally clear shelf section and a short grocery list.
How to set it up:
1. Choose a realistic amount of spare room for your shopping routine.
2. Review the fridge before each trip and move older food forward.
31. Organize on a Budget With Containers You Own
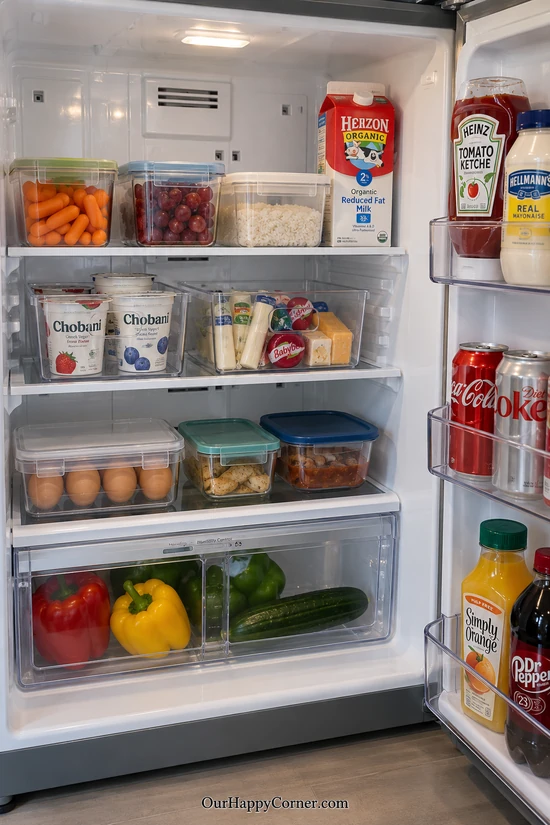
An organized fridge does not require a complete matching container collection. Food-safe tubs you already own can work well when their lids seal properly.
Use a couple of inexpensive bins for loose packets and keep the rest of the setup straightforward. Choose containers by fit and usefulness rather than appearance alone.
Wash and dry everything before rearranging the shelves. If you are refreshing other hardworking spaces too, explore our laundry room organization ideas for more practical storage inspiration.
What you’ll need: Existing food-safe lidded containers and one or two affordable bins.
How to set it up:
1. Sort your containers by size and check their condition.
2. Reuse the pieces that fit well, then buy only what solves a remaining storage problem.
Final Thoughts
Start with the fridge organization ideas that solve your biggest daily frustration, whether that is hidden leftovers, loose snacks, or crowded produce drawers. A few well-fitting containers and a simple food-rotation habit can make the space much easier to use.
Keep what works, adjust what does not, and leave yourself room for the next grocery trip. Your fridge should support everyday meals without becoming another complicated system to maintain.