Flower pot painting is such a simple and joyful way to spend creative time with your kids, and the best part is, you end up with something useful too.
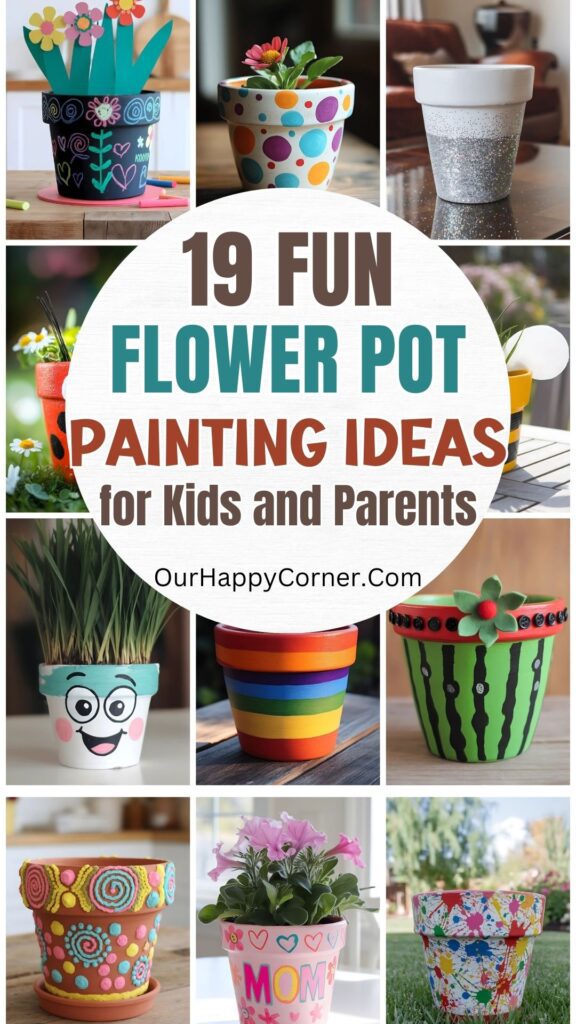
Whether you’re planting herbs, bright flowers, or just decorating a windowsill, painted pots bring a cheerful, handmade touch to your space.
It’s great for a lazy afternoon, a rainy day project, or even as a thoughtful gift idea for birthdays, holidays, or Mother’s Day.
No two pots ever turn out the same, and that’s what makes it so special.
Before we jump into all the fun design ideas, here’s a little more on why this craft works so well for all ages, and a quick checklist to help you get started.
Why Try Flower Pot Painting with Kids?
If you’re looking for a simple, creative activity that doesn’t require a lot of prep or expensive supplies, flower pot painting is honestly one of the best picks.
It’s low-mess (as far as paint projects go), super customizable, and something the whole family can enjoy, from toddlers to tweens, and yes, even adults.
You don’t need to be “artsy” to do this either. The beauty of decorating flower pots is that there’s no right or wrong way to do it.
Some kids will go wild with colors, others might want to carefully plan their designs, and both approaches are perfect.
It’s all about having fun and making something you’ll actually use or gift afterward.
What You’ll Need
Here’s a quick look at the basic supplies you’ll want to have on hand before getting started:
- Terracotta flower pots (any size works!)
- Acrylic or washable paint
- Paintbrushes (thick and thin are both useful)
- Cup of water and some paper towels
- Optional extras: glitter, puffy paint, googly eyes, foam stickers, buttons, Mod Podge, or a clear sealer spray
You probably already have most of this in your craft bin!
A Few Helpful Tips Before You Begin
Cover your workspace – An old tablecloth or some newspaper makes cleanup a breeze.
Dress for mess – Smocks or play clothes are a good idea, especially for younger kids.
Let kids take the lead – The end result doesn’t have to be perfect. It’s their creation, and that’s what makes it special.
Plan drying time – Some designs need layering or gluing on extras, so it helps to let things dry between steps.
Ways to Use Your Painted Flower Pots
Once your painted pots are dry, there are so many ways to use them:
- Display them indoors on window ledges or bookshelves
- Plant herbs and place them in the kitchen
- Use them as pencil holders or party favors
- Gift them for holidays like Mother’s Day, Father’s Day, or Teacher Appreciation Week
- Decorate your porch or garden for seasonal themes (like the Fourth of July one!)
Painted pots look especially lovely when tucked into a well-designed flower bed or styled on a front porch. If you’re looking for inspiration, don’t miss these flower bed ideas and front yard landscaping tips that pair beautifully with your handmade planters.
Now that you’re set up and ready to go, scroll down for some of our favorite flower pot painting ideas. Each one is easy, fun, and full of color.
Flower Pot Painting Ideas
Rainbow Painted Pot
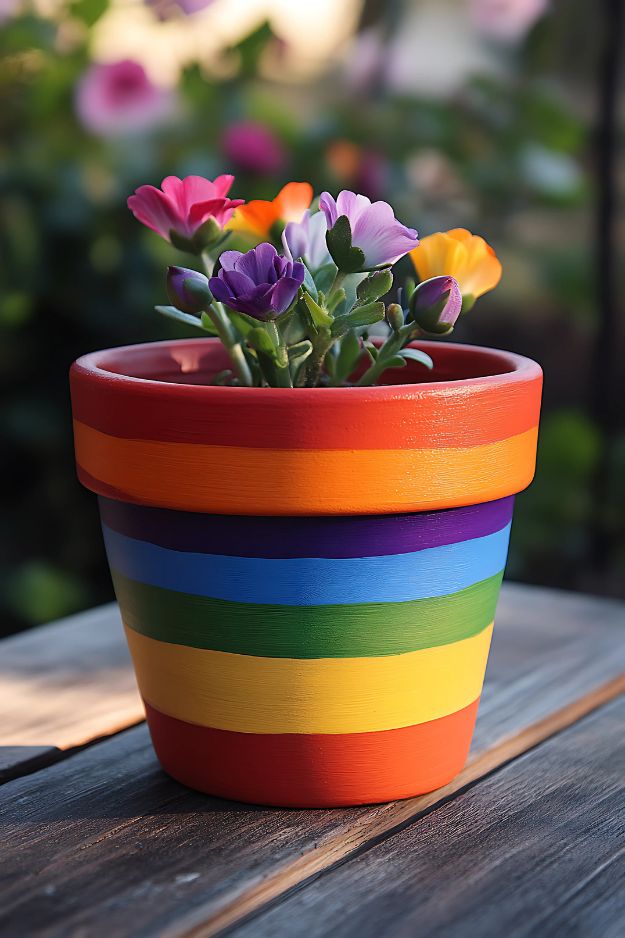
This cheerful rainbow flower pot painting is such a fun way to brighten up any space, indoors or out.
It’s the perfect project for a weekend afternoon, and it’s one that both kids and grownups will enjoy painting together.
The bold, clean stripes make it look super polished, but don’t worry, it’s easier to pull off than it looks.
How to Make It:
Start with a clean pot – Wipe your terracotta pot with a damp cloth and let it dry completely.
Choose your colors – Pick six bright rainbow shades (red, orange, yellow, green, blue, and purple).
Paint the stripes – Use painter’s tape to create even bands around the pot or go freehand for a more organic look.
Seal the paint – Once dry, apply a clear acrylic sealer to protect the design and give it a slight shine.
Splatter Paint Pot
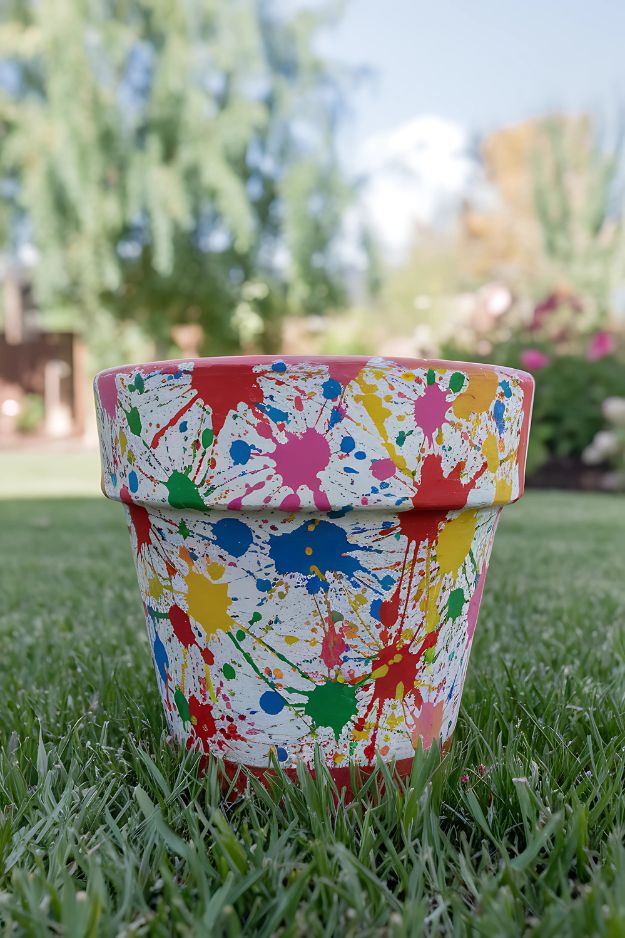
This splatter paint flower pot is loud, messy, and totally perfect for creative fun.
If you’re looking for a craft that lets kids let loose (and maybe get a little paint on their arms), this one’s it.
The end result is a colorful explosion that looks like a mini piece of abstract art.
How to Make It:
Paint the base coat – Start by painting the entire pot white and let it dry.
Prepare your splatter station – Head outside and lay down newspaper or a drop cloth.
Dip and flick – Use old toothbrushes, spoons, or paintbrushes to flick bright paint colors onto the pot.
Let it dry fully – Once the splatters have dried, you can seal the pot with clear spray for durability.
Polka Dot Pot
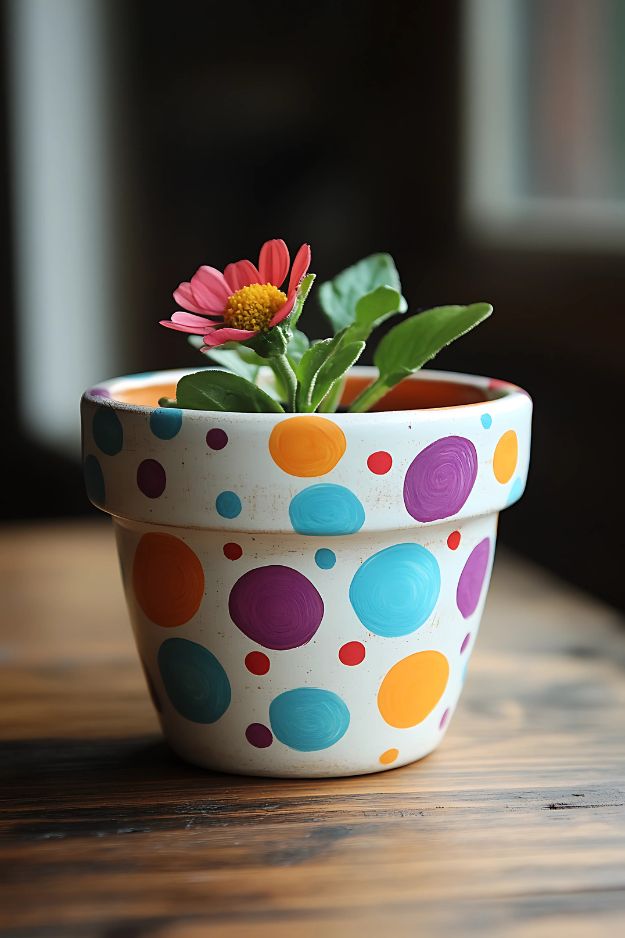
The polka dot flower pot painting is playful, simple, and a great project for all ages. You can go bold with big dots or add in tiny ones for extra fun.
Whether your kids want a random dot explosion or an organized pattern, there’s no wrong way to dot it up.
How to Make It:
Paint the base – Start with a light base color like cream or white and let it dry.
Pick your colors – Choose 3 to 5 bright acrylic paint colors.
Add the dots – Use round sponge brushes, the back of a paintbrush, or even fingers to add polka dots all around the pot.
Seal the design – Once dry, apply a clear sealer to make the dots last.
Ladybug Pot
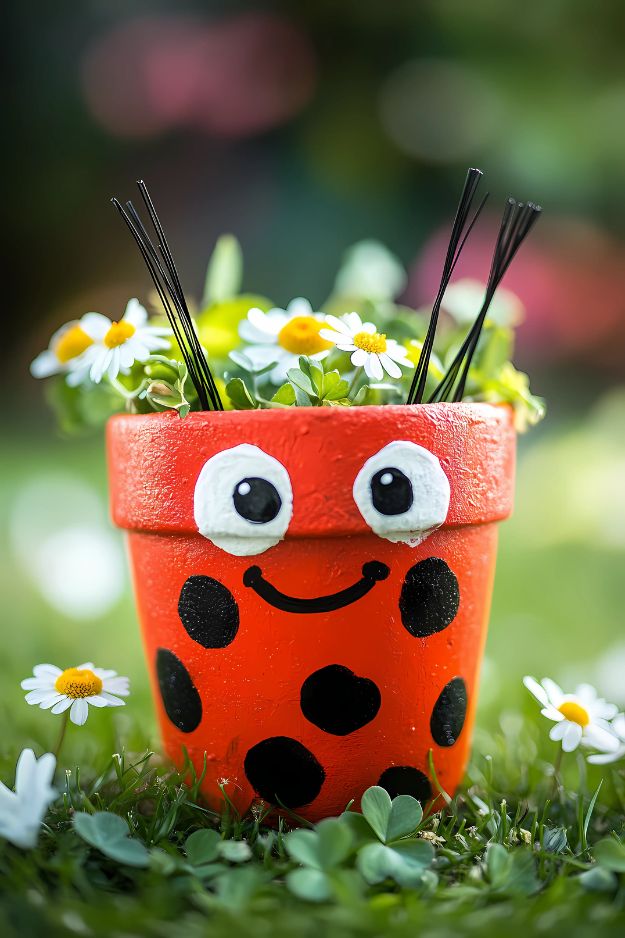
How cute is this little ladybug pot? With its sweet face and daisy crown, this one’s always a favorite with the kids.
It’s a great mix of painting and crafting, with details like the pipe cleaner antennae and googly eyes giving it a whole lot of personality.
How to Make It:
Paint the pot red – Let the red base coat dry completely before adding details.
Add the spots – Use black paint to make round dots, then add a smiling mouth with a fine brush or marker.
Glue on eyes and antennae – Use large googly eyes and black pipe cleaners or craft wire for antennae.
Plant it up – Add cheerful flowers like daisies to finish the look.
Chalkboard Paint Pot
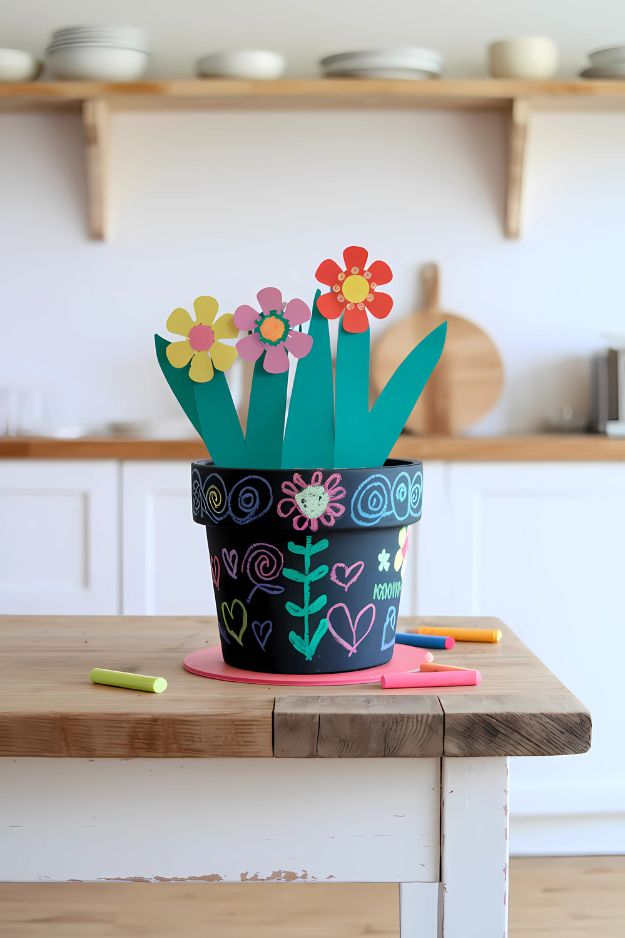
This chalkboard flower pot painting is full of creativity, literally! It’s painted in chalkboard paint so you and your kids can keep drawing on it again and again.
Add names, messages, doodles, or even seasonal decorations. Plus, it makes a great gift.
How to Make It:
Apply chalkboard paint – Cover the entire pot with two coats of black chalkboard paint and let it cure for at least 24 hours.
Decorate with chalk – Use colorful sidewalk chalk or chalk markers to draw fun designs, hearts, flowers, or write names.
Add paper flowers – Cut out paper flowers and leaves and glue them onto skewers or craft sticks, then place inside the pot.
Change it up anytime – Just wipe it clean and start again when you’re ready for a new look.
Tissue Paper Mosaic Pot
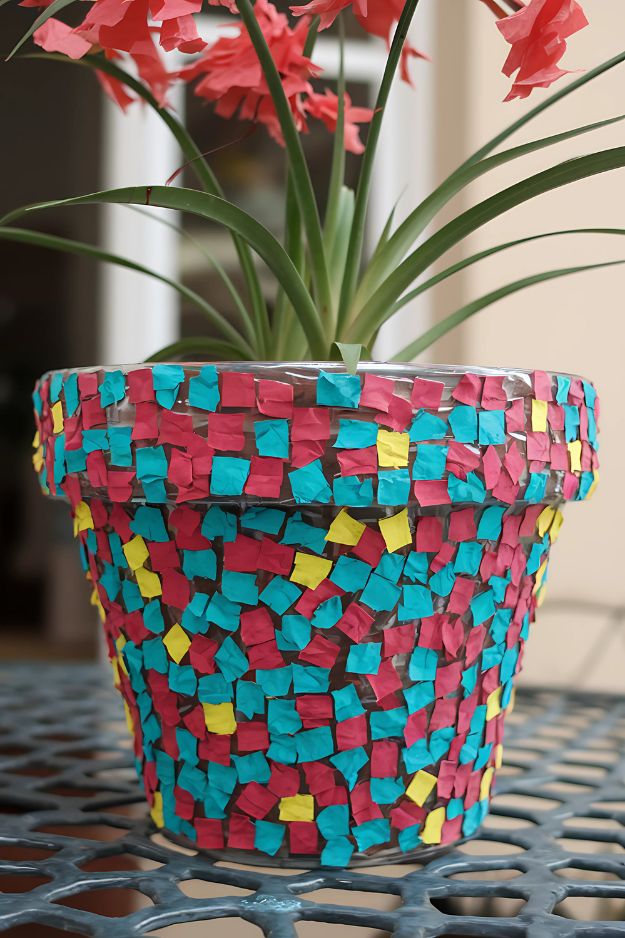
Color lovers, this one’s for you. The mosaic look is made with tiny squares of tissue paper in bold hues, and the result is a totally kid-friendly version of tile art.
It’s a great sensory craft too, kids will love the feel of crinkling and placing each piece.
How to Make It:
Prep your materials – Cut tissue paper into small squares (around 1-inch each) in 3–4 different colors.
Apply glue – Use a brush to spread school glue or Mod Podge onto a section of the pot.
Stick the tissue squares – Press the squares randomly around the pot, overlapping slightly for a colorful pattern.
Seal it up – Once everything is dry, brush a final layer of Mod Podge over the top to seal and shine.
Glitter-Dipped Pot
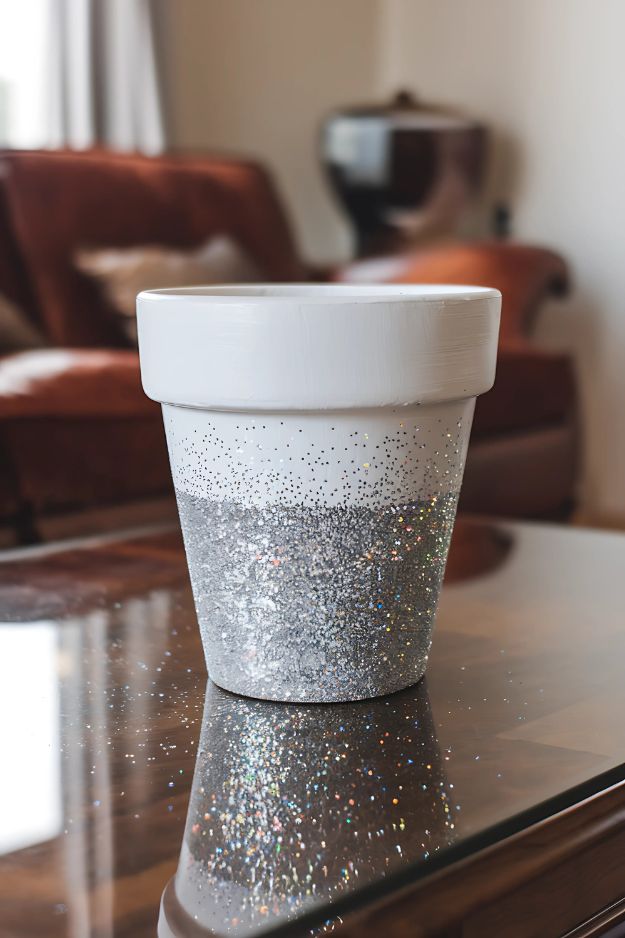
If you’re looking for sparkle, the glitter-dipped pot delivers. It’s simple, sleek, and somehow both classy and kid-approved.
It makes a great accent for desks, shelves, or even as a gift from your little glitter artist.
How to Make It:
Paint the top half – Start by painting the entire pot white and let it dry.
Add glue to the bottom – Cover the bottom half of the pot with Mod Podge or tacky glue.
Sprinkle on glitter – Over a tray or paper plate, pour glitter over the glued area until fully covered.
Let dry and seal – Once it’s dry, spray with a clear sealant to keep glitter from falling off.
Button Flower Pot
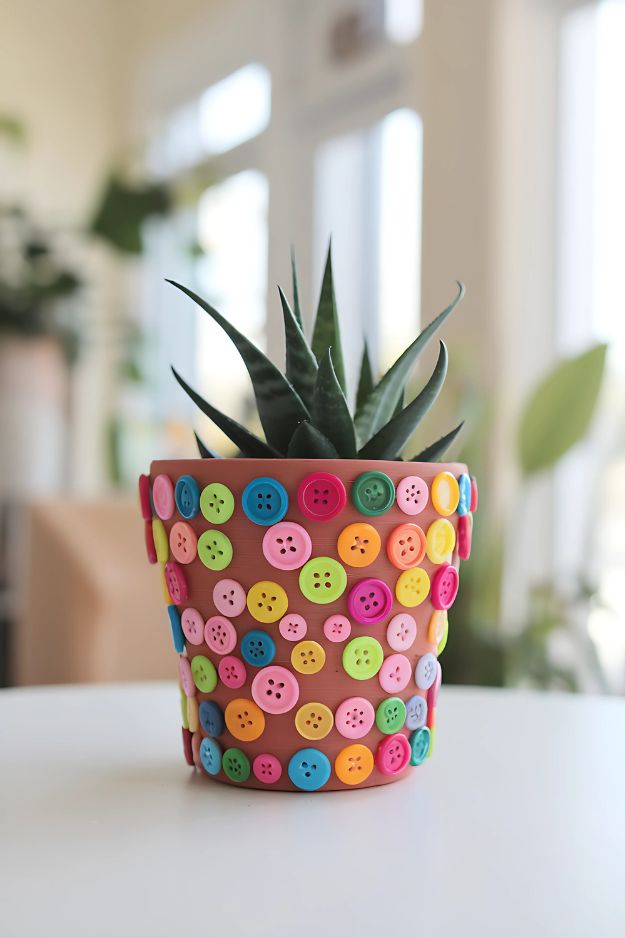
There’s just something so cheerful about buttons. This button flower pot is bright, tactile, and a great fine motor skill activity for kids.
Plus, it turns an ordinary pot into a colorful little masterpiece with almost no mess.
How to Make It:
Pick your buttons – Choose a mix of sizes and colors for a playful look.
Plan your pattern (or not!) – Kids can place them randomly or in rows, whatever they like.
Glue them on – Use strong tacky glue or a hot glue gun (with adult help) to attach the buttons all around the pot.
Let it dry – Give it plenty of time to dry before using it to plant.
Pom-Pom Pot
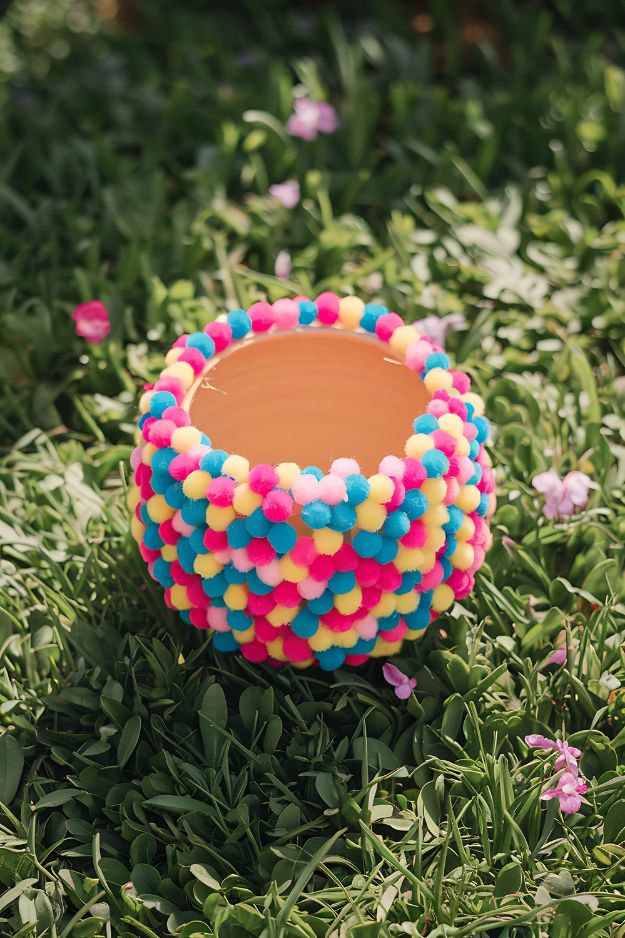
This pom-pom flower pot is pure joy. It’s bright, fluffy, and super fun to make.
Kids can choose their favorite color scheme or go totally random, either way, it ends up looking like a party in a pot.
How to Make It:
Choose your pom-poms – Grab mini pom-poms in a variety of colors.
Apply glue – Working in small sections, spread tacky glue over the pot’s surface.
Press on pom-poms – Gently press the pom-poms into the glue and fill in any gaps as you go.
Let it set – Allow it to dry thoroughly before handling or planting.
Foam Sticker Pot
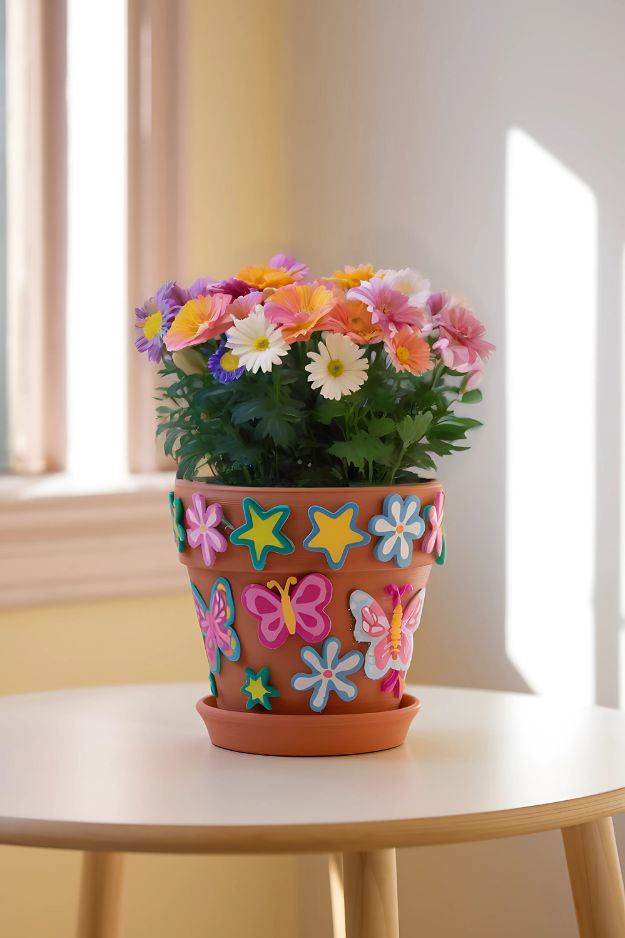
Here’s a super simple option that’s great for little hands, foam stickers. This pot uses pre-cut flowers, butterflies, and stars to create a garden-themed design.
It’s a quick project with no paint or mess, but still looks totally festive.
How to Make It:
Gather your foam stickers – Choose a mix of flower, star, and butterfly shapes.
Stick them on – Let your child press the stickers around the pot in any design they like.
Layer if you like – You can overlap shapes or add smaller stickers on top of larger ones for more depth.
Done and ready to use – No drying time needed—just pop in a plant and display it.
Puffy Paint Pot
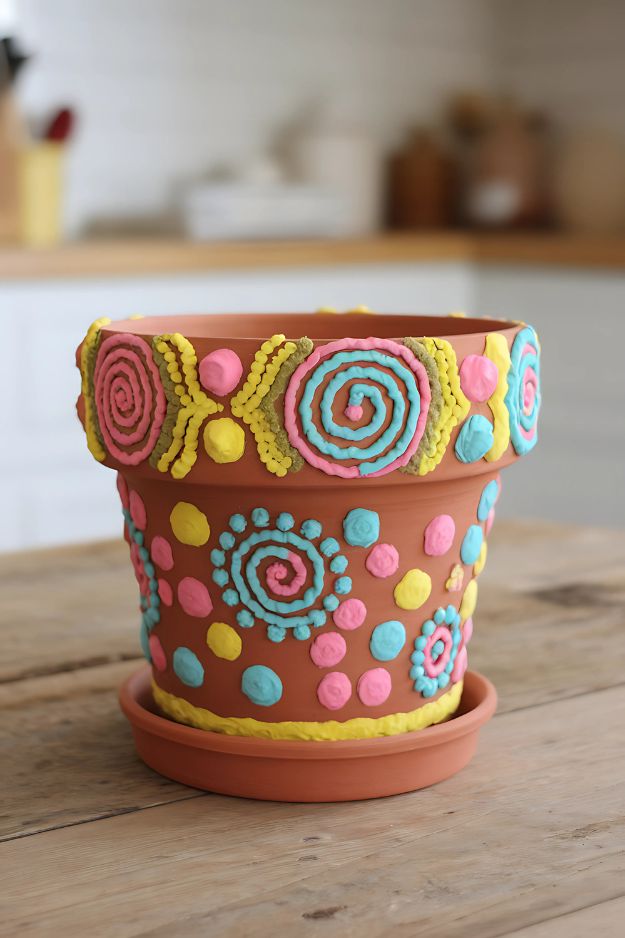
Puffy paint takes ordinary flower pots to the next level. It adds fun, texture, and a bit of a 3D effect that makes every design pop, literally.
Kids love the way it feels going on, and once it dries, the raised patterns are so satisfying to touch.
How to Make It:
Start with a clean base – Paint your pot in a solid background color if you’d like.
Add puffy paint – Use puffy paint bottles with narrow tips to draw hearts, dots, zigzags, or any fun shapes.
Go slow – Encourage kids to squeeze gently and let the designs puff up as they go.
Let dry overnight – Puffy paint takes longer to set, so leave it untouched for at least 24 hours.
Name Pots
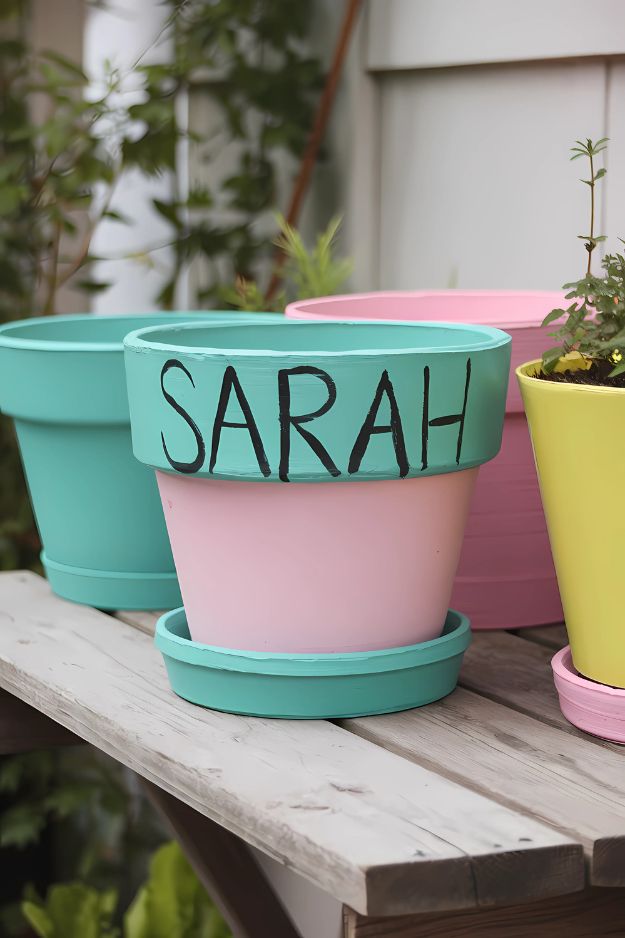
Personalized name pots are always a hit. Whether you’re growing a plant for each kid or giving it as a gift, having their name on it makes the whole project feel special.
Bonus: it helps prevent garden mix-ups too.
How to Make It:
Paint your base – Choose two coordinating paint colors and cover the inside and outside of the pot.
Add the name – Use black paint or a permanent marker to write the name across the rim.
Let kids decorate more – Add little hearts, stars, or doodles if they want to make it their own.
Seal it – Apply a waterproof sealant so it’s outdoor-ready.
Grass Hair Pots
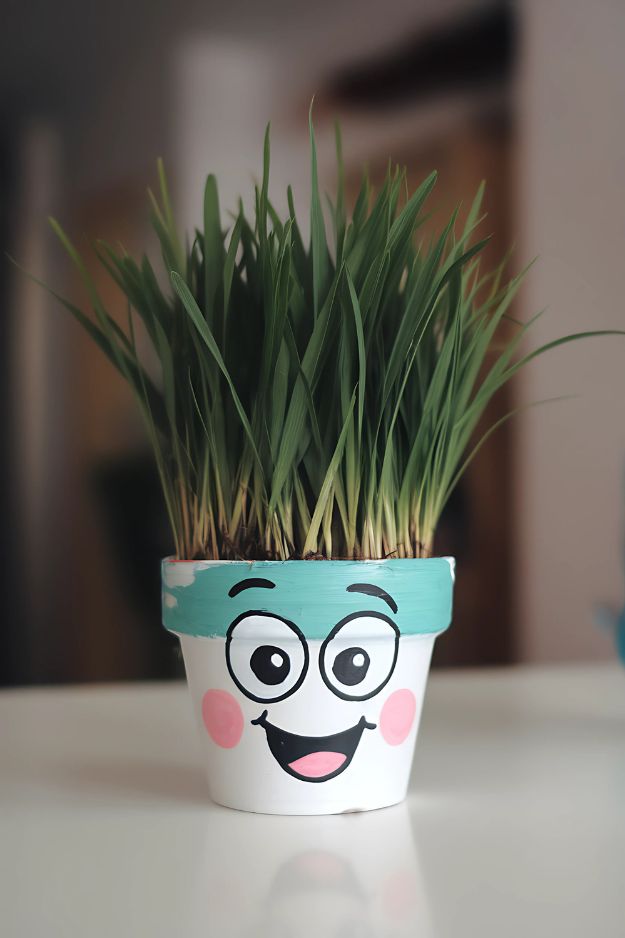
The sillier the better with these grass hair pots. Once the grass grows in, it looks like your little character has a head full of wild green hair.
It’s a fun way to mix crafting with a little bit of plant science.
How to Make It:
Paint a face – Use white paint for the base and black or pink for the eyes, smile, and cheeks.
Let it dry – Make sure the face details are fully dry before planting.
Add soil and seeds – Fill the pot with soil and sprinkle grass or wheatgrass seeds on top.
Water and wait – Keep the soil moist and watch the “hair” grow in just a few days!
Emoji Pots
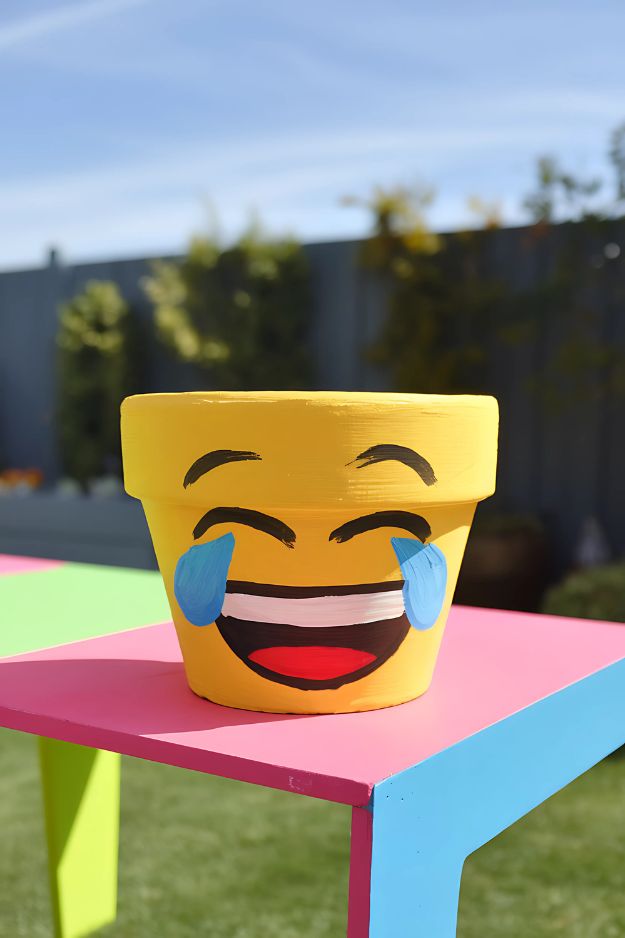
Emoji fans will love this one. The expressions are hilarious, bold, and surprisingly easy to paint.
You can even let each child choose their favorite emoji and turn it into a face pot, there’s no wrong way to smile.
How to Make It:
Paint the pot yellow – Cover the entire pot and let it dry.
Sketch the face – Use a pencil to lightly outline your emoji’s expression.
Fill in with paint – Use black, white, red, and blue paints for eyes, tears, and smiles.
Optional sealant – Spray with a clear sealer if it will be outdoors.
Mother’s Day Flower Pot
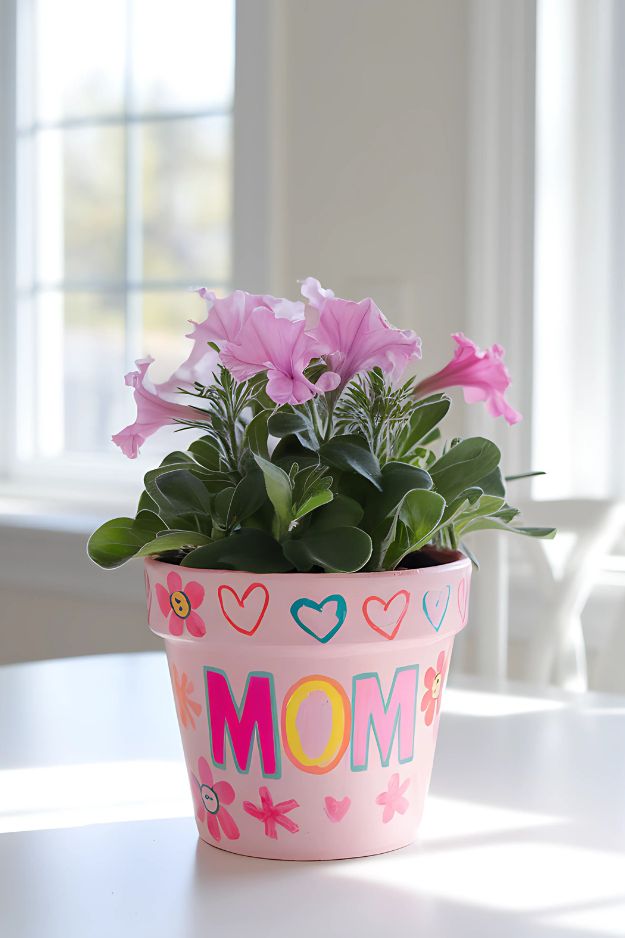
Looking for a handmade gift idea for Mother’s Day? These sweet pots are packed with love and creativity.
The best part? They double as a gift and the wrapping, especially if you pop a blooming plant inside.
How to Make It:
Paint the pot – Soft pastels like pink or lavender work beautifully.
Add your message – Use markers or paint pens to write “MOM” and decorate with hearts, flowers, and doodles.
Add button centers – Glue on small buttons for the center of the flowers if you’d like.
Fill with a flower – Choose her favorite plant and deliver it with a smile.
Fourth of July Pot
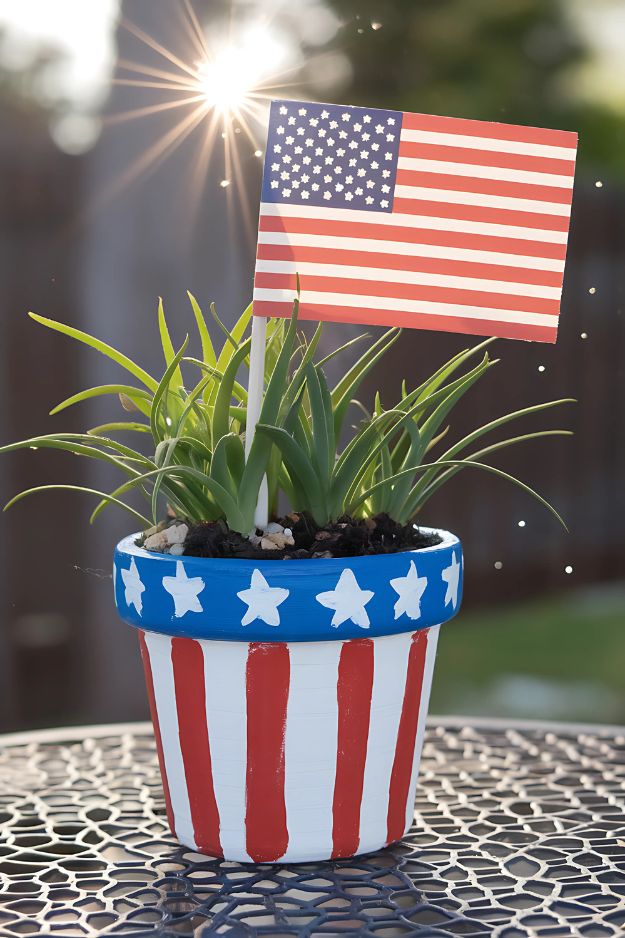
If you’re planning a summer barbecue or just want to show off your patriotic spirit, this red, white, and blue pot makes a perfect festive centerpiece.
It’s bold, simple to paint, and a great excuse to get creative while chatting about holidays and history with the kids.
How to Make It:
Paint the stripes – Start by painting vertical red stripes over a white base and let dry.
Add the blue rim – Paint the rim with blue acrylic paint and allow it to dry.
Dot on stars – Use a stencil or paint small white stars along the blue rim.
Top it off – Stick a small American flag into the soil to complete the look.
Bumblebee Flower Pot
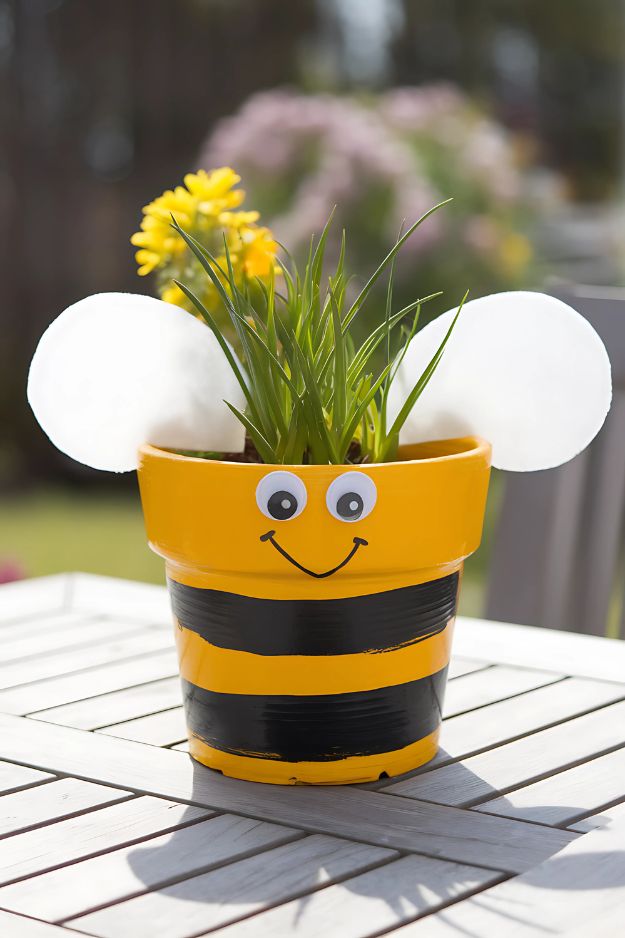
How adorable is this little bee? It’s bright, cheerful, and sure to make anyone smile.
This is a great project to pair with planting flowers that bees actually love – instant garden lesson for the kids.
How to Make It:
Paint yellow base – Cover the entire pot in yellow and let dry.
Add black stripes – Use black paint to create wide horizontal stripes like a bee’s body.
Attach googly eyes and smile – Glue on eyes and draw a cute smile.
Make the wings – Cut out circles from white foam or cardstock and glue one on each side.
Rainbow Flower Pot with Face
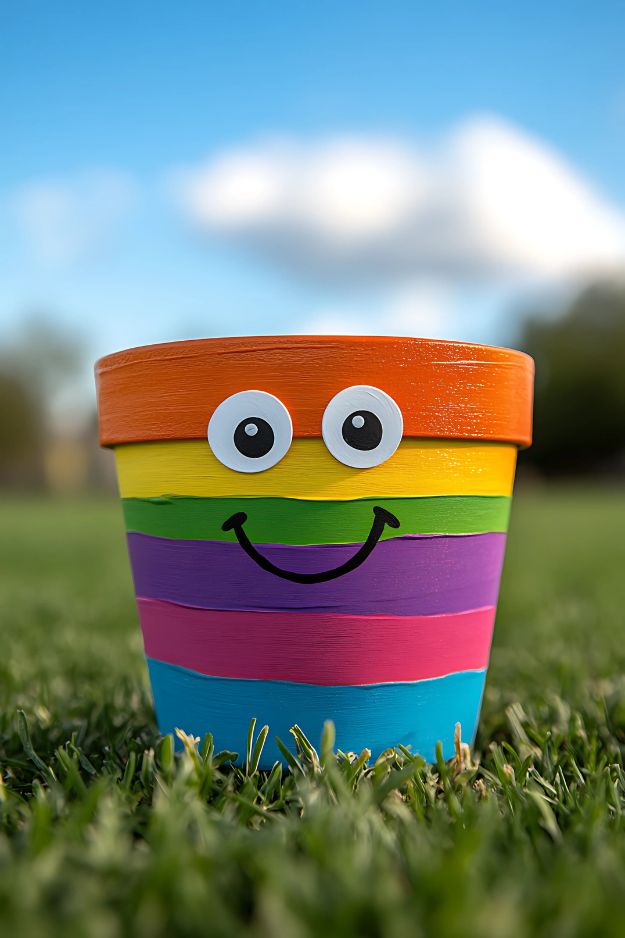
This one’s bright, happy, and full of personality. The wide rainbow bands combined with a goofy little face make this pot one that feels like it could come alive.
Perfect for preschoolers and early learners who love colors and silliness.
How to Make It:
Paint rainbow stripes – Use bold, colorful acrylics to paint thick horizontal bands around the pot.
Add a face – Stick on googly eyes and draw a big smiling mouth with black paint or marker.
Let it dry – Allow everything to dry fully before planting anything inside.
Place it outside – This one deserves a sunny spot to shine.
Watermelon Flower Pot
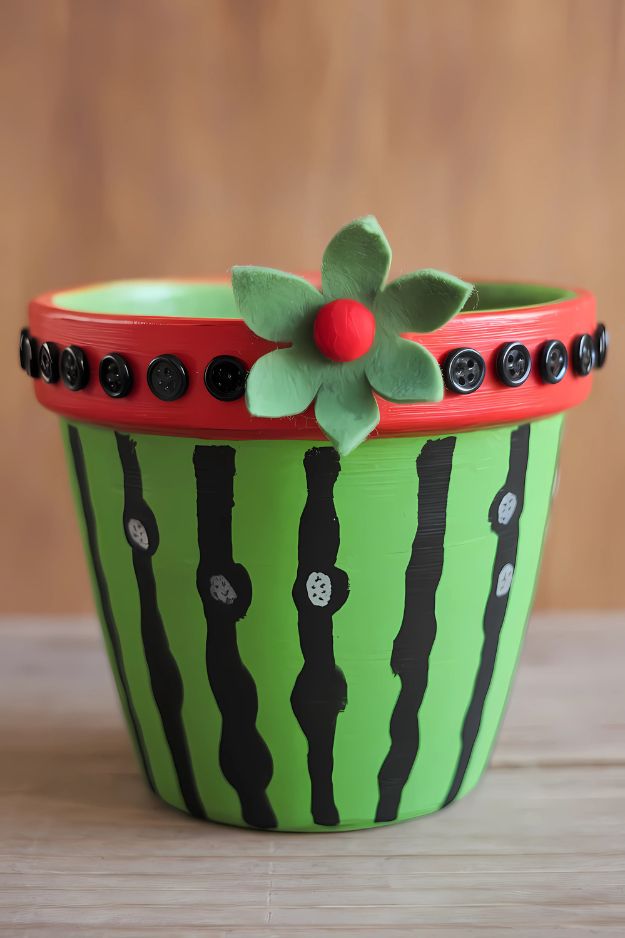
A watermelon pot just screams summer. With its bright green rind, juicy red top, and cute button “seeds,” this one is full of charm.
Kids will love painting the stripes and adding a little flair with the buttons and foam flower.
How to Make It:
Paint the body green – Use a bright green for the base and let it dry.
Add black stripes – Paint wavy vertical lines from top to bottom to mimic a rind.
Decorate the rim – Paint the rim red and glue on small black buttons for seeds.
Add a foam flower – Glue a green foam flower with a red center for a sweet finishing touch.
Final Thoughts
Flower pot painting is such a rewarding craft for both kids and adults. You end up with something beautiful, useful, and personalized, and the process is just as fun as the finished product. Whether you’re making gifts or brightening up your own space, I hope these ideas spark your creativity.

