This post may contain affiliate links. If you make a purchase through these links, I may earn a small commission at no extra cost to you. Thank you so much for your support.
Kitchen organization becomes much easier when the things you use every day have a place that makes sense.
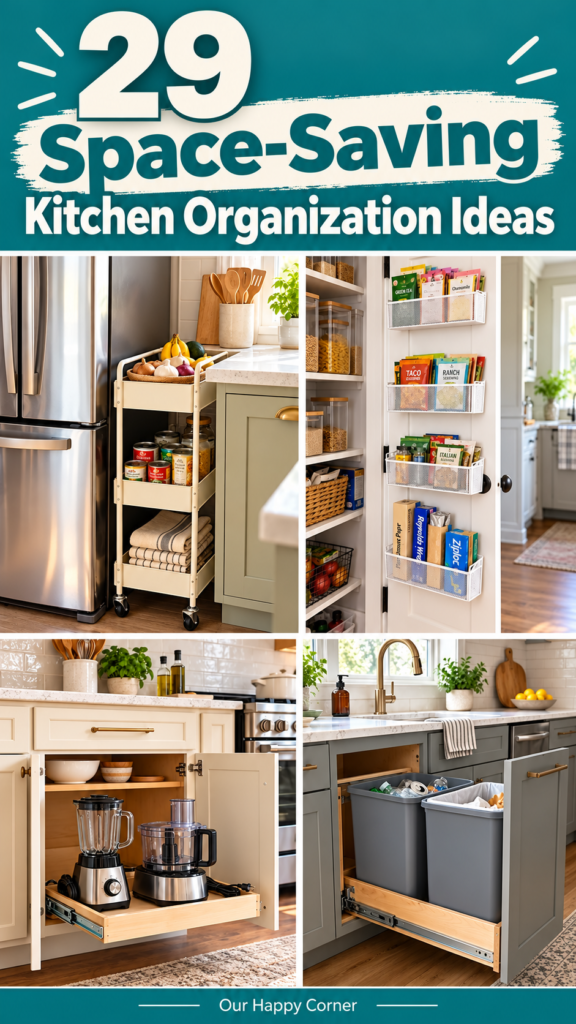
You can find the pan you need, put groceries away without reshuffling three shelves, and pack leftovers without hunting for a matching lid.
If your kitchen feels crowded, you do not have to tackle every cupboard at once. A better cutlery drawer or a clear snack basket can make a noticeable difference before you move on to the bigger jobs.
These kitchen organization ideas cover cabinets, drawers, countertops, pantry shelves, and the fridge. Choose the ones that solve your daily frustrations, then build a setup your household can actually keep using.
Before You Start Organizing Your Kitchen
Start with the area that slows you down most often. Empty that one drawer or shelf, wipe it clean, and put back the things you still use. Set aside duplicates, damaged containers, and gadgets that have been taking up space without earning their place.
Measure the inside width, depth, and height before buying organizers. Hinges, plumbing, drawer sides, and shelf dividers all affect what will fit. For anything that slides or mounts on a door, check its loaded clearance rather than only the empty organizer.
Keep storage close to the job it supports. Dishes belong near the dishwasher, prep tools near your chopping area, and food containers near the spot where you pack leftovers.
If you are also refreshing the room itself, these vintage pink kitchen ideas offer inspiration for a warm, personal kitchen.
Kitchen Organization Ideas
1. Add Shelf Risers for Everyday Dishes
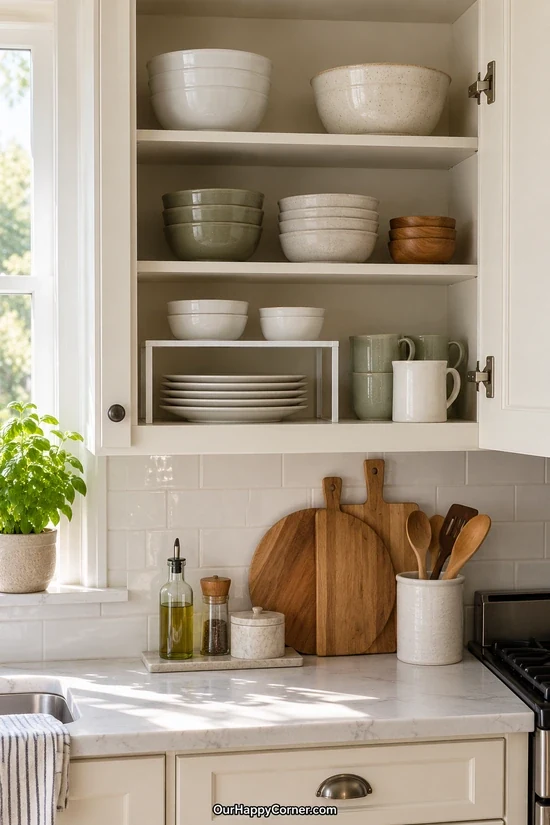
That awkward gap above a stack of plates can hold more than you think.
A shelf riser creates another level for bowls or smaller dishes while keeping the plates underneath easy to reach.
Separate pieces by how you use them, with everyday dinnerware together and occasional serving pieces elsewhere. Measure the cabinet height with your tallest bowl in place before choosing a riser.
Pick a sturdy model that sits flat and supports the weight of your dishes. Keep stacks manageable so you can take out a plate without lifting a tower first.
2. Bring Pantry Staples Forward With Pull-Out Baskets
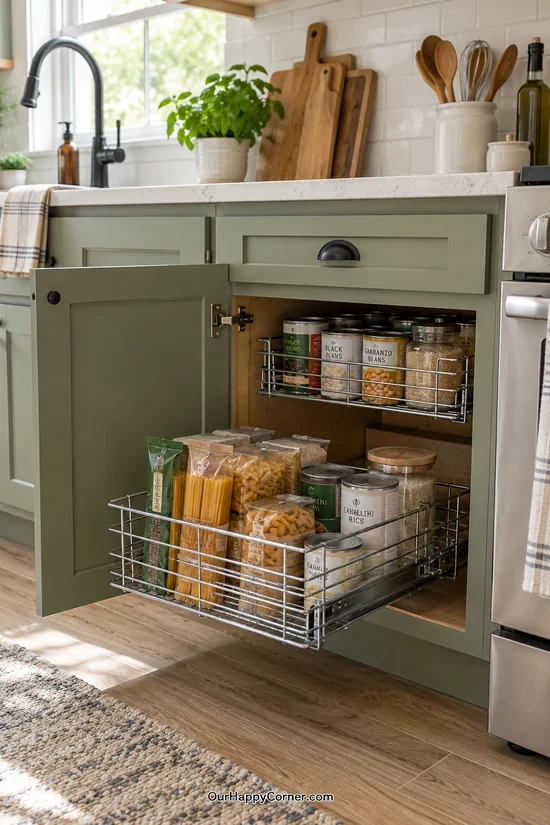
Deep cabinets are useful until the food at the back disappears from your routine. Pull-out baskets bring those forgotten packets and jars into view without making you empty the shelf.
Give each basket a purpose, such as breakfast supplies, dinner ingredients, or baking extras.
Place heavier items low and keep tall bottles upright with enough clearance overhead.
Measure the opening between the hinges as well as the cabinet interior before installing the runners. Leave room around the basket so packets do not catch when you slide it back.
3. Use a Turntable for Cooking Condiments
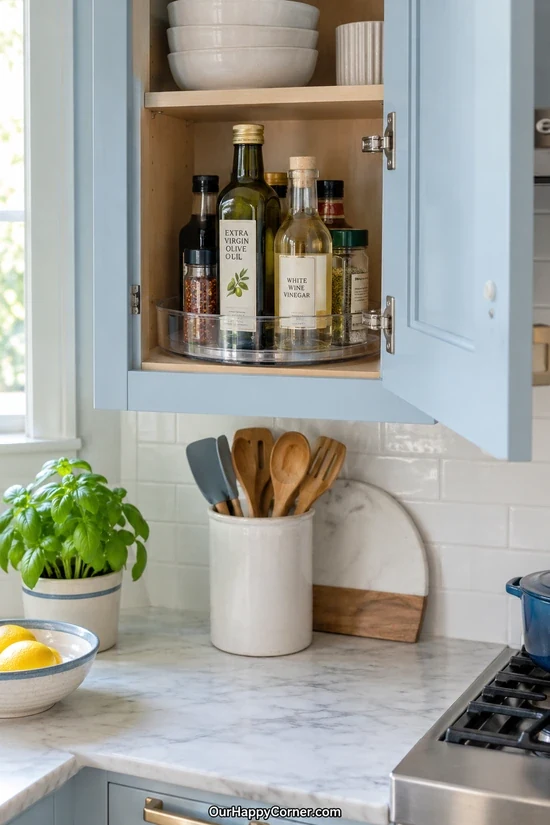
Reaching past three bottles to find the soy sauce gets old quickly. A turntable keeps smaller cooking sauces, vinegars, and seasonings within reach with a quick spin.
Group bottles you use for similar meals rather than filling the tray with everything you own.
Check the diameter against the cabinet opening and make sure the tallest bottle clears the shelf above.
A tray with a raised edge helps keep bottles in place. Wipe the base occasionally so sticky drips do not turn this useful little spot into another cleaning job.
4. Separate Pots and Pans With Adjustable Dividers
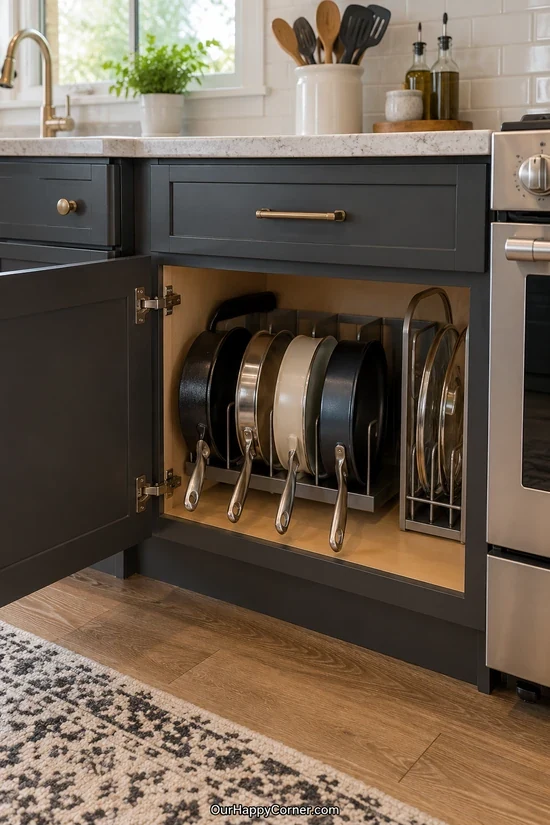
You should be able to grab a frying pan without unstacking every pot in the cabinet. Adjustable dividers give each pan its own slot and keep the collection easier to sort through.
Start by setting aside cookware you rarely use so the organizer only needs to hold your regular pieces. Position handles where they will not block the door or neighboring pans.
Choose dividers that support the size and weight of your cookware, particularly heavier skillets.
Leave enough space to lift each pan out comfortably instead of squeezing it into a tight gap.
5. Give Cutlery Its Own Drawer Compartments
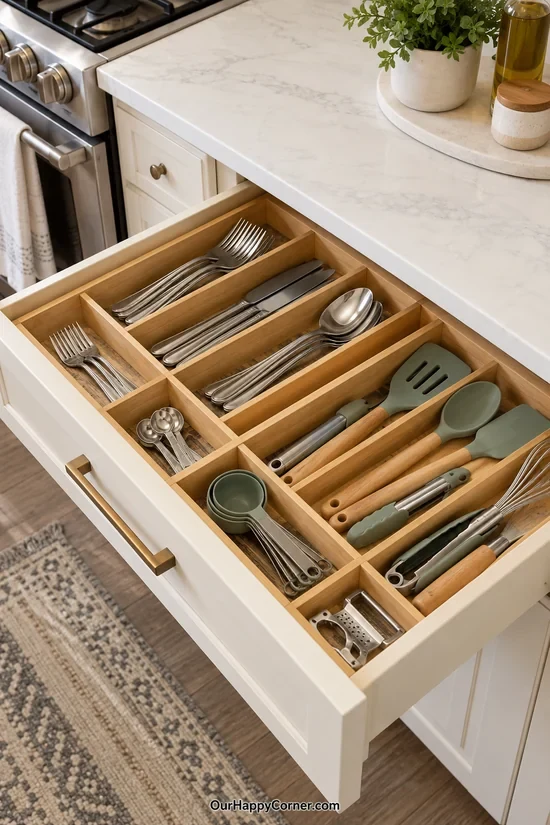
A cutlery tray is a small change you notice every time you set the table. Separate forks, spoons, and table knives so everyone can find what they need.
Use the longer compartments for serving utensils if they fit without crowding the everyday pieces. Measure the inside of the drawer and its usable height before buying an expandable tray.
Wipe the drawer clean before putting the organizer in, then add only the pieces you actually use.
Leave one small compartment for a useful extra rather than letting the whole drawer collect odds and ends.
6. Store Baking Sheets in Vertical Slots
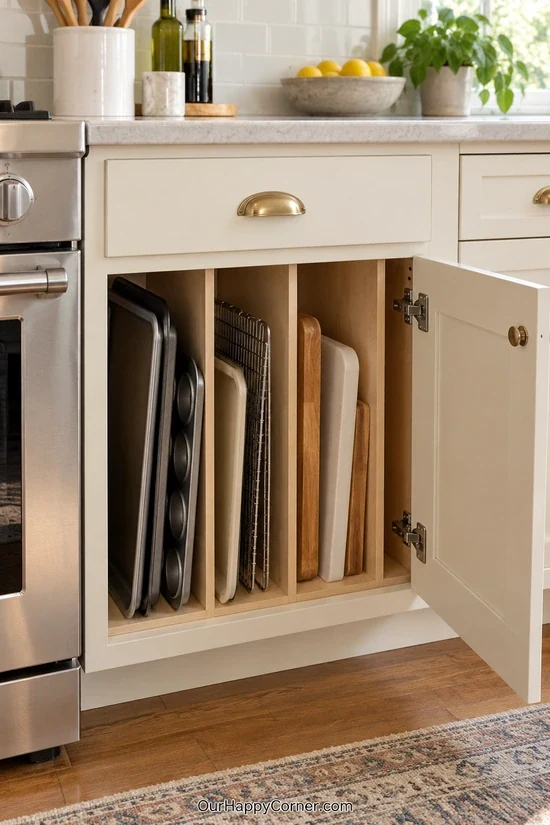
Baking sheets are much easier to pull out when they stand on their edges. Vertical slots let you separate cookie sheets, cooling racks, and cutting boards without building a heavy stack.
Put your most-used tray in the easiest slot to reach. Space the dividers for thicker boards and pans rather than making every opening the same width.
Check the full height of each piece, including handles, against the cabinet opening. Return boards and trays completely dry so the storage area stays clean and ready for the next meal.
7. Match Food Containers With a Separate Lid Section
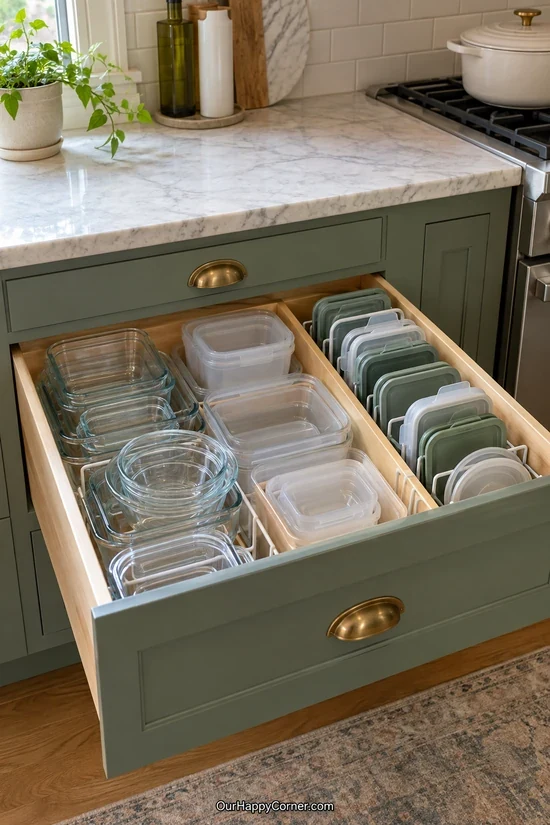
The container drawer feels less frustrating when every base has a lid you can actually find. Sort the collection first and remove cracked pieces and unmatched lids.
Nest empty containers by shape, then stand their lids upright in a divided section beside them. Keep the sizes you use for packed lunches and leftovers nearest the front.
A few dividers help the stacks stay separate when the drawer moves. Try putting everything away once before calling the setup finished, because easy cleanup matters as much as a tidy drawer.
8. Mount a Shallow Spice Rack Inside a Cabinet Door
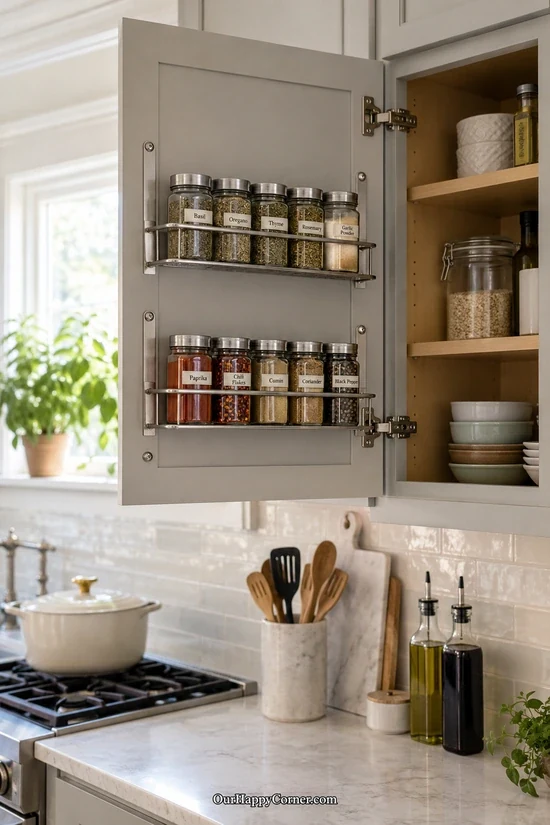
A shallow door rack turns a small unused space into convenient spice storage. It works particularly well for the jars you reach for while cooking most nights.
Keep labels facing forward and arrange the jars in whatever order you can remember easily. Check that the loaded rack clears the cabinet shelves when the door closes.
Use mounting hardware suited to the door material and the weight of the rack. Choose a cabinet away from direct stove heat so the storage spot is useful without putting your spices beside a hot burner.
9. Work Around the Plumbing Under the Sink
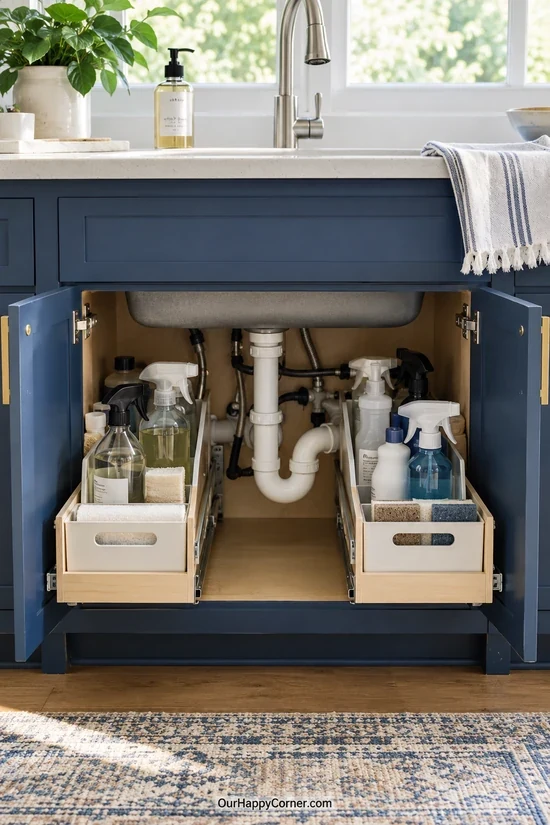
Under the sink is one of those places that needs a plan before it needs more storage. Start with the pipes and disposal, then choose bins that fit the space left around them.
Group dishwashing supplies together and give extra sponges and cloths their own container. Keep cleaning products upright in their original labeled packaging.
A removable tray makes small drips easier to notice and wipe up. Leave plumbing connections accessible, and use a child-resistant cabinet lock where young children can reach household cleaners.
10. Put Foil and Wrap Boxes in a Door Rack
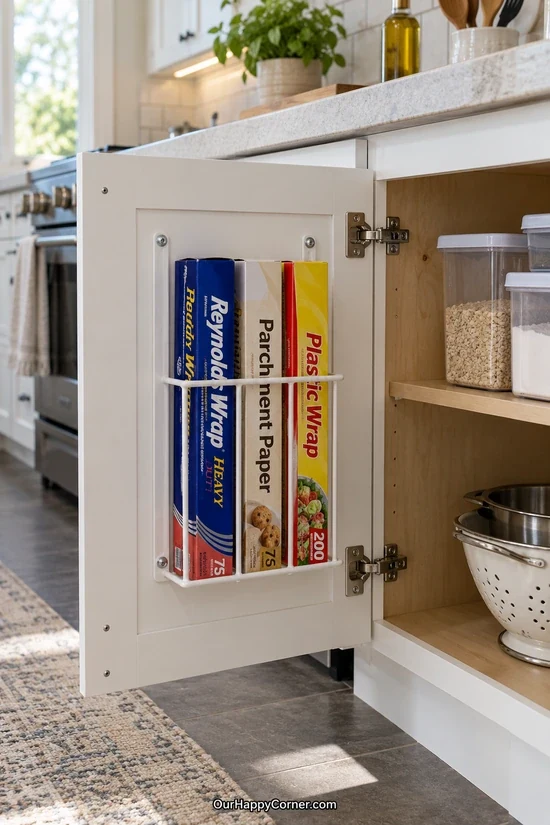
Long wrap boxes have a way of taking over an otherwise useful drawer. A narrow door rack keeps foil, parchment, and plastic wrap together without hiding the labels.
Arrange the boxes upright if the rack supports them securely. Measure their height and check that the rack does not collide with an interior shelf.
Keep the cutting edges protected inside their boxes rather than leaving loose rolls in the rack. Put this organizer close to the area where you pack lunches or cover leftovers so the extra storage also makes sense for your routine.
11. Free Up the Counter With a Knife Drawer Insert
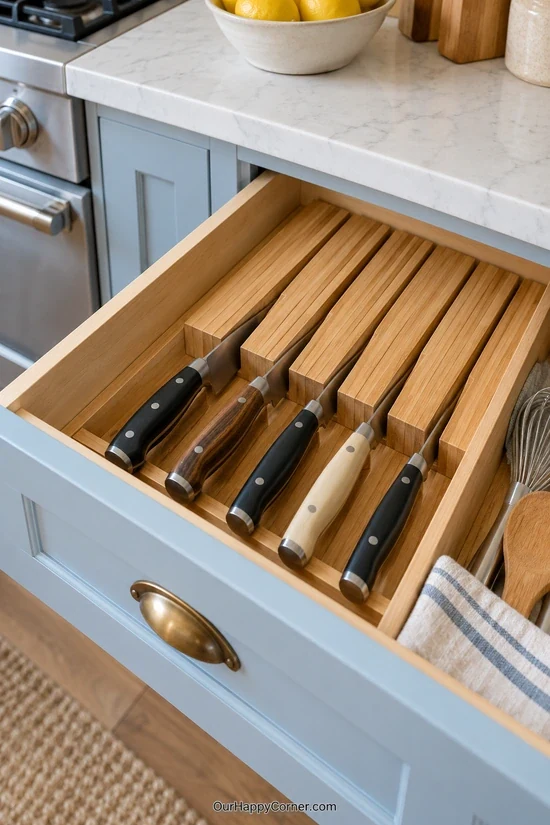
A fitted knife insert gives your knives a dedicated place while clearing space on the counter. Choose slots that suit the blades you own instead of forcing wide knives into narrow openings.
Keep handles easy to grasp and blades protected inside the insert. Check that the tallest handle sits below the drawer opening before closing it.
Put knives away clean and dry so moisture does not sit against the insert. This drawer should also be secured or kept inaccessible to young children.
12. Sort Small Kitchen Gadgets Into Bins
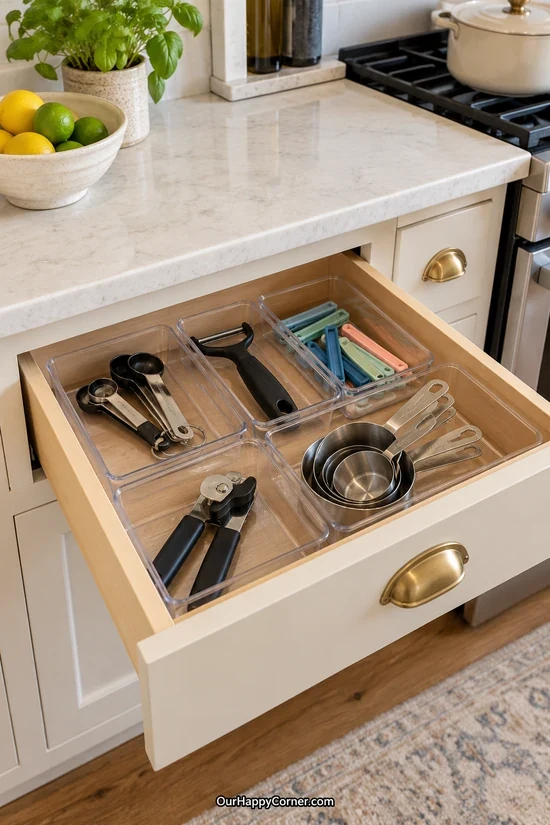
The peeler, measuring spoons, and bottle opener do not need to share one tangled pile. Small bins divide the drawer into easy categories without requiring a custom insert.
Keep food-prep tools together and give measuring tools their own space. Use a longer section for awkward pieces such as a citrus press or can opener.
Leave enough room to lift each item out without moving the bin beside it. If a gadget never gets used, removing it will usually help more than finding a cleverer container for it.
13. Fold Dish Towels Into a Dedicated Drawer
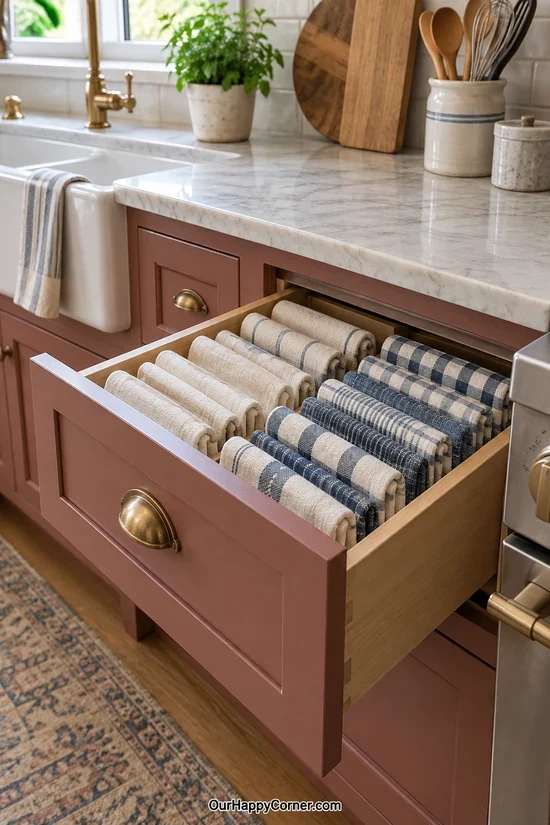
A towel drawer makes wiping up spills and replacing a damp cloth much easier. Fold towels to a similar width and stand them upright so you can see the whole selection.
Separate dish towels from cleaning cloths if you use them for different jobs. Keep a small stack of everyday favorites at the front instead of saving the useful ones underneath extras.
Put towels away fully dry and avoid packing the drawer so tightly that they are difficult to remove. This is also a good place to limit the collection to what your household uses between wash days.
14. Use Pegs to Keep Dishes Steady in a Deep Drawer
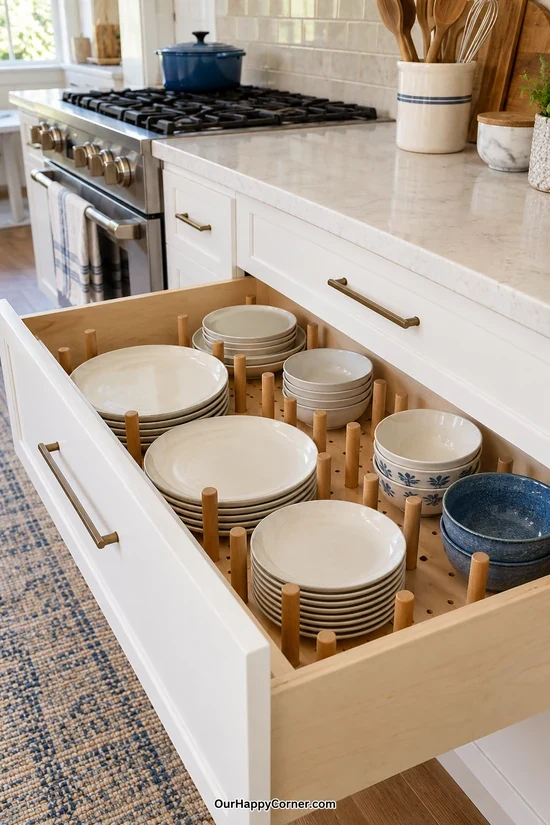
Deep drawers can be a comfortable home for plates and bowls when the stacks have support. A peg system lets you arrange sections around the dishes you already own.
Keep larger dinner plates together and give smaller bowls a separate space. Position the pegs close enough to steady each stack without making it hard to lift a piece out.
Check the drawer weight limit before filling it with heavy dinnerware. Placing this drawer near the dishwasher makes putting clean dishes away feel a little more straightforward.
15. Keep Coffee Supplies Together on a Tray
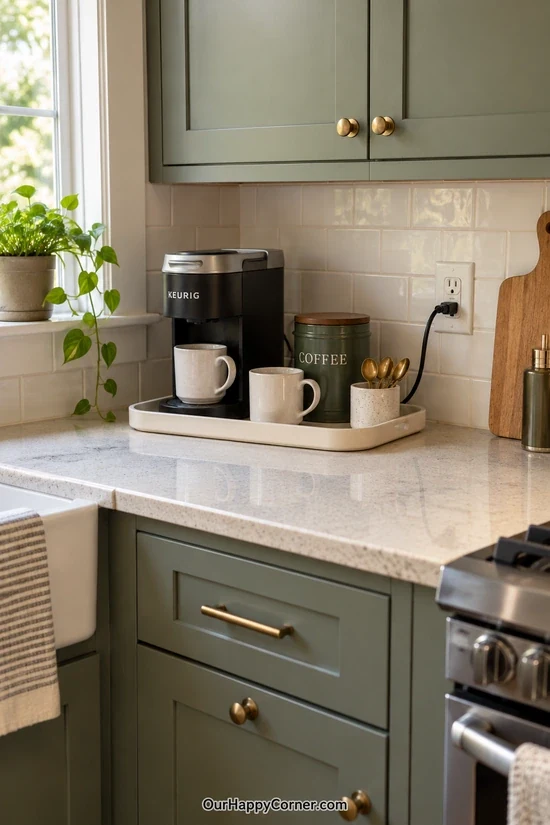
A coffee tray gives the morning routine one clear home on the counter. Keep the coffee maker, a couple of mugs, and your regular add-ins together without spreading them across the worktop.
Store spare mugs and bulk coffee nearby rather than crowding them onto the tray. Choose a surface that is easy to wipe when coffee or sugar spills.
Leave room to fill the machine and remove its water tank without moving everything first. A small, useful coffee corner can feel inviting while still leaving you space to prepare breakfast.
16. Limit the Utensil Crock to Your Everyday Tools
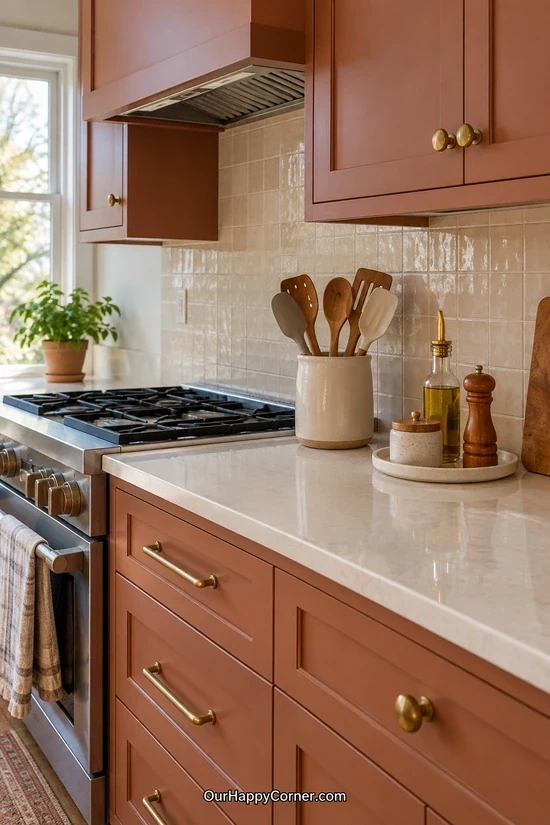
A utensil crock works best when it holds your regular cooking tools. Keep the spatula, wooden spoon, whisk, and other favorites within easy reach of your prep area.
Move duplicate tools and occasional baking utensils into a drawer. Choose a stable crock with enough room for handles to separate naturally.
Place it outside the burner area so tools and their handles are not exposed to direct heat. Empty and wipe it out occasionally, because crumbs can gather at the bottom even when the counter looks tidy.
17. Hang Frequently Used Tools on a Wall Rail
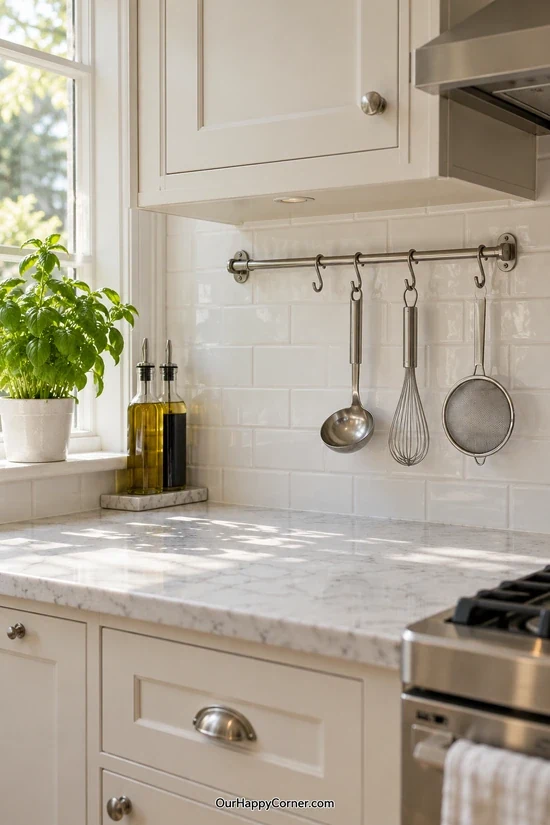
A short wall rail can make a useful home for tools that crowd your drawers. Hang a few lightweight pieces, such as a sieve, ladle, and measuring tools, where you can reach them comfortably.
Leave enough space between hooks so each item comes off without bringing its neighbor along. Position the rail clear of the main chopping area and away from open flames.
Mount it with fixings suited to the wall and the combined weight of the tools. Keep the selection small so the wall stays easy to wipe and the rail remains convenient.
18. Use a Slim Rolling Cart in an Accessible Gap
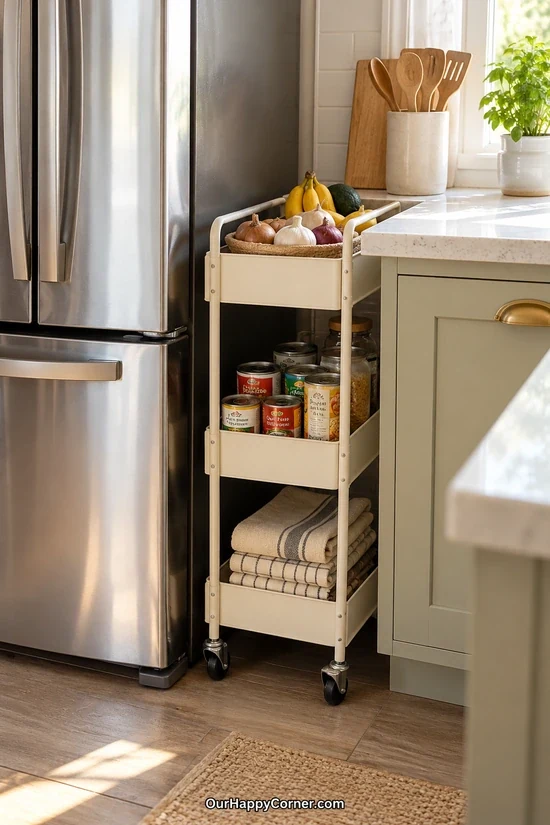
A narrow gap can become useful storage if you can reach it comfortably. A slim rolling cart is handy for packaged pantry extras or supplies that do not have a cabinet home.
Measure the gap at its narrowest point and allow room for the cart to roll freely. Keep heavier items on the lower shelves so the cart feels steady.
Choose a position that does not block an appliance vent, doorway, or cabinet opening. Give the cart a clear purpose so it does not become another place to collect miscellaneous clutter.
19. Group Pantry Packets in Clear Bins
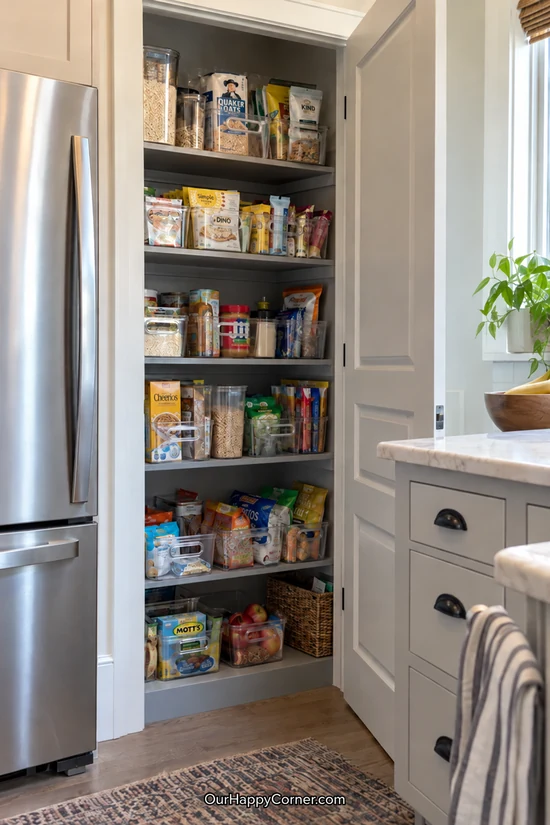
Clear bins make all those little packets easier to see and put away. Group oatmeal, baking supplies, snack bars, or dinner ingredients according to how your household uses them.
Keep the original packaging when it already works well, especially when you need preparation instructions or ingredient information. Put taller packets behind shorter ones so the contents remain visible.
Leave a little spare room in each bin for the next grocery shop. A simple label helps everyone return items to the right place without making the pantry feel fussy.
20. Use Airtight Containers for Frequently Used Dry Goods
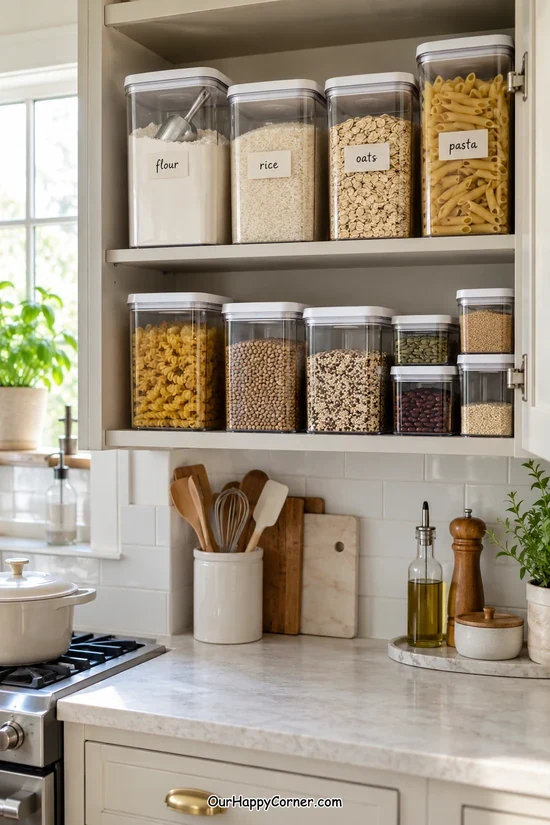
Dry goods containers are helpful when you regularly use the food inside them. Start with a few staples, such as rice, oats, flour, or pasta, instead of decanting your whole pantry at once.
Choose containers sized for the packages you buy so you do not create an awkward second storage pile.
Label the contents and keep the original best-by date and preparation details where you can find them.
Wash and thoroughly dry the containers before refilling, using up older contents first. Similar shapes can make the shelf easier to arrange, but a container that fits your routine matters more than a perfectly matching set.
21. Raise Back Rows of Canned Food
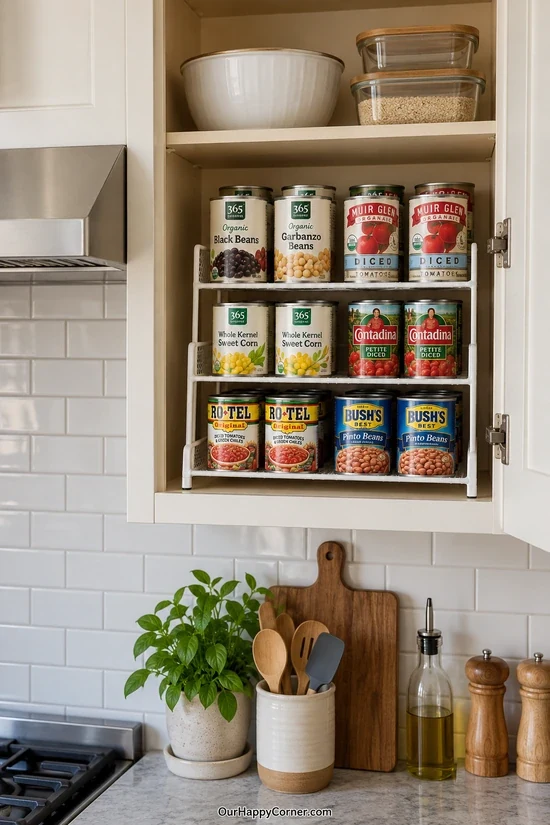
Cans at the back of a shelf are easy to overlook when every row sits at the same height. A tiered riser lifts the rear rows so you can read the labels.
Group canned vegetables, beans, and other staples in a way that matches the meals you make. Keep duplicates behind the can you plan to use first.
Check the shelf height with cans on the highest tier before choosing an organizer.
Avoid stacking extra cans on top of the riser rows if that makes them unstable or hides the labels again.
22. Make a Grab-and-Go Snack Zone
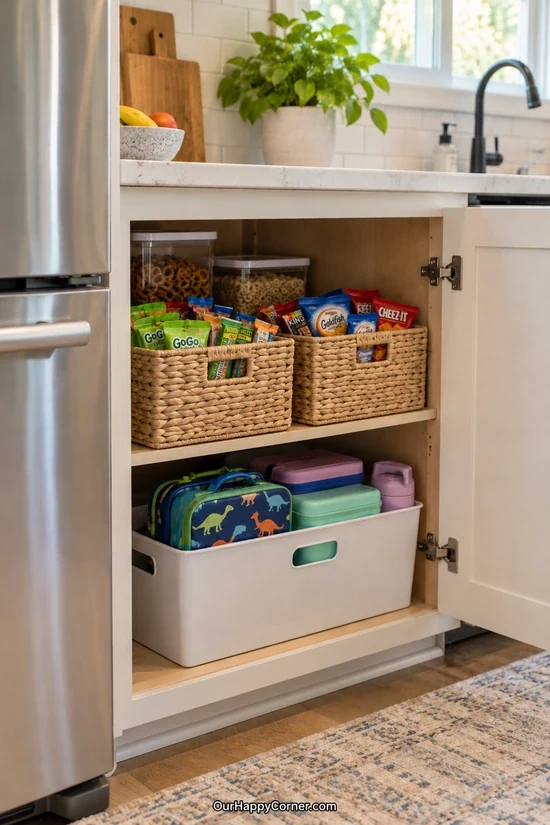
A dedicated snack zone makes packed lunches and after-school snacks easier to manage.
Use baskets for broad groups such as crackers, fruit pouches, and snack bars.
Place them at a height that suits the people who will use them. Keep individually wrapped foods in their packaging and put open bags in suitable sealed containers.
Restock from the back so older snacks stay at the front. Broad categories are easier to maintain than a separate tiny basket for every flavor.
23. Add Shallow Baskets to the Pantry Door
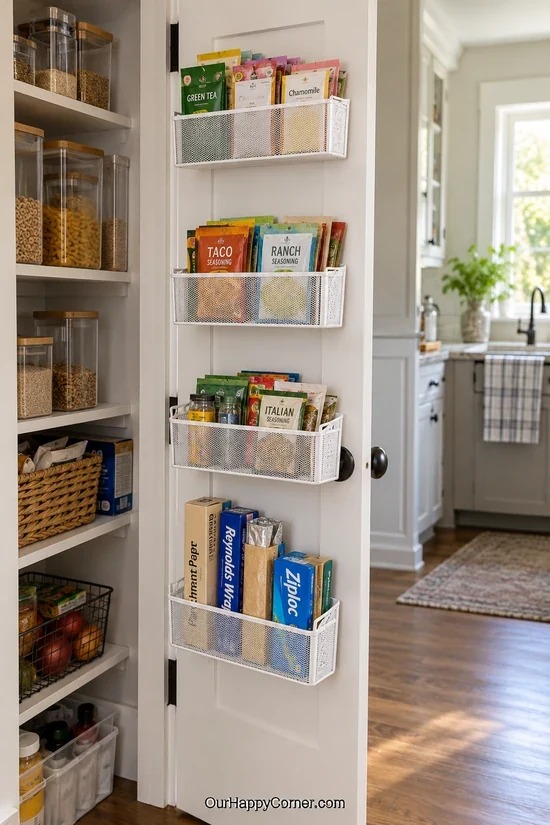
The back of the pantry door can hold items that disappear on deep shelves. Shallow baskets are useful for seasoning packets, small boxes, and other lightweight pantry supplies.
Keep the heaviest items lower down and avoid overloading the door. Measure the clearance between the closed door and the shelves with the baskets filled.
Use a rack and mounting method suited to the door construction. Leave tall or bulky packages on the main shelves if they stop the door from closing comfortably.
24. Give Fridge Produce Clear, Practical Zones
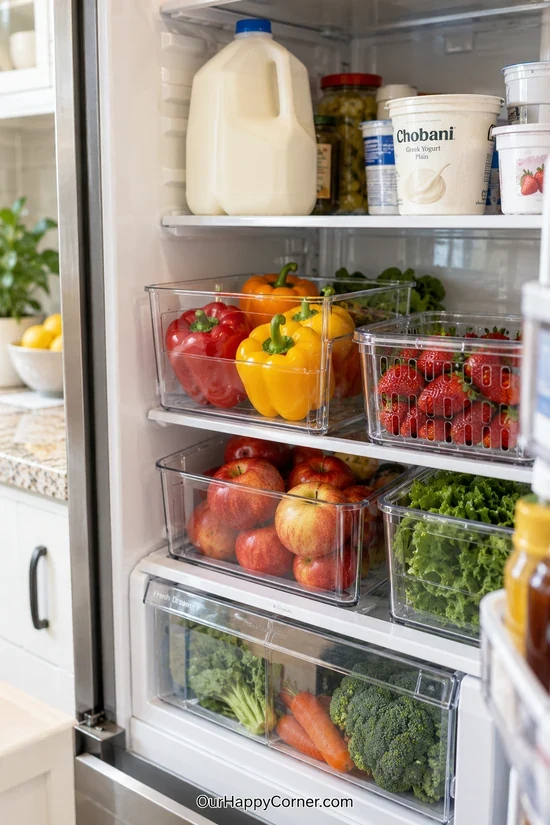
A few produce zones make it easier to see what needs using before another grocery shop. Group similar fruits and vegetables in clear bins where the packaging and fridge layout allow.
Keep delicate berries in suitable containers and use the crisper drawers for produce that benefits from them.
Avoid filling every inch with bins, because you still need access and space around the food.
Follow storage directions for the produce you buy, and wait to wash items that store better unwashed until you are ready to use them. Wipe the bins when you restock so stray leaves and soft fruit do not disappear underneath the fresh groceries.
25. Create a Visible Leftover Zone
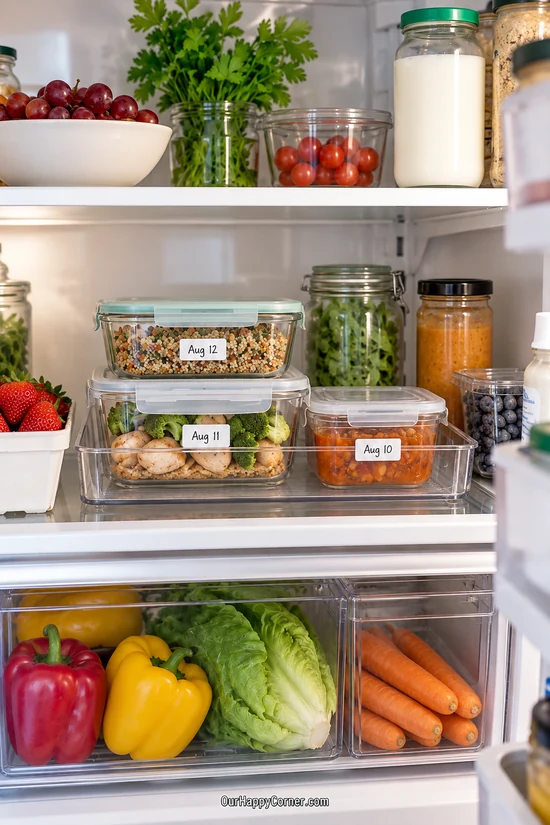
Leftovers are easier to remember when they have one visible spot in the fridge. Keep them in sealed containers and label each one with the food and the date it was prepared.
Arrange containers so the older meals are easiest to reach rather than hidden underneath newer ones.
Use a shallow bin only if it fits the containers without making them difficult to lift out.
Leave enough headroom for the lids and keep stacks steady and manageable. Check this area before planning another meal so a useful portion does not get forgotten at the back.
26. Give Refrigerator Door Shelves Clear Categories
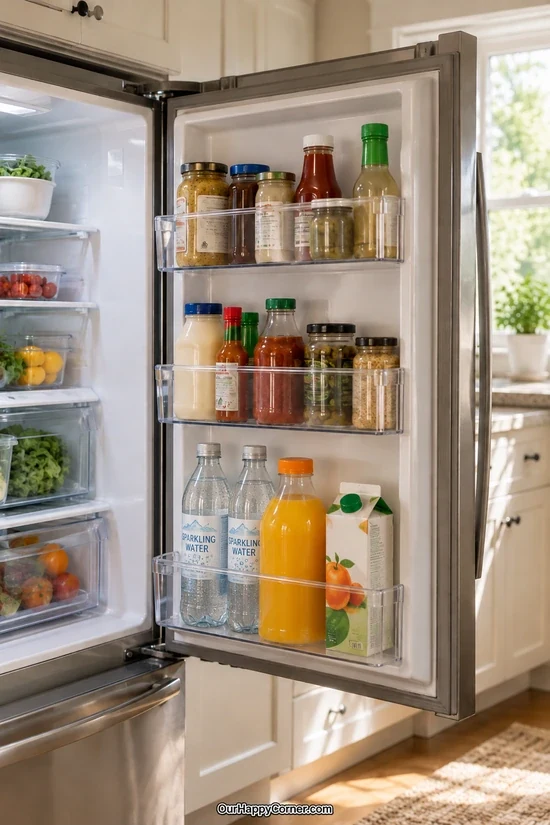
Fridge door shelves work well when bottles have predictable places. Group condiments together, keep cooking sauces in another section, and separate suitable drinks if your door has space.
Put shorter bottles where their labels stay visible and larger bottles in a shelf that supports them securely.
Keep milk, eggs, and other temperature-sensitive foods in the main refrigerator compartment rather than using the door for convenience.
Leave enough room to remove a bottle without shifting the whole row. Wipe shelf bases when you notice a drip so a sticky condiment bottle does not make the whole section unpleasant to use.
27. Divide a Drawer for Water Bottles and Lids
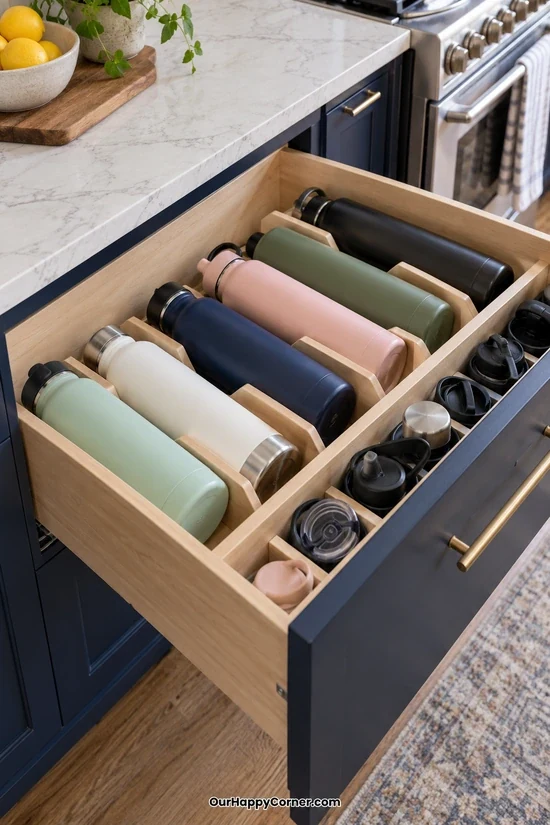
Water bottles are much easier to manage when the lids stop wandering into other drawers. Lay fully dry bottles in divided sections and keep matching lids in a smaller space alongside them.
Arrange bottles by size so tall ones do not push smaller ones out of place. Check that handles and caps clear the drawer when it closes.
Use the front section for school, work, or exercise bottles that leave the house most often.
If the drawer still feels crowded, removing bottles you never choose is a useful final step.
28. Put Small Appliances on a Pull-Out Shelf
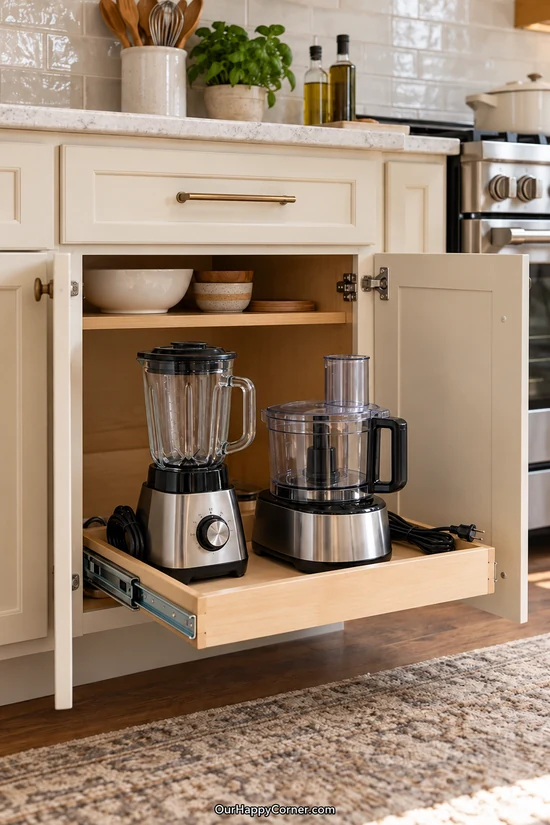
A pull-out shelf makes stored appliances easier to retrieve from a lower cabinet. Keep the blender and food processor together if you use them in the same prep area.
Measure each appliance with its lid, handle, and feed tube attached before deciding where the shelf above should sit.
There needs to be clear headroom throughout the slide path so the loaded shelf can move fully inside.
Choose runners rated for the combined weight and keep cords contained so they cannot catch. Use appliances on a stable counter unless the shelf system is specifically designed and rated for operation.
29. Hide Trash and Recycling in a Pull-Out Cabinet
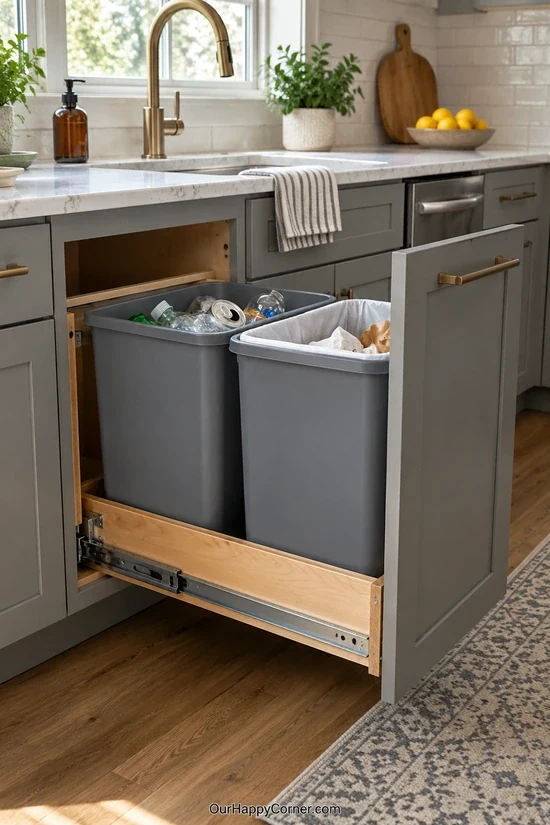
A two-bin pullout gives everyday waste a clear home without taking up floor space. Use one bin for trash and one for the recyclables accepted in your area.
Choose removable bins that you can lift out easily for emptying and washing. Check that the cabinet opening and runners suit the loaded weight of the setup.
Store spare liners nearby so replacing a bag does not turn into another search.
A quick wipe of the tray and cabinet edges helps this busy corner stay pleasant to use.
Keep Your Kitchen Organization Easy to Maintain
Before you unpack groceries, take a quick look at the pantry and fridge so older food can stay in front. Return tools to their assigned sections when you empty the dishwasher, and wipe a single drawer or bin whenever it needs attention.
Leave a little breathing room in the places that change from week to week. Pantry bins, snack baskets, and fridge shelves are easier to use when they can handle a grocery shop without a complete rearrangement.
If planning meals is part of the struggle, keep a short list of what needs using beside your weekly plans. These free printable floral planner pages can give your notes and household plans a handy place to land.
Final Thoughts
The best kitchen organization ideas are the ones that make your normal day easier. Start with a small change you will use often, whether that is separating container lids, giving snacks a basket, or making the pans easier to reach.
Live with the setup for a few days before adding more organizers. If putting things away feels awkward, adjust the spacing or simplify the categories. You want a kitchen that works during a busy evening as well as it does after a tidy-up.
Once you find a system that suits your household, try the same approach in another busy space. These laundry room organization ideas can help you give supplies, towels, and everyday essentials a more useful home.