This post may contain affiliate links. If you make a purchase through these links, I may earn a small commission at no extra cost to you. Thank you so much for your support.
Winter crochet projects are a lovely way to turn a quiet afternoon into something you can wear, use, or wrap up for someone you love.
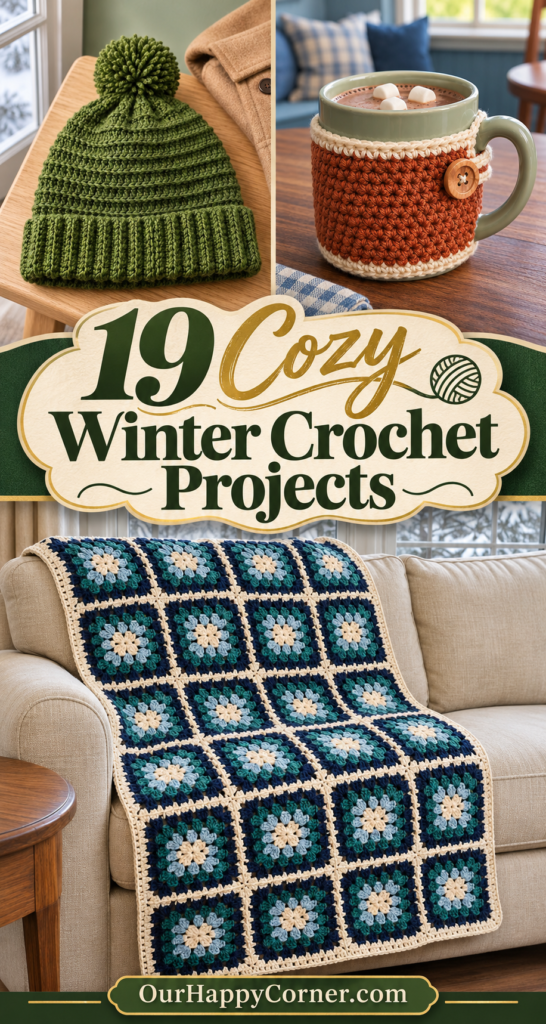
There is room here for a small make beside your evening cup of tea and for a bigger project you can return to over several weekends. Think warm mittens, a little book sleeve, a textured cushion, and a throw that makes the sofa more inviting.
I have kept the colors varied, from moss green and burgundy to soft pink, denim blue, and warm rust. You can follow the pictured palette or choose shades that already feel at home in your wardrobe.
Below, each idea has its own materials and construction steps. Read the getting-started notes first, especially for fitted pieces, then choose the project you are most excited to finish.
Before You Choose Your Yarn
These winter crochet projects use US crochet terms. They assume you can make a chain, single crochet, half double crochet, and double crochet; the shaped pieces also use increases and decreases.
Make a swatch in the actual stitch before starting. Wash and dry it as the yarn label directs, then measure it without stretching. Your yarn, hook, and tension affect both the finished size and the amount of yarn needed.
The dimensions below are starting targets, not a promise that one stitch count fits everyone. Check the hat, mitts, mittens, slippers, and leg warmers against the intended wearer as you work; adjust before finishing seams or closing tips.
For shopping, allow roughly 100–200 g of medium-weight yarn for a hat or cowl, 200–400 g for a scarf, and more for a shawl or blanket. Yardage varies considerably between yarns, so use your swatch and yarn label rather than treating these ranges as an exact requirement.
Stitches and Finishing Notes to Keep Nearby
In the steps, ch means chain, sl st means slip stitch, sc means single crochet, hdc means half double crochet, and dc means double crochet. BLO means work into the back loop only. An increase is two stitches in one stitch; a decrease combines the next two stitches into one.
For sc2tog, insert the hook into the next stitch and pull up a loop, repeat in the following stitch, then yarn over and draw through all three loops. For hdc2tog, yarn over, pull up a loop in each of the next two stitches, yarn over, and draw through all four loops.
For moss stitch, chain an even number. Sc in the fourth chain from the hook; repeat ch 1, skip one chain, sc in the next chain to the end. On later rows, ch 2 and turn, sc in the first ch-1 space, then repeat ch 1 and sc in the next space, ending in the space beneath the previous turning chain.
Unless a step says otherwise, a starting ch 1 or ch 2 does not count as a stitch. In continuous rounds, mark the first stitch and move the marker each round. Weave ends through the backs of several stitches, change direction, then trim; block gently according to the yarn label.
Choose a Project That Fits Your Afternoon
If you are easing back into crochet, begin with the scarf, coasters, placemat, or book sleeve. Their straight sides let you concentrate on even stitches and tidy edges.
The ear warmer and leg warmers add simple seams. The hat, mittens, slippers, and little snowman ask for shaping, while the waffle cushion introduces raised post stitches.
Give yourself more time for a shawl or blanket. You do not have to finish these winter crochet projects in one sitting; keeping the yarn and hook together makes them easy to pick up again.
If the children want a project alongside yours, our winter crafts for kids has activities they can enjoy while you work on a few more rows.
Winter Crochet Projects to Make This Season
1. Moss-Green Ribbed-Brim Beanie
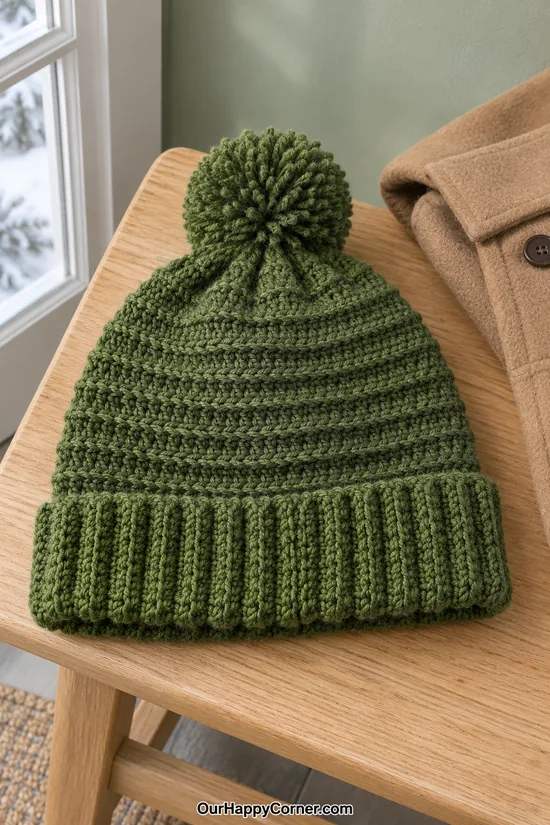
A green beanie is one of those winter crochet projects you can imagine wearing as soon as it is finished. The generous folded brim and soft pom-pom give this one a particularly cozy shape.
The body has horizontal ridges, while the brim has vertical ribbing. Those two textures come from different sections of the construction, rather than one rectangle gathered at the top.
I would choose a smooth yarn that lets you see every stitch. It is easier to check your increases, and the finished ridges show up beautifully.
Keep the pom-pom removable if you want washing to be simpler. The hat should fit comfortably before you add it; the topper cannot fix an opening that is too tight.
You will need: Moss-green medium-weight wool blend, a hook that gives about 14 hdc per 10 cm, stitch marker, yarn needle, scissors, pom-pom maker or cardboard.
How to make it:
- For an adult starting size, work 10 hdc into a magic ring. Close the ring and join with a sl st. Ch 2 at the start of each following round and join to its first stitch.
- Round 2: increase in every stitch, giving 20. Round 3: repeat 1 hdc, increase around, giving 30. Continue adding one plain hdc to each repeat on successive rounds until you have 70 stitches: 40, 50, 60, then 70.
- At the suggested gauge, 70 stitches gives about 50 cm around. Check the crown against the intended head size; use another size or adjust the final increase round if needed. The fabric should stretch comfortably, not feel rigid.
- Continue with 70 hdc per round. Work two rounds through both loops, then one round BLO for a ridge. Repeat until the crown-to-edge depth is about 19–20 cm, or the depth needed before the folded brim.
- Make an attached brim: ch enough stitches to measure 8 cm, plus one. Sc in the second chain and each chain back toward the hat. Sl st into the next two hat-edge stitches; turn.
- Skip those two slip stitches and sc BLO along the brim to its outer edge. Ch 1, turn, sc BLO back toward the hat, then sl st into the next two unused hat-edge stitches. Repeat this pair of rows around the opening.
- Sew the first and last brim rows together without twisting. Fold the 8 cm brim in half to make a cuff about 4 cm deep. Try on, then weave in ends.
- Make and trim a yarn pom-pom. Tie it securely through the crown with two yarn tails, knotting inside so it can be untied for washing.
Helpful tip: Keep the brim joins relaxed; tight slip stitches can make an otherwise comfortable hat difficult to pull on.
2. Dusty-Rose Twisted Ear Warmer
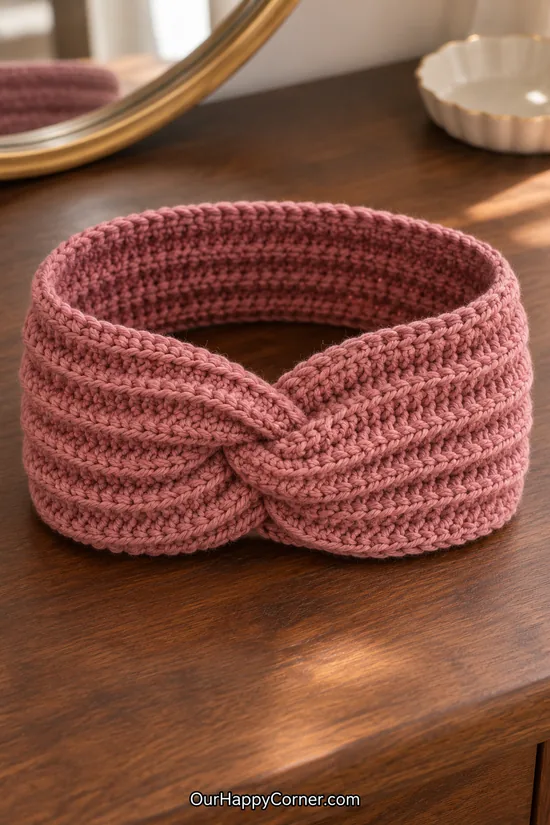
An ear warmer is a lovely choice when you want warmth without flattening your hair under a hat. The twist gives an ordinary ribbed strip a pretty focal point.
This dusty rose looks especially soft against dark wood. A deeper berry or warm oatmeal would be just as easy to wear.
The twist is made when you sew the ends together. There is no separate knot sitting on top, so the finished band stays fairly flat against your head.
Of these winter crochet projects, this is a satisfying small step beyond a scarf. Check the band length on yourself before sewing, because different yarns spring back differently.
You will need: Dusty-rose medium-weight yarn, suitable hook, measuring tape, yarn needle, scissors.
How to make it:
- Chain a length about 10 cm, plus two chains. Hdc in the third chain from the hook and in every remaining chain. Count the stitches.
- Ch 2 and turn. Work hdc BLO in every stitch. Repeat, keeping the same count, until the strip fits around your head with about 2–3 cm of gentle stretch remaining.
- Fasten off with a 35 cm sewing tail. Lay the strip flat, with both short ends facing one another.
- Fold each short end in half across its width, making two U-shaped ends. Interlock them: one half of the first end, one half of the second, the other half of the first, then the other half of the second. All four cut edges should line up.
- Sew through all four layers across that aligned edge. Make a second pass for strength, keeping the seam flexible.
- Weave in the tail and turn the seam to the inside. Open and smooth the folded ends into the front twist, then try the band on.
Helpful tip: Use a blunt yarn needle and catch every layer; missing a middle layer leaves the twist loose.
3. Navy, Oatmeal, and Rust Color-Block Scarf
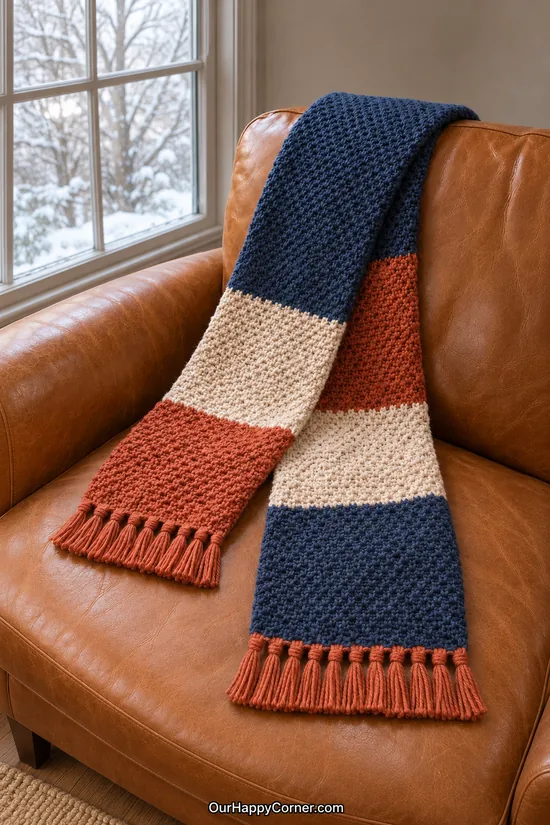
A long color-block scarf makes simple stitches feel special. Navy, oatmeal, and rust bring warmth without looking like a strictly holiday accessory.
The two fringed ends stay separate, with the middle folded over the couch back. It is one open rectangle, so you can wear it loose or wrap it around your neck.
Moss stitch gives the surface a small, woven-looking texture. I like it for winter crochet projects because the color changes remain clear without needing a complicated pattern.
Keep both ends the same width and trim the fringe after everything is attached. A tidy outline makes even a very simple scarf look thoughtfully finished.
You will need: Medium-weight yarn in navy, oatmeal, and rust, suitable hook, measuring tape, yarn needle, scissors.
How to make it:
- Use the moss-stitch method above. Make an even foundation chain that produces a swatch width of about 22–25 cm; continue with that stitch count for the scarf.
- Work the first color section in rust until it measures about 30 cm. Change to oatmeal on the final yarn-over of the last stitch, then work about 30 cm in oatmeal.
- Continue with about 30 cm navy, 30 cm rust, 30 cm oatmeal, and 30 cm navy, giving six broad sections and a scarf around 180 cm long. Keep the same number of moss-stitch spaces in every row.
- Fasten off and weave in the color-change tails on the back. Wash and block as the yarn label allows, keeping the edges straight without stretching the fabric.
- For each fringe bundle, cut four rust strands about 24 cm long. Fold them in half. Pull the folded loop through a stitch at a short scarf end, pass the loose ends through the loop, and tighten gently.
- Attach bundles evenly along both short ends. Lay the scarf flat and trim the fringe to an even length of about 10 cm.
Helpful tip: Count your moss-stitch spaces at every color change; adding one at an edge gradually turns a rectangle into a wedge.
4. Chunky Ivory Cowl
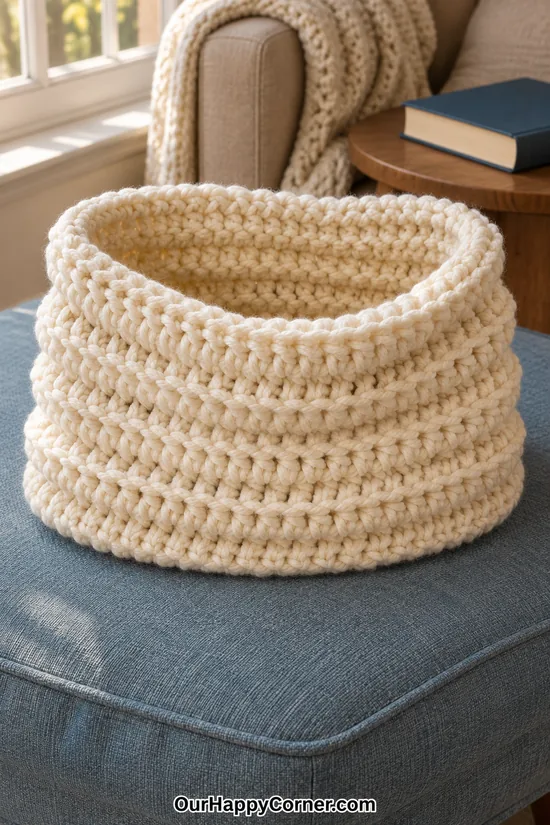
An ivory cowl brings a soft layer to an ordinary winter coat. There are no long tails to arrange, which makes it useful for busy mornings.
The opening should be generous enough to slip over your head. The pictured collar is a continuous tube that folds softly, rather than a stiff basket shape.
A smooth bulky yarn makes these winter crochet projects grow quickly. Choose a hook that gives a flexible fabric instead of using a tiny hook to force a dense stitch.
I would keep the finishing simple here. The cream color and raised horizontal rows already give the collar plenty of texture.
You will need: Soft bulky ivory yarn, suitable hook, measuring tape, yarn needle, stitch marker, scissors.
How to make it:
- Chain a relaxed length that slips over your head comfortably, usually around 60–65 cm for an adult. Join the last chain to the first without twisting the chain.
- Ch 2. Work one hdc into every chain, then join to the first hdc. Mark that first stitch and count the round.
- Work two rounds of hdc through both loops. On the next round, work hdc BLO to make a horizontal ridge. Keep the same stitch count in every round.
- Repeat that three-round sequence until the tube is about 23–25 cm tall. Try it over your head before fastening off.
- Finish with a relaxed round of sc, join, and weave in the ends. Wash and dry according to the yarn label, then let the collar settle into soft folds.
Helpful tip: Check the foundation chain first; a tight starting edge will not stretch as easily as the rest of the cowl.
5. Mustard Fingerless Mitts
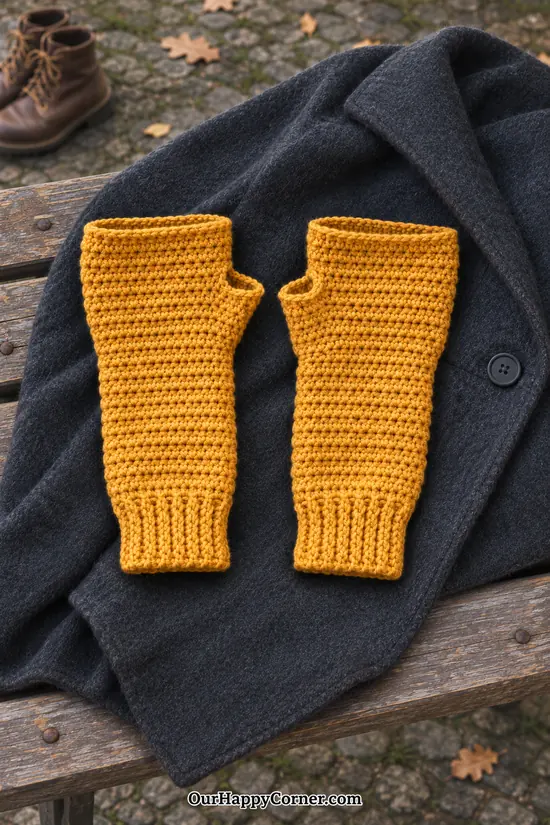
Fingerless mitts are handy when you want warm wrists but still need your fingers free. Mustard makes this pair feel cheerful against a dark coat.
The small thumb openings keep the mitts in place. The opening is left in the side seam, then edged to give it a tidy finish.
You can make the body shorter if you prefer a wrist-length pair. Try the first mitt on before making the second so both have the fit you actually want.
These winter crochet projects also make useful gifts for someone who enjoys reading or working at a chilly desk. A soft yarn matters more here than a fancy stitch.
You will need: Mustard medium-weight yarn, suitable hook, measuring tape, yarn needle, stitch markers, scissors.
How to make it:
- Make a ribbed cuff first. Chain enough for a 4 cm strip, plus one chain. Work sc back along it, then ch 1, turn, and sc BLO on later rows.
- Continue until the strip wraps comfortably around the wrist with a little stretch. Sew its short ends together to make a cuff ring.
- Join yarn at the cuff edge. Work sc evenly around the row ends to make a hand tube. Add evenly spaced increases in the first body round only if needed to reach a comfortable hand circumference.
- Work sc rounds until the body reaches the base of the thumb, usually about 4–5 cm above the cuff. Try it on and mark the thumb position.
- Stop working in rounds. Turn after each row and work back across all body stitches, leaving the opening between the row ends. Continue for about 3–4 cm, or enough to pass the thumb comfortably.
- Join the next row end to its beginning to close the tube again. Work another 2–3 cm in sc rounds, stopping below the finger knuckles.
- Work one relaxed sc round around the finger opening. Join yarn around the thumb opening and sc evenly around it; add a second round for a short thumb rim. Do not stitch the opening shut.
- Make the second mitt with the same measurements and counts. Weave in ends and lay both flat with the thumb openings facing inward.
Helpful tip: Keep the thumb edging loose enough to move comfortably; a neat edge should not pinch.
6. Burgundy Crochet Mittens
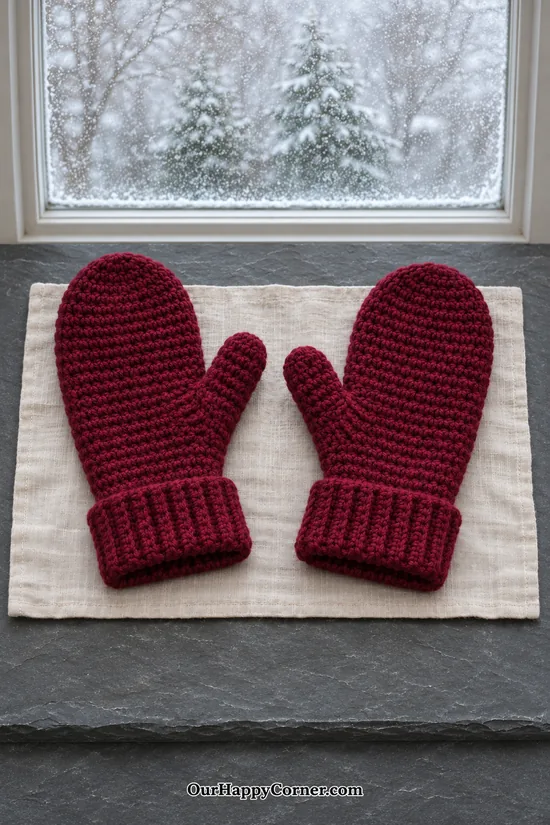
A pair of burgundy mittens is wonderfully simple in color but needs more careful shaping than the fingerless pair. The rounded fingertips and proper thumb tubes are what make them useful.
I like a dense stitch here, with enough give to bend your hand comfortably. Very open crochet can look pretty but lets a lot of cold air through.
Make one mitten completely before starting its partner, and write down your round counts. That little note is much easier than trying to count dark yarn later.
These are the winter crochet projects to take slowly through the fitting stages. The thumb opening, hand length, and cuff should all feel right before you close the tips.
You will need: Burgundy medium-weight yarn, hook giving about 18 sc per 10 cm, stitch marker, yarn needle, measuring tape, scissors.
How to make it:
- Make a BLO sc cuff strip 8 cm wide, working rows until it wraps around the wrist comfortably. Sew the short ends together; it will fold into a 4 cm cuff.
- For a starting adult size, distribute 36 sc around the cuff row ends. At the suggested gauge this gives a 20 cm hand circumference. Check the fit and adjust in multiples of six if necessary.
- Work sc in continuous rounds until the hand section reaches the thumb base, about 5 cm above the unfolded cuff edge. Mark the position while trying it on.
- Make the thumb opening: ch 6, skip six body stitches, then sc around the remaining stitches. On the following round, work one sc into each chain, keeping 36 body stitches. For another size, make the chain span fit the thumb base.
- Continue straight until the mitten reaches near the little-finger tip. Try it on; the final decrease rounds will add about 2–3 cm. For 36 stitches, decrease as follows: repeat 4 sc, sc2tog six times for 30; then 3 sc, sc2tog for 24; 2 sc, sc2tog for 18; 1 sc, sc2tog for 12; then sc2tog six times for 6.
- Fasten off with a tail. Thread it through the six remaining front loops and draw closed. For a different multiple-of-six count, begin the decrease sequence with the corresponding number of plain sc between decreases.
- Join yarn at the thumb opening. Work six sc along the skipped stitches and six along the opposite chain edge, giving 12. Close any corner gaps with the sewing tail rather than adding extra stitches.
- Work 12-sc rounds until the thumb is almost covered, then sc2tog six times. Draw the final six stitches closed. Check the first mitten before making the second, then fold both cuffs and weave in all ends.
Helpful tip: Use the wearer’s hand as your fitting guide; the stated count is a starting size, not a universal adult size.
7. Denim-Blue House Slippers
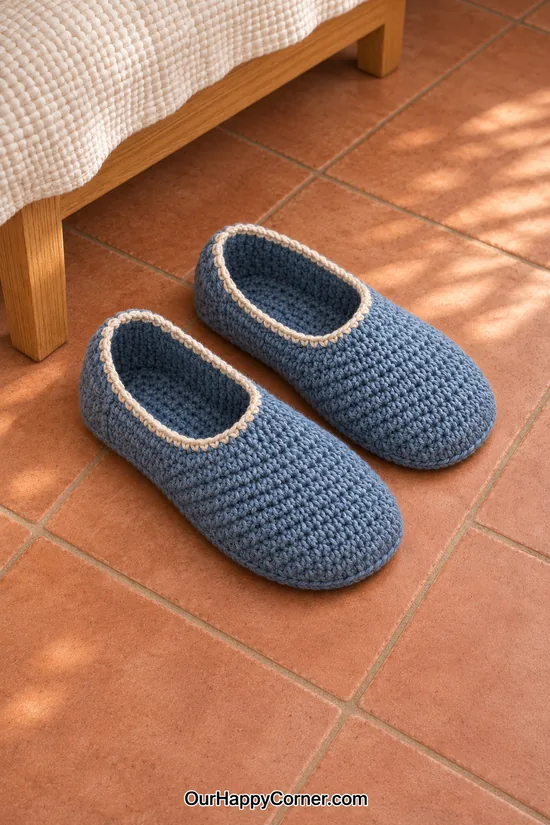
Simple crochet slippers are lovely to leave beside the bed on a cold morning. The oatmeal edging gives this denim-blue pair a clear outline.
The closed toe is worked first, then the fabric opens into rows for the sides and heel. That leaves a real foot opening instead of a sock tube with nowhere to step in.
I would use a washable yarn with some resilience. A fabric that grows dramatically when worn will soon make slippers feel loose.
Take these winter crochet projects one foot at a time and check the length before sewing the heel. Yarn soles can be slippery, so add a suitable nonslip finish before wearing them on smooth floors.
You will need: Denim medium-weight yarn, oatmeal yarn for edging, hook giving about 14 hdc per 10 cm, stitch marker, yarn needle, measuring tape, suitable nonslip sole treatment.
How to make it:
- For a starting adult slipper, work 8 hdc into a magic ring. Round 2: increase in every stitch for 16. Round 3: repeat 1 hdc, increase for 24. Round 4: repeat 2 hdc, increase for 32.
- At the suggested gauge, the tube circumference is about 23 cm. Check it around the forefoot. Change the final count in multiples of four if a different circumference is needed.
- Work hdc rounds without increasing until the toe section is about 7–8 cm long. Mark the upper center of the slipper.
- Leave eight centered stitches unworked across the upper instep and work back and forth across the remaining 24 stitches. Ch 2 and turn at every row end. For another size, leave roughly one quarter of the stitches open on top.
- Continue until the total toe-to-back length is about 1 cm shorter than the foot. Fold the final row in half and sew its two halves together to form the heel. Keep the seam on the outside while trying it on, then turn it inward.
- Join oatmeal yarn at the foot opening. Work sc evenly around the opening, avoiding extra stitches that make it flare. If the heel is loose, work two or three sc2tog evenly across the heel section of the edging.
- Make a second slipper with the same counts and length. Finish all seams, then apply a purpose-made nonslip treatment to the soles according to its directions and let it cure fully.
Helpful tip: Try the slipper on over the socks you plan to wear with it before closing the heel seam permanently.
8. Oatmeal Ribbed Leg Warmers
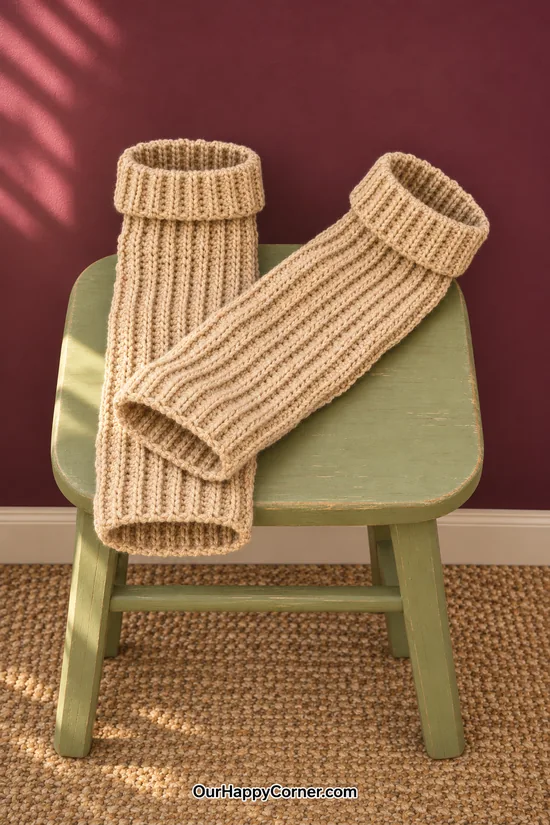
Leg warmers are a nice way to add a cozy layer without making a whole pair of socks. The open ends keep the construction much simpler.
The oatmeal color lets the ribbing do the work. Both pieces are tubes, so there are no heels, toes, or hidden foot sections to shape.
For winter crochet projects like these, measure the widest part of the calf rather than guessing from the photograph. The fabric should stay up without feeling restrictive.
You can wear them straight or gently scrunched. A slightly longer rectangle gives you room for the folded cuffs shown in the image.
You will need: Oatmeal medium-weight yarn, suitable hook, measuring tape, yarn needle, scissors.
How to make it:
- Measure the intended calf and choose a finished tube circumference about 2–3 cm smaller, provided your swatch stretches comfortably that far.
- Chain a length about 39 cm, plus two chains. Hdc in the third chain and every chain back. This foundation runs along the leg warmer’s length.
- Ch 2, turn, and work hdc BLO in every stitch. Repeat rows until the rectangle reaches your chosen circumference, checking the stretch around the calf.
- Bring the two long edges together. Sew or slip-stitch them together from one end to the other to make a tube, leaving both short ends open.
- Turn the seam inward. Fold about 2 cm at each end if desired, giving a worn length around 35 cm. Make the second piece with the same row count and finish.
Helpful tip: Do not add tight edging to the openings; it can cancel out the stretch you built into the ribbing.
9. Plum Granny-Stitch Triangle Shawl
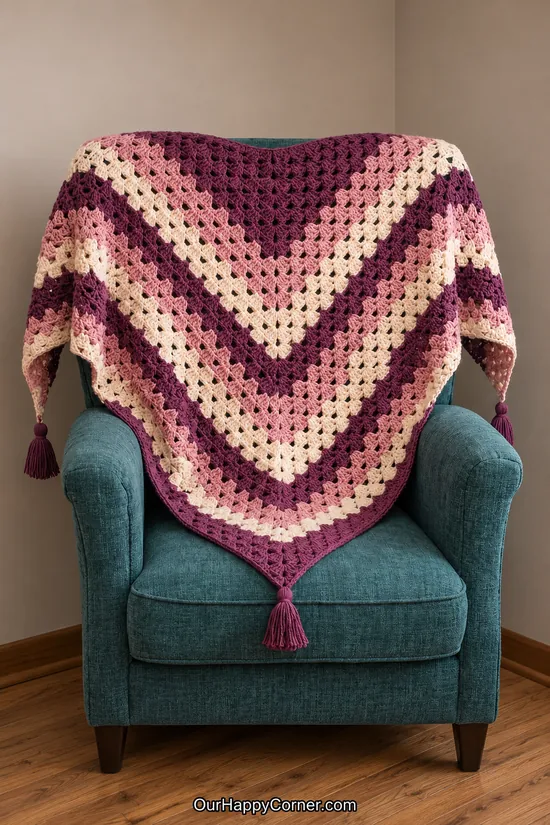
A generous triangle shawl is one of the loveliest winter crochet projects to grow slowly over several evenings. The plum, pink, and cream bands make it easy to see your progress.
The wide upper edge rests across your shoulders, while the point falls down the back. Three corner tassels finish the shape without needing fringe around every edge.
This one is worked outward from the center of the upper edge. The increases at the middle and ends are what keep the triangle growing evenly.
I would spread it over a chair when checking the size, but measure it flat before deciding to stop. Draped fabric can look shorter than it really is.
You will need: Medium-weight yarn in plum, dusty pink, and cream, suitable hook, measuring tape, stitch marker, yarn needle, scissors.
How to make it:
- With plum, ch 4 and join into a ring. Row 1: ch 3, work 2 dc into the ring, ch 2, then 3 dc into the ring. You have two groups of three dc with a center ch-2 space.
- Row 2: ch 3 and turn; work 2 dc into the first stitch. Ch 1, work 3 dc, ch 2, 3 dc into the center space, ch 1, then work 3 dc into the top of the previous starting ch 3.
- For every later row, begin with ch 3 and 2 dc in the first stitch. Work ch 1 and 3 dc in each ch-1 space until the center. In the center work 3 dc, ch 2, 3 dc. Continue ch 1 and 3 dc in each remaining ch-1 space, then finish with ch 1 and 3 dc in the previous starting ch-3 top.
- Keep a marker in the center ch-2 space. Each row adds two more three-dc groups than the previous row. Check this regularly so the point stays centered.
- Make a broad plum center, then change colors only at row ends. Repeat bands of dusty pink, cream, and plum, giving the plum and pink bands more rows than the narrow cream bands, as pictured.
- Continue until the upper edge measures about 150–170 cm, or comfortably reaches around the shoulders. Fasten off, weave in ends, and block the triangle flat according to the yarn label.
- Make three tassels by wrapping plum yarn around a 10 cm card. Tie the top, cut the opposite end, and bind a short neck below the tie. Sew one tassel securely to each corner and trim evenly.
Helpful tip: Keep the center chain space distinct from the smaller gaps; putting the center increase in the wrong gap quickly distorts the triangle.
10. Heather-Gray Pocket Shawl
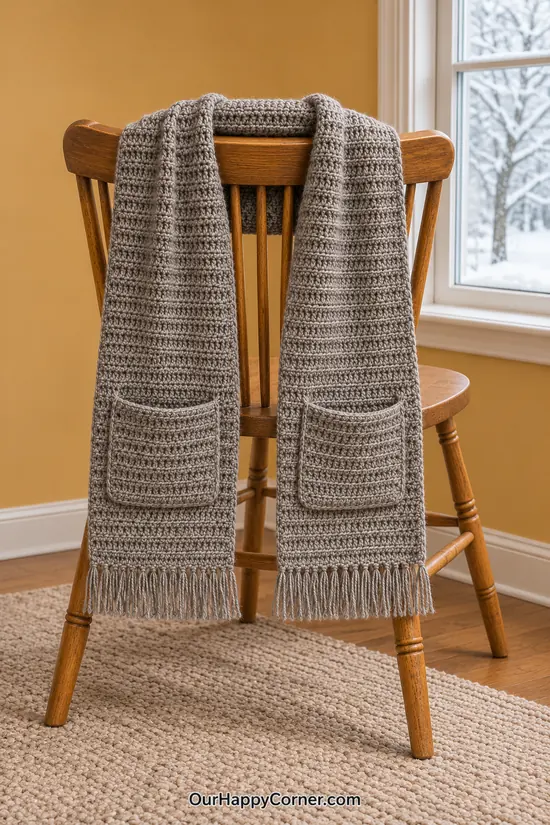
A pocket shawl feels like a wearable blanket, with somewhere to tuck chilly hands. The gray yarn keeps the pictured version easy to pair with everyday clothes.
The body is one long rectangle. Two separate square pockets are sewn onto the front ends, leaving the upper edges open.
That simple construction makes these winter crochet projects easier to fit than a cardigan. You still need to check the length on your shoulders before deciding where the pockets belong.
I like a short fringe here, rather than long strands that catch on everything. The horizontal ridges and pocket outlines already give the shawl plenty of detail.
You will need: Heather-gray medium or bulky yarn, suitable hook, measuring tape, yarn needle, stitch markers, scissors.
How to make it:
- Chain a length that produces a panel about 40–45 cm wide, plus two chains. Work hdc across the foundation, then ch 2 and turn.
- Work two rows of hdc through both loops and one row hdc BLO. Repeat this three-row sequence, keeping the stitch count steady, until the rectangle is about 150–170 cm long.
- Drape the plain rectangle over the shoulders with both ends at the front. Mark comfortable pocket positions, usually 8–12 cm above each lower end. Adjust the body length now if necessary.
- Make two separate pocket squares about 17–19 cm across using the same yarn and row sequence. Add one sc row along each pocket’s upper edge.
- Lay the shawl flat and pin the pockets symmetrically. Sew each pocket along its two sides and bottom only. Reinforce the upper corners with several small stitches, keeping the top open.
- Weave in ends and block gently. Add short fringe across the two lower ends by looping folded yarn bundles through evenly spaced edge stitches, then trim it to about 8–10 cm.
Helpful tip: Place the pockets while wearing the shawl; a perfectly measured pocket is not useful if your hand cannot reach it comfortably.
11. Navy and Teal Granny-Square Throw
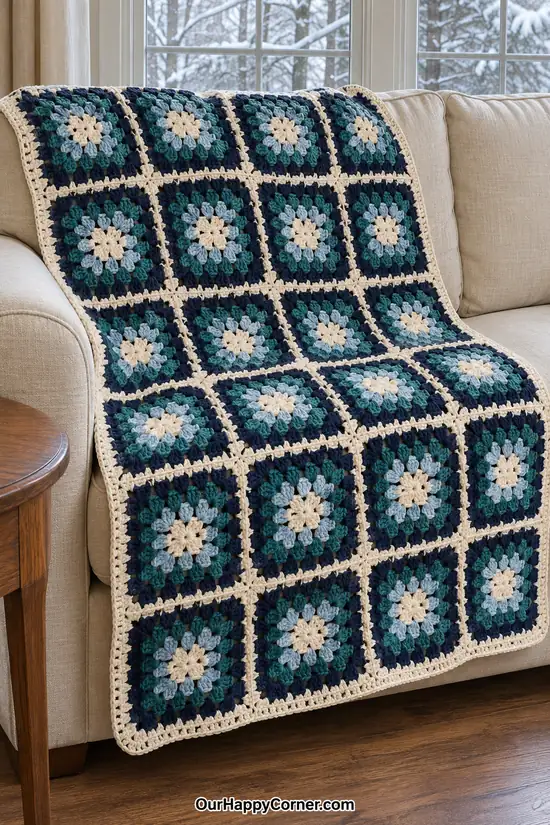
A granny-square throw is a lovely project to return to when you want a little repetition. You can finish a square, put it down, and still feel you have made progress.
Cream centers and joins keep the navy and teal from feeling too dark. The pale border also gives the whole blanket a clear outline on the sofa.
These winter crochet projects are good for planning color placement before the pieces are joined. Move the squares around on the floor and check that the dark sections feel balanced.
Keep one finished square nearby as your size reference. Consistent square measurements matter more than finishing every piece in a single sitting.
You will need: Medium-weight yarn in cream, pale blue, teal, and navy, suitable hook, yarn needle, measuring tape, blocking surface.
How to make it:
- For one square, ch 4 in cream and join into a ring. Ch 3, work 2 dc into the ring, then ch 2. Repeat 3 dc, ch 2 three times; join to the starting ch 3. This gives four groups and four corners.
- Join pale blue in a corner. Work 3 dc, ch 2, 3 dc in that corner. Ch 1; repeat the same corner group in each other corner, with ch 1 between corners. Join the round.
- On each later round, work 3 dc, ch 2, 3 dc in every corner. Along each side, work 3 dc in every ch-1 space, with ch 1 between groups. Use teal and then navy for the next color bands.
- Make each square about 18–20 cm across, adding rounds as needed. Finish with the same number of rounds and the same final color on every square.
- For a small throw, make 30 squares and arrange them five across by six down. Block them all to the same size before joining.
- With cream yarn and right sides together, sc through matching edge stitches to join neighboring squares. Work one direction first, then the crossing seams. Use the same joining tension throughout.
- Work two or three sc rounds around the full blanket, placing 3 sc in each corner stitch. If the border ripples, reduce excess edge stitches; if it pulls inward, add more evenly. Weave in ends and block gently.
Helpful tip: Buy enough of the joining color in one dye lot; it takes more yarn than a thin line between squares might suggest.
12. Rust Waffle-Stitch Cushion
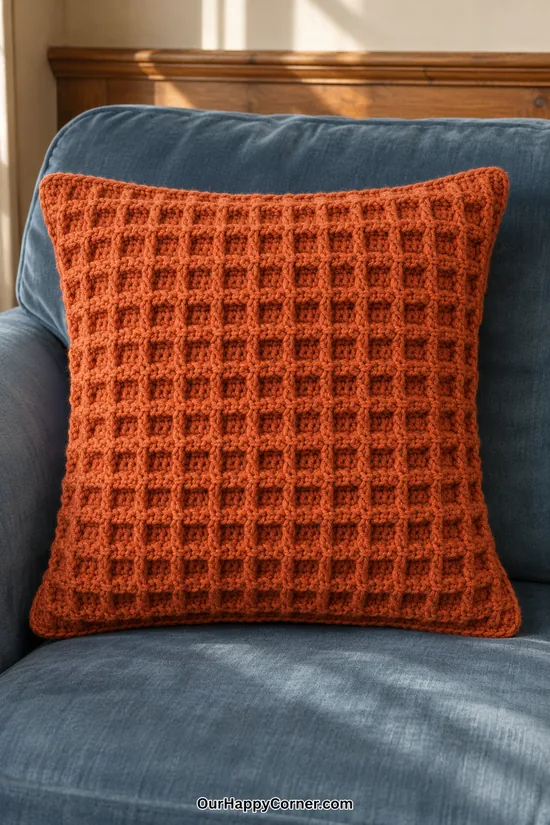
A waffle-stitch cushion gives a winter sofa an inviting bit of texture. The rust shade makes the raised grid especially easy to see against blue upholstery.
The little recessed squares come from front-post stitches, not from sewing a grid onto plain fabric. A small practice swatch is worth making before the cushion panels.
This is one of the winter crochet projects I would choose when you want something decorative that still gets used. A removable insert also makes finishing and washing easier.
Keep the border narrow so the waffle texture stays the main feature. The back can be plain if you would rather save a little time and yarn.
You will need: Rust medium-weight yarn, suitable hook, 40 cm cushion insert, yarn needle, measuring tape, matching sew-in zipper about 35 cm, sewing needle and thread.
How to make it:
- Practice the waffle repeat first. Chain a multiple of 3 plus 2. Dc in the third chain and across. Ch 2 and turn. Your row should contain a multiple of three dc.
- Pattern row A: dc in the first stitch, front-post dc around the next, then repeat 2 dc and 1 front-post dc across, ending with dc in the last stitch. A front-post dc passes the hook from front to back to front around the upright post below.
- Pattern row B: ch 2 and turn; dc in the first stitch. Repeat 1 dc and 2 front-post dc until two stitches remain, then dc in each of those last two stitches. Alternate rows A and B, keeping the same count.
- Use the swatch to choose a foundation multiple that gives a finished panel about 39–40 cm wide. Work until it is equally tall. Make a second matching panel, or a plain hdc panel of the same blocked size.
- Work one sc border around each panel, with 3 sc in each corner. Block and dry both panels before assembly.
- Hold wrong sides together and sc through both panel edges around three sides. On the fourth side, join only the corners and short end sections, leaving an opening for the zipper.
- Hand-sew the closed zipper tapes to the inside of the opening, keeping the teeth clear of the crochet. Open it, insert the cushion, and close it to check the fit.
Helpful tip: Watch the front and back of the swatch; post stitches look different from the reverse, and the grid develops over several rows.
13. Plum Hot-Water-Bottle Cover
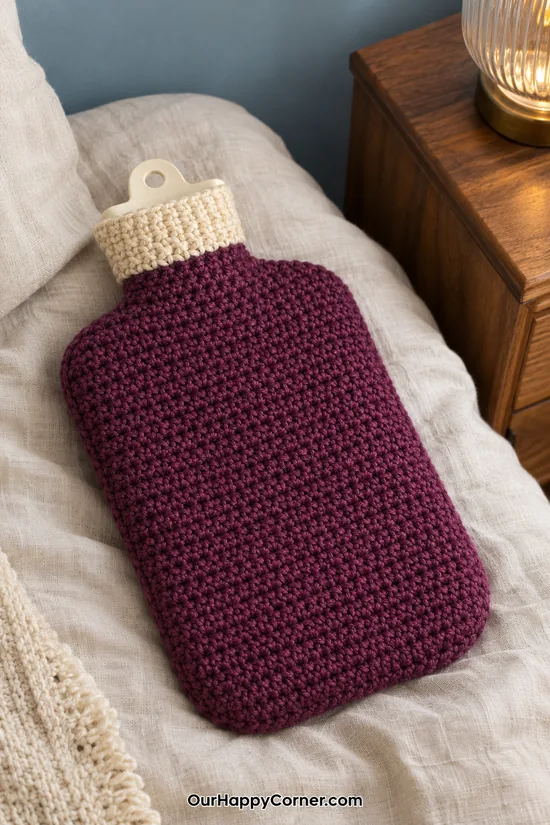
A plum cover makes a familiar winter comfort feel a little more personal. The cream neck gives the rounded bottle shape a neat finish.
The cover needs to fit the bottle you own. A decorative photograph cannot tell you its exact capacity or shoulder shape, so measure the empty bottle before starting.
For these winter crochet projects, a removable opening matters. The bottom fastening below lets the bottle come out without forcing its broad body through the narrow neck.
Treat the cover as a washable accessory, not as a substitute for the bottle’s safety instructions. Check the bottle’s condition and follow its maker’s filling and use guidance.
You will need: Plum and cream medium-weight yarn, suitable hook, empty hot-water bottle, measuring tape, yarn needle, three small buttons, sewing thread.
How to make it:
- Measure the empty bottle body, shoulders, and neck. Make two plum sc panels, each about 1 cm wider than the bottle’s flat body, so the finished seams leave enough room.
- Work each panel straight up to the start of the shoulders. On the next rows, decrease once at each edge whenever needed to follow the bottle’s narrowing outline. Lay the dry panel over the empty bottle as you shape it.
- Stop the plum section at the neck base. Join cream and sc straight for the neck height, adding a few extra rows if you want the cuff to turn down. Make the second panel with the same counts and shaping.
- With wrong sides together, sc or sew the panels together along both sides and shoulders. Leave the neck and the entire bottom open. Check that the empty bottle slides in from below.
- Along the rear bottom edge, crochet a 2 cm-deep sc flap. Sew three buttons evenly to the front bottom edge. Add three chain loops to the flap edge, sizing each loop to fit snugly behind its button.
- Insert the empty bottle, fasten the bottom, and check that the original neck and stopper remain accessible. Remove the bottle before washing the cover, and dry the cover fully before using it.
Helpful tip: Make the flap and fastenings after checking the fit; a closed bottom seam would defeat the removable design.
14. Rust and Cream Buttoned Mug Cozy
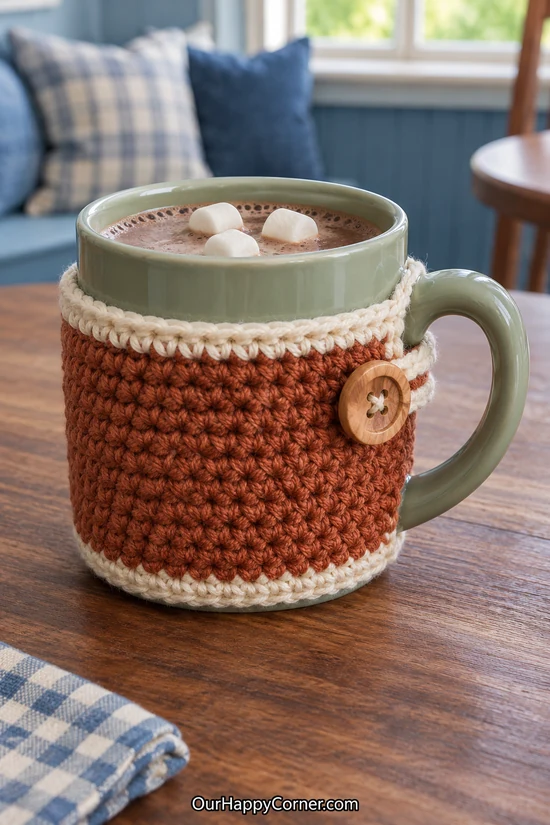
A mug cozy is a lovely small project when you have a little yarn left from something bigger. The rust sleeve and cream edging make this one feel especially warm.
The handle stays free, and the sleeve stops below the drinking rim. That makes the construction useful rather than simply wrapping yarn around every part of the mug.
I like winter crochet projects that become part of an ordinary routine. A favorite mug with a handmade sleeve is a nice little detail to enjoy every morning.
The wooden button adds a simple finish, but the loop needs to work properly. Check it on the actual mug before deciding where to sew the button.
You will need: Rust and cream cotton yarn, suitable hook, straight-sided mug, wooden button, yarn needle, sewing thread, measuring tape.
How to make it:
- Measure around the mug body below the rim. Subtract the width of the handle attachment area, usually about 2–3 cm, to find the sleeve length.
- With rust yarn, chain that length plus one chain. Sc in the second chain and across. Work sc rows until the panel is about 6 cm high, or low enough to leave the mug’s rim and base clear.
- With cream, work one sc round around the rectangle, putting 3 sc in each corner. Add another border round only if the finished height still fits the mug.
- Wrap the panel around the mug with the short edges ending on either side of the handle. At the middle of one short edge, add a chain loop long enough to pass through the handle space and reach the opposite edge.
- Sew the button to the opposite short edge. Slip the loop through the handle opening and over the button, letting it settle behind the button face. Adjust until secure without pulling the fabric hard.
- Weave in ends. Remove the sleeve for washing, and handle the mug by its ceramic handle rather than using the cozy as a lifting strap.
Helpful tip: Choose a snug loop; a loose one can slide off the button when the mug is moved.
15. Blue Winter-Stripe Coasters
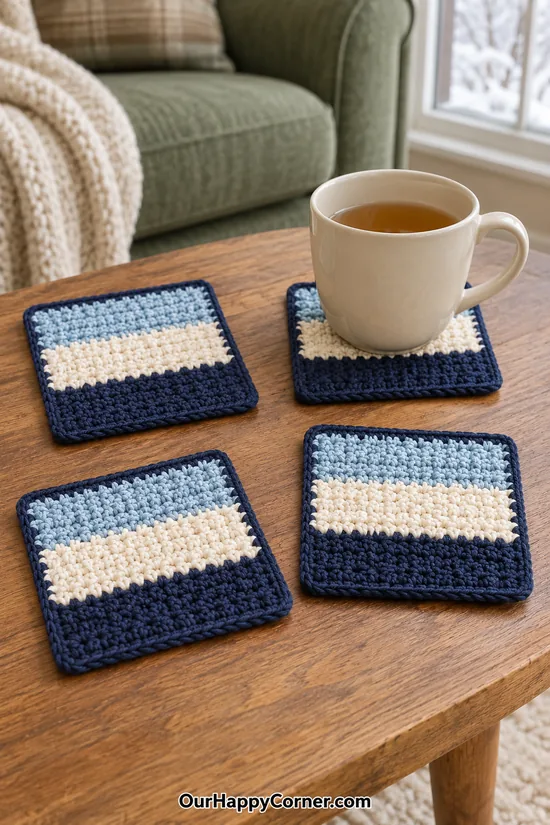
A little set of striped coasters is useful without being a big commitment. Navy borders frame the icy blue and cream stripes beautifully.
The square shape makes the color changes easy to keep tidy. You can work one coaster first, then repeat its measurements for the rest of the set.
For these winter crochet projects, cotton is a practical choice because it absorbs small drips and is easy to wash. Keep the fabric fairly flat so the cup sits steadily.
If you enjoy mixing handmade pieces on your table, you might also like our coaster painting ideas for another set with a completely different texture.
You will need: Navy, cream, and pale blue cotton yarn, suitable hook, yarn needle, measuring tape, scissors.
How to make it:
- Using navy and the moss-stitch method above, make an even foundation chain that gives a width of about 9 cm.
- Work navy rows until the panel is about 3 cm high. Change to cream for about 3 cm, then pale blue for another 3 cm, keeping the same number of stitch spaces.
- Join navy at a corner and sc evenly around the square. Work 3 sc in each corner, and distribute side stitches so the border lies flat.
- Fasten off and weave in ends. Make three more coasters with the same chain, row, and border counts.
- Wash and shape all four to about 10 cm square. Let them dry flat, then test a filled cup on each one to check that the surface is level.
Helpful tip: Do not use these as trivets for hot pans; they are cup coasters, not tested heat-protection pads.
16. Forest, Cream, and Gold Placemat
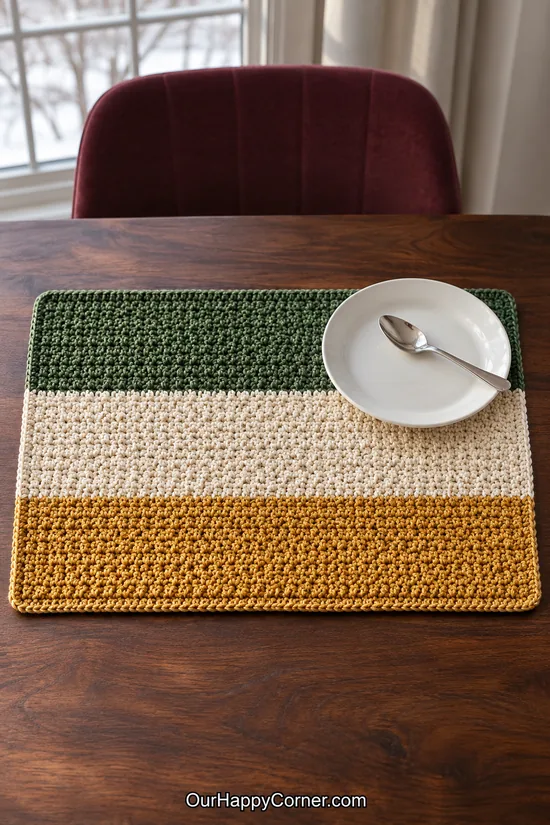
A striped placemat brings a little winter color to the breakfast table. Forest green, cream, and muted gold look lovely with plain white crockery.
The broad blocks keep the project calm and simple. There are no tiny motifs to join or long fringe ends sitting under the plate.
This is one of the winter crochet projects where straight edges really matter. Count the stitch spaces every few rows, and block the mat before using it.
You can repeat the same palette for several place settings or make just one for your own morning coffee. Handmade does not always have to mean a full matching set.
You will need: Forest green, cream, and muted gold cotton yarn, suitable hook, yarn needle, measuring tape.
How to make it:
- Use the moss-stitch instructions above. Make an even foundation chain that gives a panel about 42 cm wide after a few rows.
- Work forest-green rows until the first block is about 10 cm deep. Change to cream for the next 10 cm, then muted gold for another 10 cm.
- Check the width and row count as you work. The three blocks should form one rectangle, not three separately joined pieces.
- Work a single sc border around the rectangle, with 3 sc in each corner. Add a second round if needed to reach about 44 × 32 cm, keeping the corners flat.
- Weave in ends, wash, and shape flat according to the cotton label. Let it dry completely before placing crockery on it.
Helpful tip: Choose a compact stitch and avoid raised embellishments where the plate will sit.
17. Small Oatmeal Yarn Basket
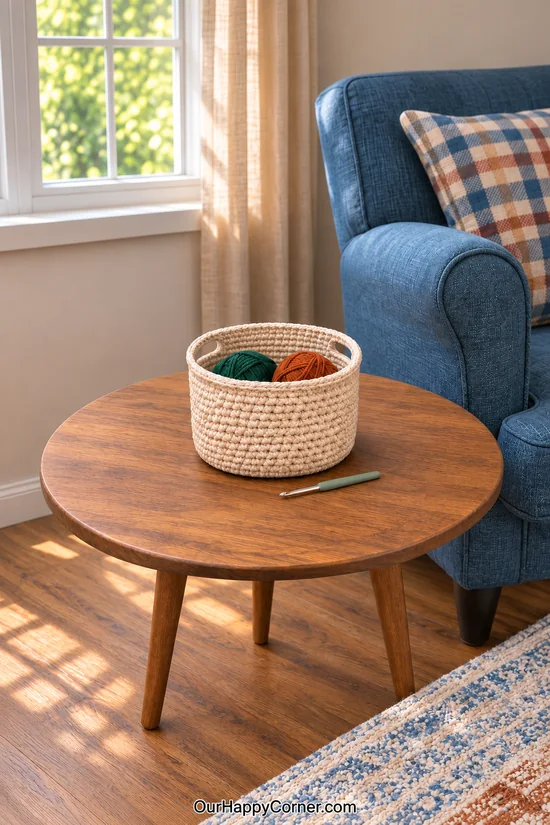
A small yarn basket is a lovely way to keep the next project close to your chair. The pictured basket sits on a side table, with two ordinary yarn balls inside.
It is a tabletop container rather than a large floor hamper. The broad surface around it helps show its scale, and the two open handles make it easy to move.
For winter crochet projects like this, the yarn needs more structure than a scarf yarn. Cotton cord or a firm bulky cotton gives the walls a better chance of standing neatly.
I would keep it small enough to lift easily. A basket holding a couple of yarn balls does not need to carry the weight of your whole yarn collection.
You will need: Firm oatmeal cotton cord, a hook that gives dense sc fabric, stitch marker, yarn needle, measuring tape.
How to make it:
- Work 6 sc into a magic ring. Round 2: increase in every stitch for 12. Round 3: repeat 1 sc, increase for 18. Continue adding six stitches per round, increasing the number of plain sc between increases by one each round.
- Stop when the flat base is about 22–24 cm across. The stitch count will be a multiple of six. If it cups, loosen the tension or add an increase round; if it ripples, check that you have not added extra increases.
- Work one sc round BLO without increasing to turn the edge upward. Continue sc rounds through both loops, keeping the same count, until the walls are about 13 cm high.
- Place markers for exactly two opposite handles. Make each handle opening about 4 cm wide. Count the stitches in that span; call this number H. Make sure the two handle spans are separated equally around the round.
- On the handle round, sc to the first marker, ch H, skip H stitches, then sc to the opposite marker. Ch H and skip H stitches again. Sc to the round start. There must be only two skipped spans.
- On the next round, sc into each stitch and work H sc around each chain span. Work two more plain sc rounds for a firm rim, giving a finished height around 16 cm.
- Fasten off and secure all ends through several stitches. Check that the base sits flat and both handles are continuous with the walls before adding the yarn balls.
Helpful tip: The hook should be small enough to make a firm fabric, but not so tight that working the stitches strains your hands.
18. Little Snowman in a Teal Hat
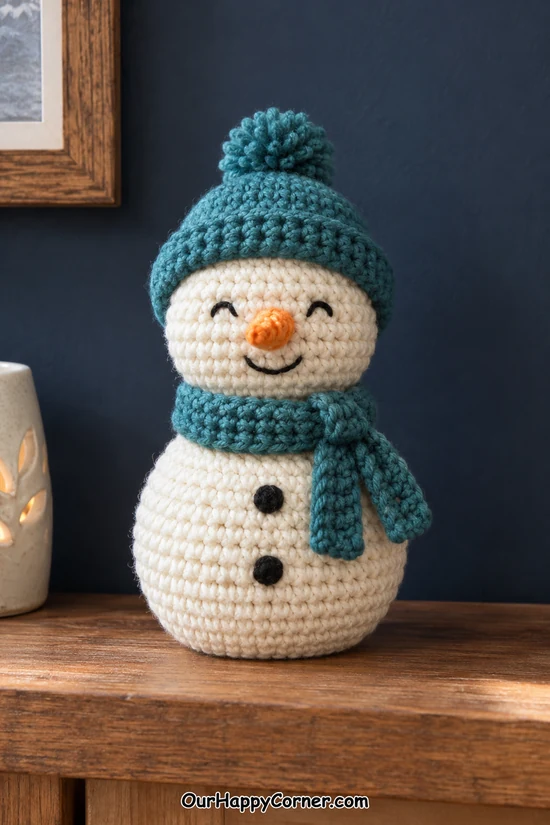
A little snowman brings a playful finish to the collection. The teal hat and scarf feel wintry without making the whole figure depend on Christmas colors.
The body and head are separate stuffed shapes, joined at the neck. A flat lower round helps the snowman sit on the shelf rather than balancing on a completely round ball.
These winter crochet projects need smaller stitches than a shawl or throw. Keep the stuffing hidden between the stitches and add it gradually so the shape stays smooth.
I like the embroidered face here. It keeps the expression simple, and you can choose a sleepy smile or a cheerful one before sewing the hat in place.
You will need: Cream, teal, orange, and black medium-weight yarn, small suitable hook, stitch marker, yarn needle, toy stuffing, scissors.
How to make it:
- Work the body in continuous sc rounds. Begin with 6 sc in a magic ring. Increase to 12, then repeat 1 sc/increase for 18, 2 sc/increase for 24, 3 sc/increase for 30, and 4 sc/increase for 36.
- Work one 36-sc round BLO to define the flat base, then seven plain 36-sc rounds. Keep the base flat as you add a little stuffing.
- Shape the body top: repeat 4 sc, sc2tog for 30; 3 sc, sc2tog for 24; 2 sc, sc2tog for 18; 1 sc, sc2tog for 12. Finish stuffing, then sc2tog six times and draw the final six stitches closed.
- For the head, begin with 6 sc and increase by six each round to 30. Work five plain 30-sc rounds. Decrease with 3 sc/sc2tog to 24, 2 sc/sc2tog to 18, and 1 sc/sc2tog to 12. Stuff, decrease to six, and close.
- Pin the head above the body and sew securely around the neck with several passes. Embroider two small eyes, a smile, and two body buttons in black, securing the tails inside.
- For the nose, make 4 orange sc in a magic ring. Work one 4-sc round, then repeat 1 sc, increase twice for 6. Fasten off with a sewing tail and sew the open six-stitch base to the face, with the closed tip projecting outward.
- For the teal hat, start with 6 sc and increase by six per round to 30. Work four plain rounds. Check it on the head; add a round if needed, then fold the bottom edge slightly and sew the hat securely in place. Attach a small, firmly tied yarn pom-pom.
- For the scarf, chain about 25 cm plus one chain. Work sc rows until it is about 2 cm wide. Tie it around the neck and tack it in place. Check all attachments; keep the finished piece as decor if it has not been made and assessed as a child’s toy.
Helpful tip: Avoid overstuffing the body base; a rounded bulge underneath will stop the snowman sitting steadily.
19. Periwinkle Book Sleeve with a Button Loop
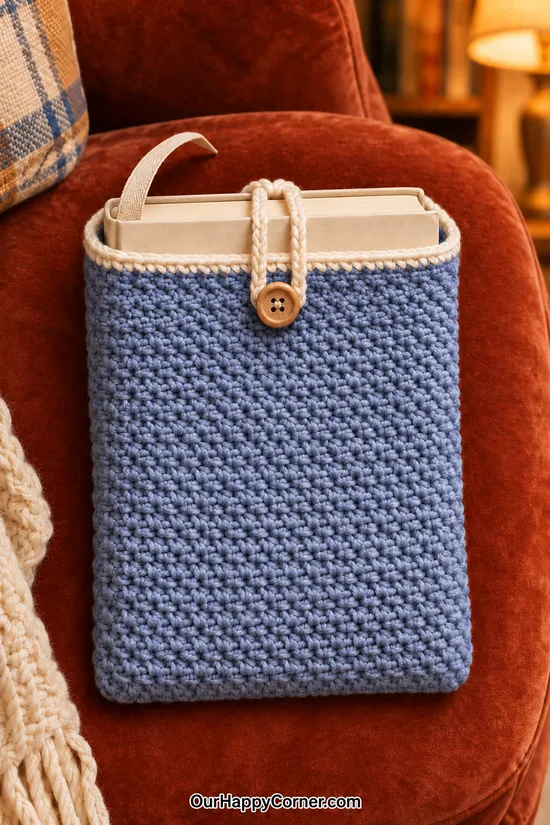
A book sleeve is a lovely last project for anyone who carries a paperback in a bag. Periwinkle and cream make this one feel soft and quietly wintry.
The opening stays at the top, with the book peeking out slightly. The cream loop comes from the back edge, passes over the book, and catches behind the front button.
That little fastening is worth getting right. A loop that stops at the front rim looks decorative but does not actually keep the book inside.
I like winter crochet projects that are useful long after the season changes. Make this to fit your favorite paperback, and it can go with you all year.
You will need: Periwinkle and cream medium-weight yarn, suitable hook, paperback book, wooden button, yarn needle, sewing thread, measuring tape.
How to make it:
- Measure the closed book’s width, height, and thickness. For each panel, allow the book width plus half its thickness plus about 1 cm for ease. Choose a panel height that leaves roughly 1–2 cm of book visible above the finished border.
- Using periwinkle and the moss-stitch method above, make two matching rectangles to those measurements. Count their stitch spaces and rows so the panels match.
- Hold wrong sides together. Sc or sew the two sides and bottom together, leaving the full top open. Slip the book in to check the fit before fastening off permanently.
- Join cream at the top opening and work one sc round around both separate panel edges. Do not join the front and back together across the mouth.
- Attach cream yarn at the center of the BACK rim. With the book inside, chain a loop long enough to pass up behind the book, over its top edge, and down to the intended front button position. Return the chain to the same rear attachment point and secure it, making one continuous loop.
- Sew the wooden button about 2 cm below the front rim, leaving enough thread shank for the yarn loop to sit behind the disk. Pass the loop over the book and button; its bottom bend should tuck underneath the button face, not sit around the outside like a frame.
- Adjust the chain length if it is loose, then secure and weave in all tails. Test the closure several times with the book inside before using the sleeve in a bag.
Helpful tip: Fit the loop around the actual book; making it against an empty sleeve almost always produces a closure that is too short.
Final Thoughts
The nicest thing about winter crochet projects is that they give you something comforting to work on and something useful to enjoy afterward.
Start with the shape that suits your time and confidence. A coaster, ear warmer, or book sleeve is a perfectly satisfying finish; a blanket can wait for the evenings when you want a longer project. Take time to check the fit, finish the joins, and weave in the ends. Those small details make the difference when the project becomes part of everyday life.
And if you are carrying that cozy feeling into the rest of the house, these winter wreath ideas after Christmas are a lovely companion to a handmade throw and a warm place to sit.