This post may contain affiliate links. If you make a purchase through these links, I may earn a small commission at no extra cost to you. Thank you so much for your support.
Coaster painting ideas are a lovely excuse to turn a few plain wooden blanks into something you’ll actually use every day.
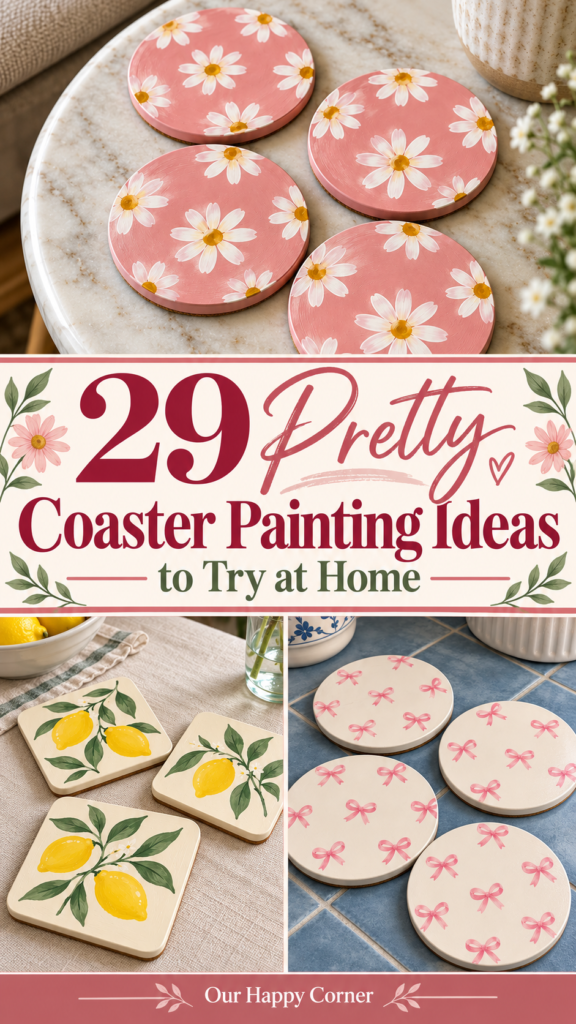
A little color beside your morning coffee can make an ordinary corner of the house feel more like yours.
You can keep things soft with daisies and pink bows, go bright with lemons and strawberries, or try bold checks and flowing stripes.
There’s room here for a quick repeating pattern and for the kind of floral project you’ll want to take your time with.
Choose a Coaster Design You’ll Enjoy Painting
Start with the style you would happily leave on your own coffee table.
If you’re new to painting, the arches, leopard spots, sunbursts, and broad wavy bands give you space to practice without lots of tiny details.
For a coordinated set, repeat the same palette and change the placement of the design on each coaster.
You don’t need four identical pictures, and a little variation is part of what makes a handmade set appealing.
What You’ll Need for Painted Wooden Coasters
- Unfinished wooden coaster blanks, approximately 4 inches across, in round, square, or hexagonal shapes
- Fine-grit sandpaper and a clean lint-free cloth
- Acrylic craft paints in the colors listed with your chosen design
- A flat brush for backgrounds, a small round brush for shapes, and a fine brush for details
- A pencil, eraser, ruler, and optional delicate-surface painter’s tape
- A palette, water container, and paper towels
- A wood-compatible primer or preparatory sealer if your surface or paint directions call for one
- A compatible clear protective topcoat suited to the coaster’s intended use
- Thin cork backing or small cork pads, plus adhesive suitable for cork and wood
The designs below use wooden blanks. If you already have glazed ceramic tiles, choose paint and preparation products specifically labeled for that surface rather than treating them like bare wood.
Prepare Your Coasters Before Adding the Design
Smooth and clean the blanks. Lightly sand rough faces and edges, then wipe away the dust. Check that each coaster sits flat before you start decorating.
Build a smooth background. Use a suitable primer or preparatory sealer when needed, then apply your background color in thin layers. Let each layer dry according to the product directions before adding the next.
Plan the larger shapes first. Make a few very light pencil marks rather than drawing every detail. Paint the main shapes, let them dry, and then add seeds, dots, stems, or highlights.
Leave room for finishing. Keep the cup-contact surface fairly smooth, without raised embellishments or thick ridges of paint. Add the protective finish and backing after the artwork is ready, following the finishing notes below.
Coaster Painting Ideas
Choose your favorite from these coaster painting ideas, gather the listed colors, and use the picture as a guide for the overall arrangement. You can simplify any of the designs to suit your time and experience.
1. Blush Pink Daisy Coasters
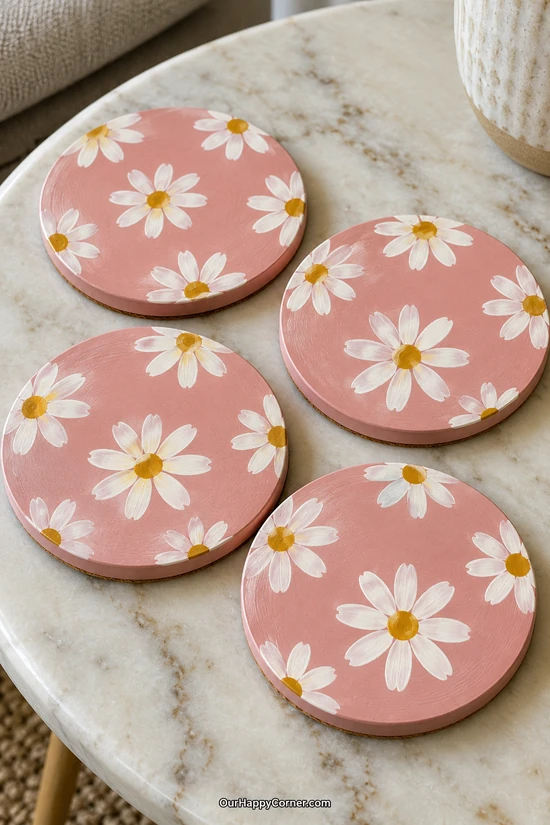
Paint colors: Blush pink, white, and mustard yellow.
White daisies on a pink background are such a cheerful place to start, especially if you want a set that feels pretty without needing lots of colors.
Paint the pink base first, including the narrow edges, and let it dry before marking a few flower centers with light pencil dots.
Pull short white strokes outward from each center. Turn the coaster as you work so your hand can make the same comfortable movement for every petal.
Add mustard centers once the white is dry, then tuck a few smaller flowers into the gaps. Varying their sizes keeps the pattern from feeling too rigid.
You can use the same three colors across the whole set while changing where each flower sits. They’ll look lovely together without needing to match exactly.
2. Lemon Coasters With Leafy Stems
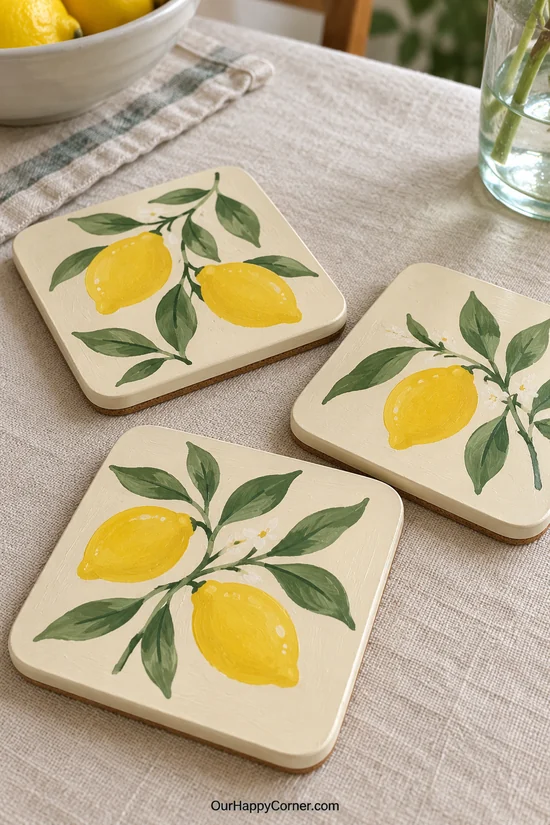
Paint colors: Cream, lemon yellow, olive green, and dark green.
A little lemon pattern gives a kitchen table a fresh, sunny detail, even when the rest of the room is fairly neutral.
Start with a cream background and sketch two or three oval lemons on each coaster, leaving space for leaves around them.
Give the fruit slightly pointed ends, then fill the shapes with yellow. A second thin coat will help the color look even over the pale base.
Connect the lemons with narrow green stems and add pointed oval leaves. A few darker strokes on the leaves bring variety without turning this into a detailed botanical study.
Keep the fruit comfortably inside the edges so the arrangement feels complete. This is a lovely set to bring out for coffee with a friend.
3. Dusty Blue Ocean Wave Coasters
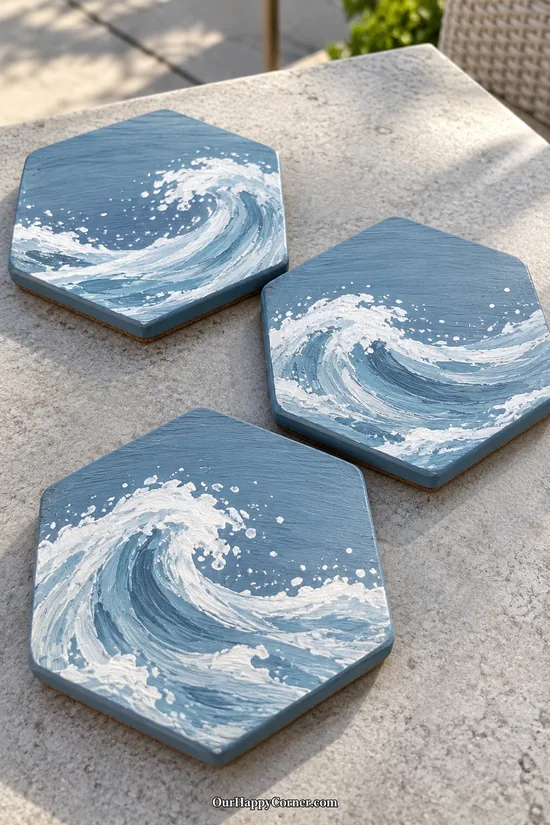
Paint colors: Dusty blue, deep blue, and white.
These waves suit anyone who likes a coastal feel without decorating everything with shells and rope. The hexagonal blanks make the loose curves feel especially interesting.
Cover each coaster with dusty blue, then use a slightly darker blue to shape one sweeping wave across the surface.
Paint a curved white band along the crest with a small flat brush. Let a little blue show through so the foam has movement rather than a solid outline.
Use a lightly loaded brush to dab broken white marks along the top and trailing edge. Practice on paper first if you tend to add more paint than you need.
Let each wave curl in a slightly different direction. Together, the coasters will feel coordinated while still looking individually painted.
4. Sage Green Fern Coasters
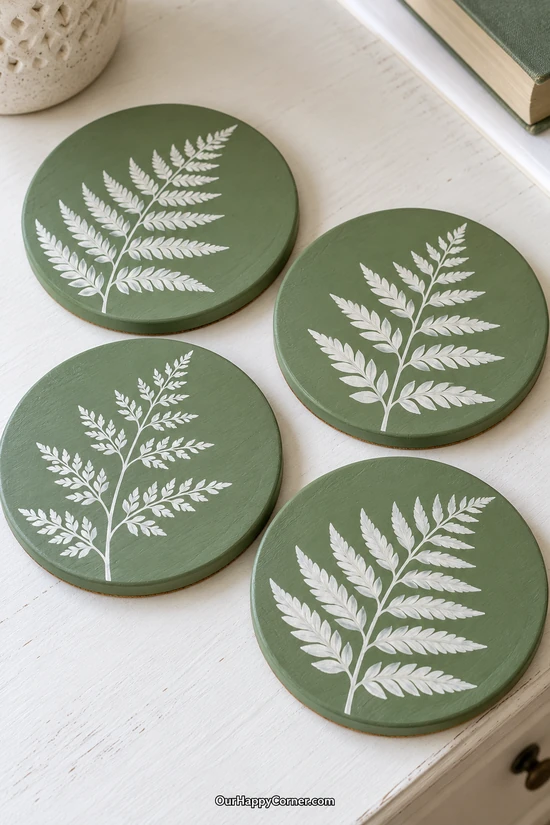
Paint colors: Sage green and warm white.
A fern design brings a quiet botanical touch to a desk or side table. You only need two colors, so you can spend your time on the shape instead of mixing a large palette.
Paint the background sage and lightly mark a gently curved line for each central stem.
Work from the bottom upward, adding small white leaf strokes on alternating sides. Make them longer near the base and shorter toward the tip.
Leave a sliver of green between the leaflets so the fern stays readable. One larger frond is a perfectly good starting point before you try a fuller arrangement.
If this is your first botanical project, paint one practice stem on scrap paper. Getting comfortable with that repeated stroke makes the coaster much less fiddly.
5. Lavender Bouquet Coasters
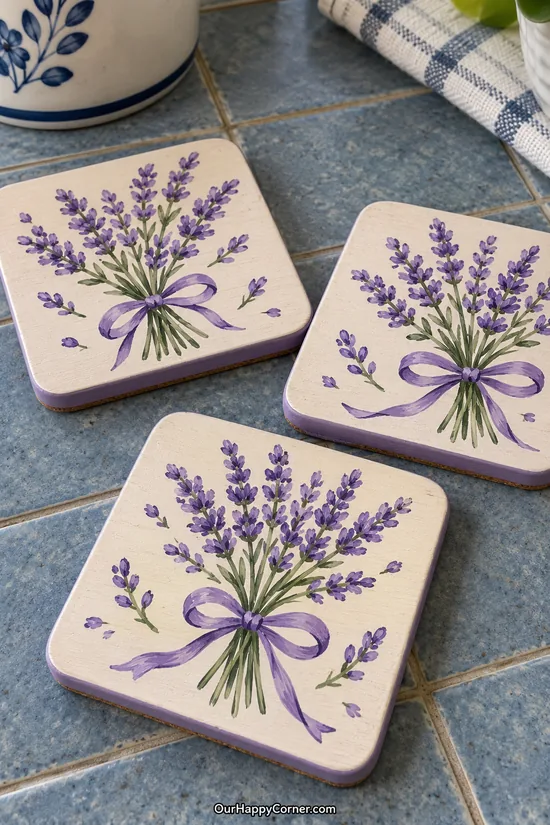
Paint colors: Ivory, lavender, deep purple, sage green, and violet.
A small lavender bouquet has a lovely cottage feel, and those flower heads are mostly little dabs of paint. You don’t have to draw every blossom.
Use an ivory base, then paint several thin green stems that gather together near the lower part of the coaster.
Build the flower heads with small purple marks along the upper stems. Add a few lighter lavender dabs after the first layer dries to give them a softer finish.
A simple violet bow can sit where the stems meet. Paint two little loops and two trailing ends, keeping it smaller than the bouquet.
Try placing the bouquet slightly off center on one coaster and more upright on another. The repeated colors will still make the set feel connected.
6. Cherry Coasters With Scalloped Borders
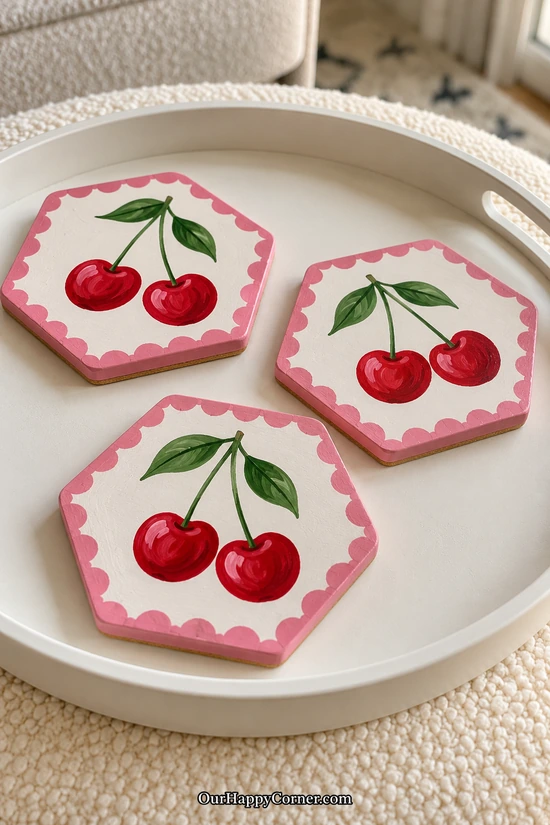
Paint colors: Warm white, cherry red, pink, and green.
The pink scalloped border makes a simple pair of cherries feel like a finished little illustration. It’s a sweet option if you enjoy a playful kitchen accessory.
Paint the surface warm white and the edges pink, then pencil in two overlapping circles near the center.
Fill the cherries with red, connect them with curved green stems, and add one or two leaves. A tiny pale highlight is enough to suggest shine.
For the border, mark small pink half circles around the perimeter and join them into a continuous scalloped band. Turn the coaster frequently to make the corners easier.
Don’t worry about making every scallop identical. Slightly uneven curves suit the handmade design and are easier to paint neatly than a very narrow straight line.
7. Black and Gold Moon Coasters
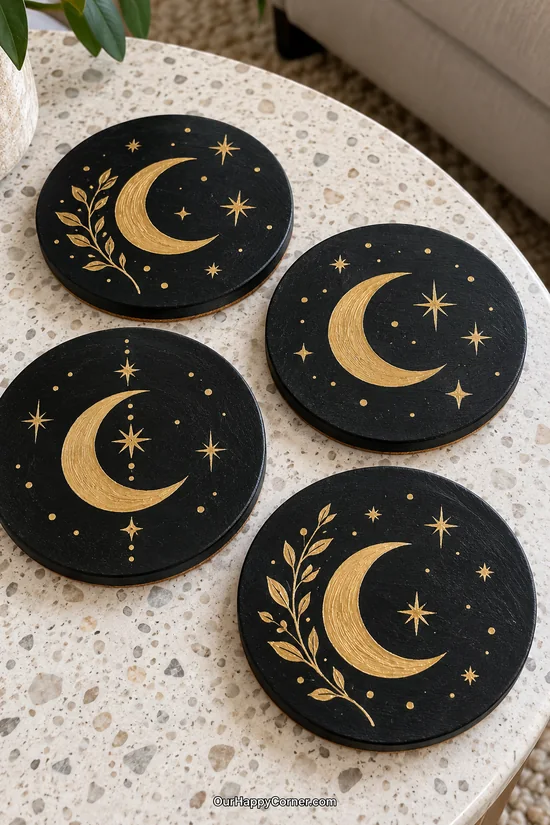
Paint colors: Black and metallic gold.
Black and gold gives this set a completely different mood from the lighter designs. A crescent moon and a few stars can look striking without filling the entire surface.
Apply thin coats of black until the background is even, and let them dry before adding metallic paint.
Sketch a crescent using two offset curved lines, then fill it with gold. Metallic paint may need more than one light coat for good coverage.
Add small dots and a few simple four-point stars, leaving plenty of black around the moon. A leafy gold sprig is an optional extra once you’re happy with the main shapes.
The same night-sky theme would work beautifully on a keepsake box, too. Our jewelry box painting ideas have more inspiration for a matching handmade gift.
8. Terracotta Arch Coasters
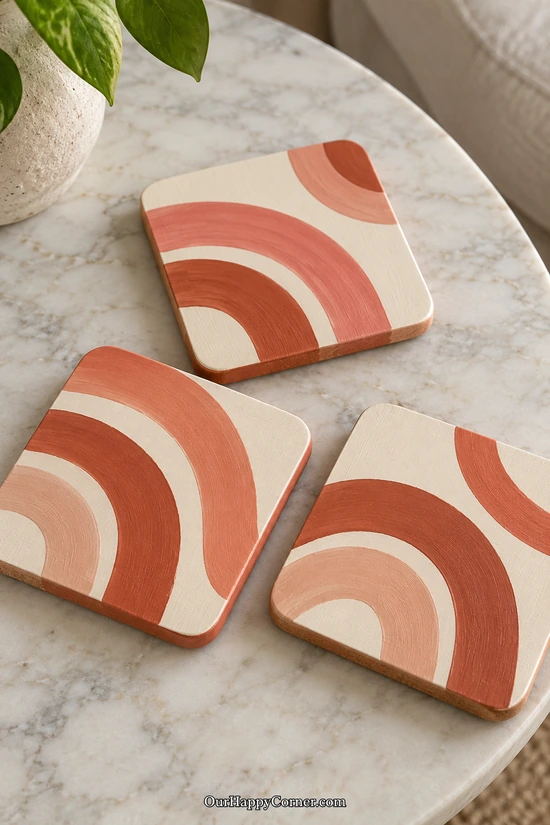
Paint colors: Ivory, terracotta, muted coral, and peach.
Broad arches are a good choice when you want an abstract design that still feels warm and inviting. They also give you room to practice smooth brushwork without tiny details.
Paint the coaster ivory, then lightly sketch two or three curved bands that begin near one corner.
Fill the largest band with terracotta and add narrower bands of coral and peach beside it. Keep a small ivory gap between some of the colors.
Use a brush wide enough to fill each band in a few strokes, rather than repeatedly tracing it with a tiny brush. Turn the coaster to follow the curve comfortably.
Move the arches to different corners across the set. That small change makes the finished coasters feel more relaxed when you spread them out on the table.
9. Pink Strawberry Coasters
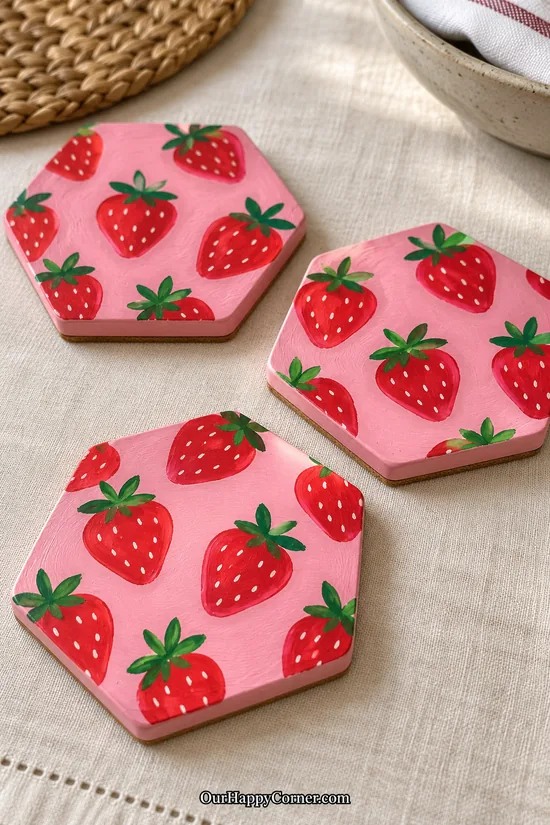
Paint colors: Pink, strawberry red, green, and cream.
Red strawberries against pink make a lively little pattern that’s easy to recognize at a glance. It’s a fun way to use a brighter palette on something small.
Paint the pink background, then lightly scatter rounded heart shapes across the surface for the berries.
Fill them with red and add short green strokes at the tops. Let some strawberries tilt in different directions so the repeat doesn’t look like a row of stamps.
Finish with tiny cream seed marks after the red is dry. Use the tip of a small brush and stop before the seeds become the busiest part of the design.
Leave a little pink space between the berries. If you enjoy these little fruit motifs, our tote bag painting ideas offer another everyday surface to try.
10. Blue Gingham Coasters
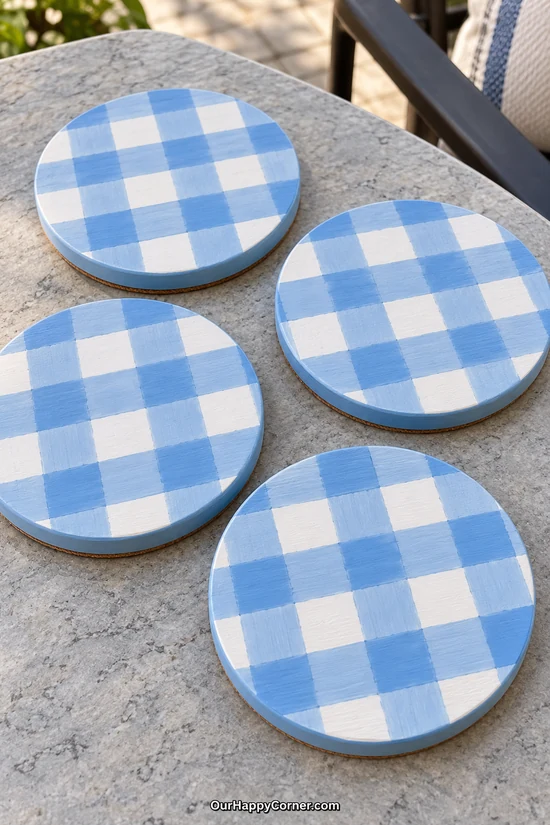
Paint colors: White, pale blue, and medium blue.
Gingham feels familiar and homey, and it works especially well on round coasters. A simple grid gives you the pattern without needing a complicated sketch.
Begin with a white base and lightly mark evenly spaced horizontal and vertical bands using a ruler.
Paint the bands pale blue, leaving white squares between them. Once dry, use a deeper blue on the small squares where the bands cross.
If you use painter’s tape, choose one suited to delicate painted surfaces and follow its directions. Let the base cure enough before taping so you don’t lift it.
Aim for consistent spacing rather than perfectly sharp edges. A little brush texture keeps the checks looking painted and gives this tidy pattern some warmth.
11. Cobalt Blue Flower Coasters
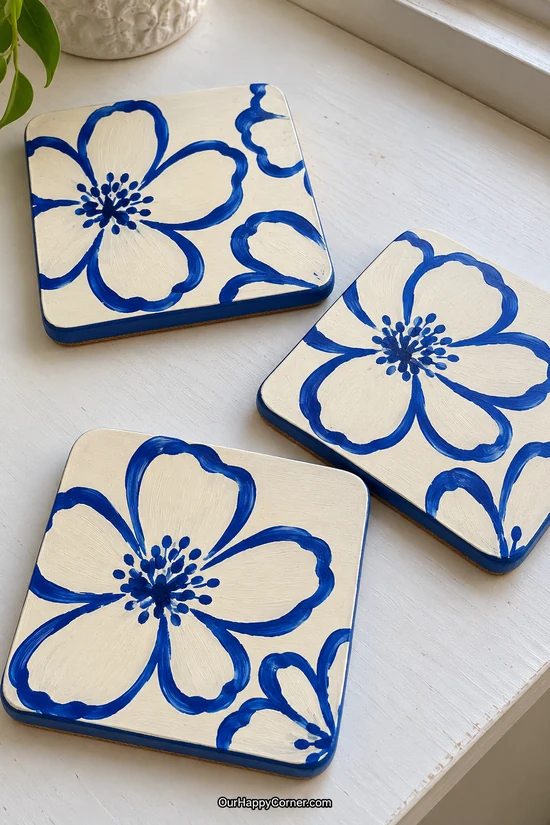
Paint colors: Ivory and cobalt blue.
Large blue flower outlines make a lovely statement on an ivory background. You get plenty of impact from two colors and a design that can extend naturally toward the corners.
Paint the base ivory, then sketch one large five-petal flower on each square coaster.
Trace the petals with a small round brush and cobalt paint. Rotate the coaster as you follow the curves so the outline stays comfortable to paint.
Add a dotted center and a few small neighboring petals or leaves where there’s room. Leave most of the flower interiors ivory to keep the contrast clear.
This palette also looks lovely on larger decorative pieces. You’ll find more color combinations to explore in our terracotta pot painting ideas.
12. Terracotta Sunburst Coasters
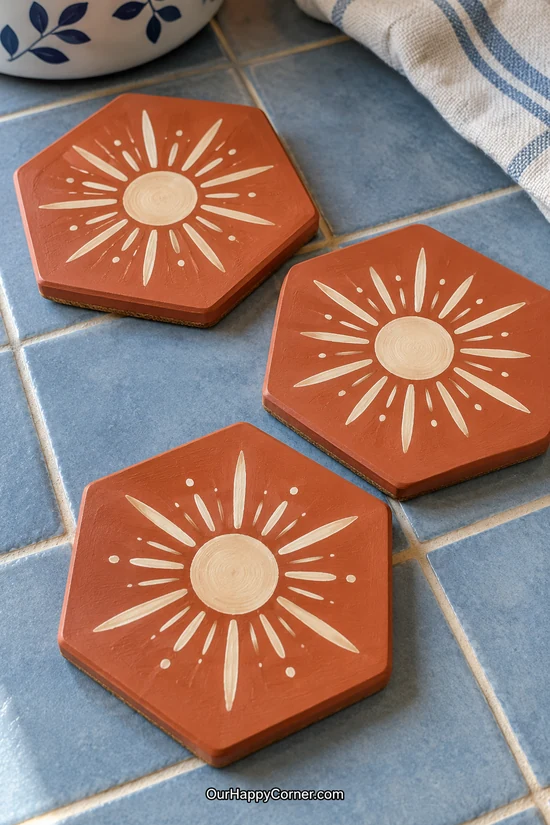
Paint colors: Terracotta and pale cream.
A cream sunburst on terracotta feels warm without needing a busy pattern. The shape is particularly satisfying on a hexagonal coaster, where the rays can spread toward the corners.
Paint the background terracotta and let it dry, then place a small cream circle near the center.
Mark the longest rays first at roughly even intervals. Fill the gaps with shorter strokes, using the brush tip to taper their ends.
A few tiny dots between the rays add another detail without changing the basic design. You can skip them if you prefer a cleaner look.
Try a paper circle as a drawing guide if you’re unsure about the center. Once the rays go around it, small irregularities are much less noticeable.
13. Leopard Print Coasters
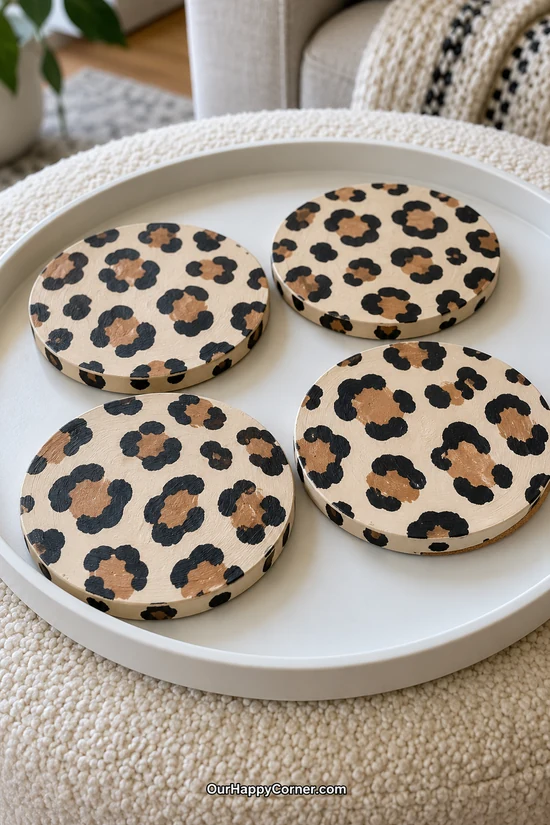
Paint colors: Cream, tan, and black.
Leopard print is a playful alternative to flowers, and the marks are supposed to vary. That makes it one of the more forgiving coaster painting ideas to try freehand.
Cover the surface with cream and scatter uneven tan blobs across it. Leave enough space to add dark outlines around each one.
Once dry, paint broken black curves around parts of the tan shapes. Avoid closing every outline into a complete ring.
Add a few smaller black marks in the open spaces, then step back to check the balance. Some spots can be wider or more stretched than others.
Keep the same approximate spot size across the set. The coasters will feel coordinated even though none of the markings are exact copies.
14. Wine Glass and Heart Coasters
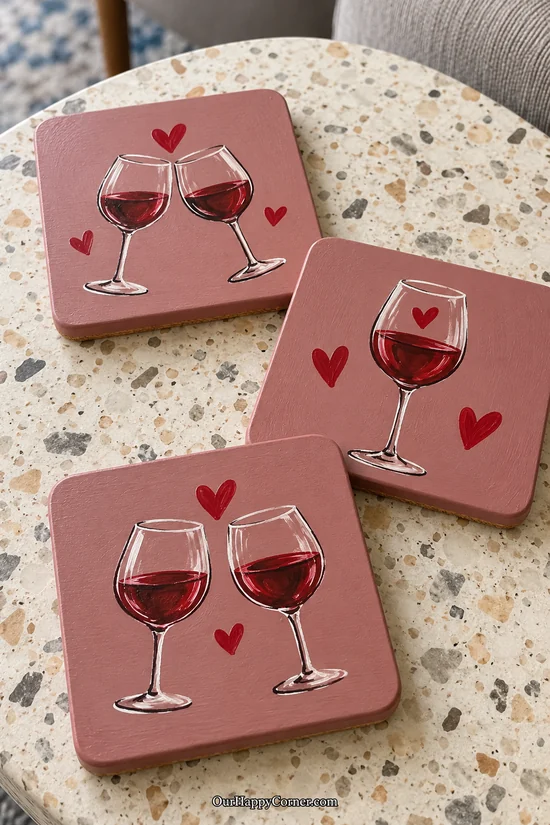
Paint colors: Dusty rose, burgundy, red, and white.
These little wine glasses make a lovely date-night set or a gift for a friend who enjoys hosting. The tiny hearts add a romantic touch without taking over the design.
Paint the background dusty rose and sketch a rounded glass bowl, a narrow stem, and a short base.
Fill the lower part of the bowl with burgundy, keeping the top edge of the liquid level. Trace the glass shape with a fine pale line once the wine color dries.
Add one or two curved highlights and a few red hearts nearby. You can paint one glass on some coasters and a pair on others.
For more gifts with the same pink-and-red feel, take a look at our Valentine wood crafts. A small coaster set is easy to personalize with the recipient’s favorite colors.
15. Black Cat Silhouette Coasters
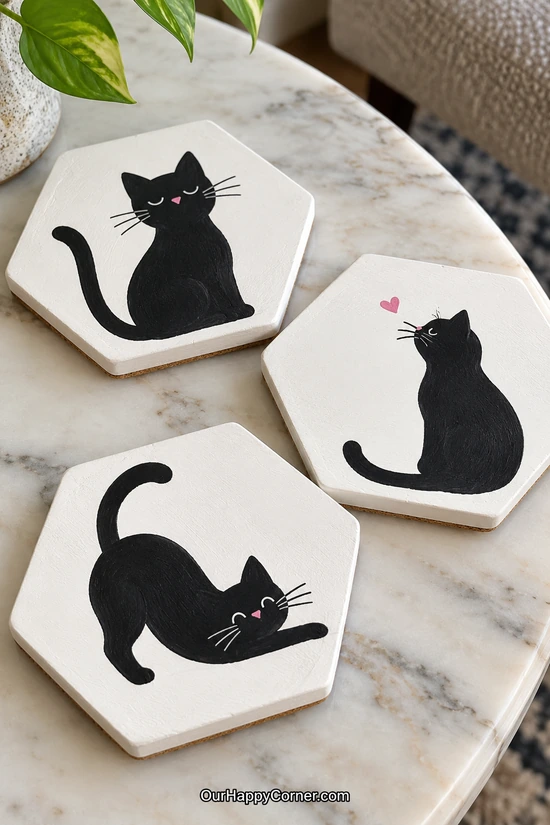
Paint colors: Warm white, black, and pale pink.
A black cat silhouette is a lovely choice for someone who would happily put their pet on every household accessory. Different sitting and stretching poses make the set feel personal.
Start with a warm white base and sketch the body as a simple oval, then add a smaller head with two pointed ears.
Fill the silhouette with black, keeping the tail narrow enough to read clearly against the background. Let the first coat dry before smoothing any patchy areas.
A tiny pink nose and a few fine whiskers can bring the face to life. Keep those details small so the silhouette remains the main feature.
Try one pose per coaster rather than squeezing several cats onto each one. A curled tail or a stretching front leg is enough to give each little character its own personality.
16. Mint Green Watermelon Coasters
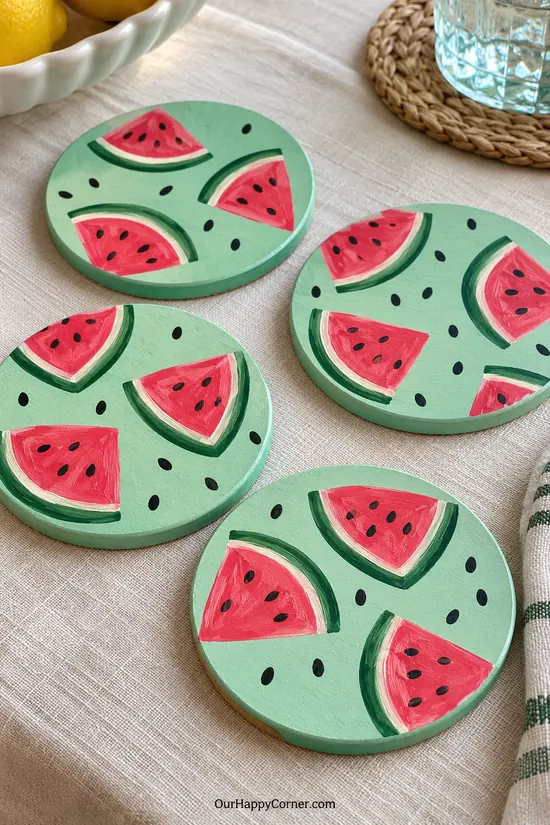
Paint colors: Mint green, red, white, dark green, and black.
Watermelon wedges give these coasters a fresh summer feel, especially against mint green. The shapes are simple enough to repeat without spending ages on a sketch.
Paint the base mint, then lightly mark several half circles or triangular wedges across each surface.
Fill the fruit with red and add a narrow white band along the curved edge. Follow that with a darker green rind, letting the layers dry between colors.
Paint a few black teardrop seeds inside each wedge. You can add a handful of loose seeds in the background, but leave some clear mint space too.
Vary the direction of the wedges so the pattern feels lively. These would make a cheerful set for an indoor summer lunch or a covered patio table.
17. Peach Coasters With Monstera Leaves
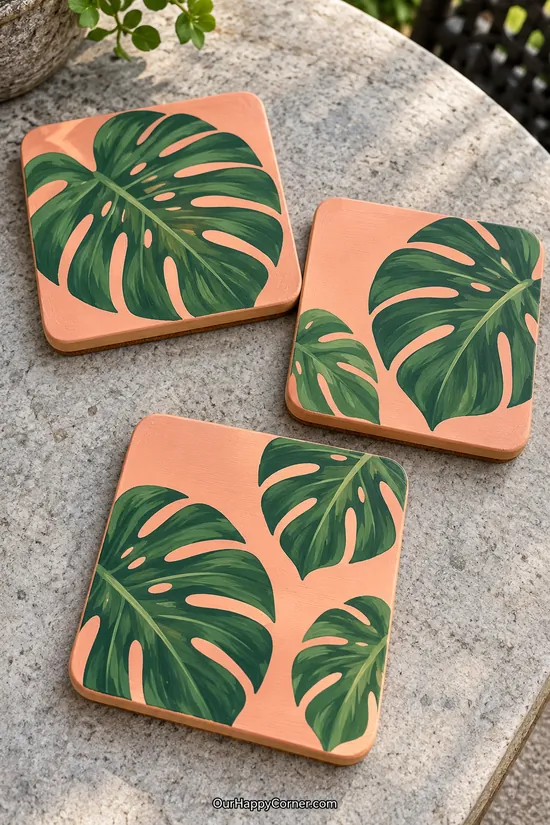
Paint colors: Soft peach, dark green, and medium green.
One large monstera leaf can fill a coaster beautifully without needing a repeated pattern. The peach background gives the dark greens a warm contrast.
Paint the base peach and sketch a broad leaf shape with a pointed tip. Mark the central vein so you have a guide for the two sides.
Fill the leaf with green while leaving a few narrow peach openings along the edges. For enclosed holes, you can paint peach shapes over the dried green instead of working around tiny gaps.
Add a few lighter green strokes beside the main vein. Keep them broad so the finished leaf doesn’t become crowded with lines.
Place the leaves at different angles on the other coasters. A large shape that reaches toward two edges will feel more natural than one squeezed into the exact center.
18. Navy Sailboat Coasters
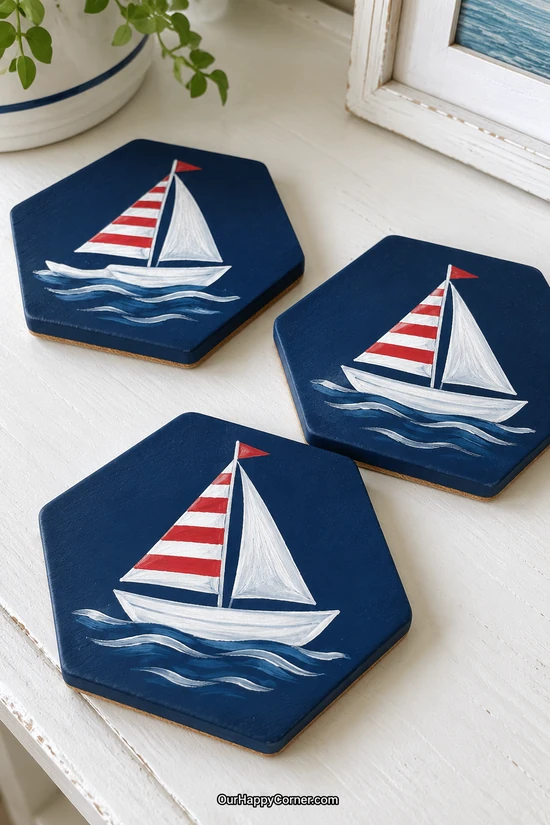
Paint colors: Navy, white, red, and pale blue.
A little sailboat gives a coastal set a different character from waves alone. White sails and a red stripe stand out clearly against the navy background.
Paint the base navy and sketch a simple boat hull with a vertical mast above it.
Add a larger white triangular sail on one side and a smaller sail on the other. Let the white dry before painting a few red stripes across the smaller sail.
Use short pale-blue and white strokes beneath the hull for the water. Keep the waves mostly horizontal so the boat feels settled on the surface.
You can repeat the same boat across all the coasters or shift it slightly from side to side. Leaving navy space around the sails helps the little scene stay clear.
19. Tiny Pink Bow Coasters
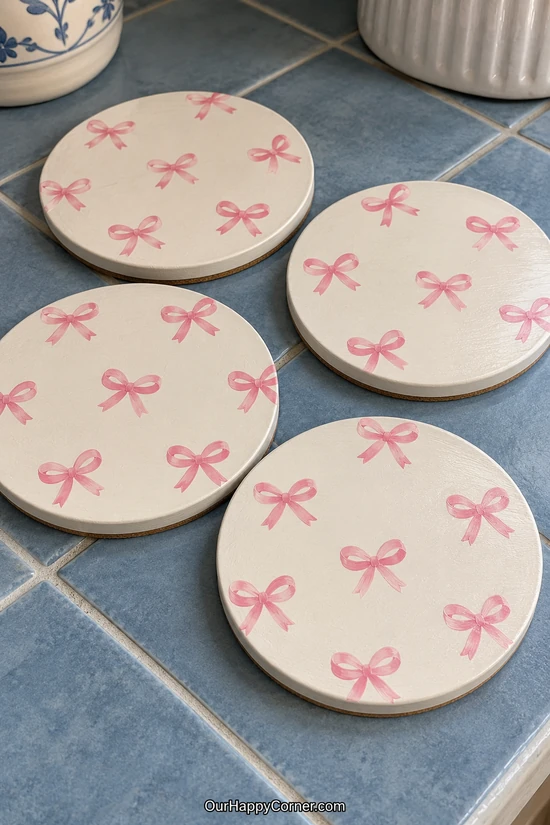
Paint colors: Ivory and soft pink.
Small pink bows feel sweet without needing a large central illustration. The open ivory background also makes the set easy to mix with other tableware.
Paint the base ivory, then mark a few tiny dots where you want the bow knots to sit.
For each bow, add two curved loops beside the dot and two short ribbon tails underneath. A slightly darker pink at the knot can help separate the shapes.
Keep the bows spaced apart and turn a few at a gentle angle. Practicing one simple bow on paper first will help you find a size that’s comfortable to repeat.
This is a lovely design for a small handmade gift. Finish the coasters fully before stacking them, then tie the set together with a ribbon in the same soft pink.
20. Orange and Blossom Coasters
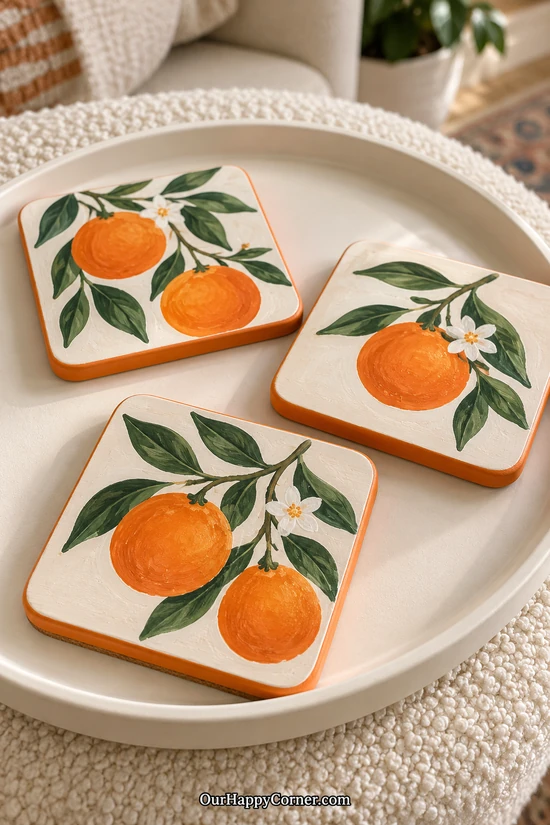
Paint colors: Ivory, orange, dark green, white, and yellow.
Bright oranges and dark leaves make a warm, cheerful combination on a cream background. A painted orange rim ties the whole set together.
Start with the ivory base and sketch two round oranges, allowing a little space for a stem between them.
Fill the fruit with orange and dab a few slightly lighter marks over the dried surface. Those small changes suggest peel texture without requiring detailed shading.
Add dark green leaves and a couple of simple white blossoms with yellow centers. Keep the flowers smaller than the fruit so the oranges remain the focus.
Paint the thin outer edge orange once you’re happy with the surface. That finishing detail makes the coasters look coordinated even when the fruit arrangements differ.
21. Teal Fish Coasters
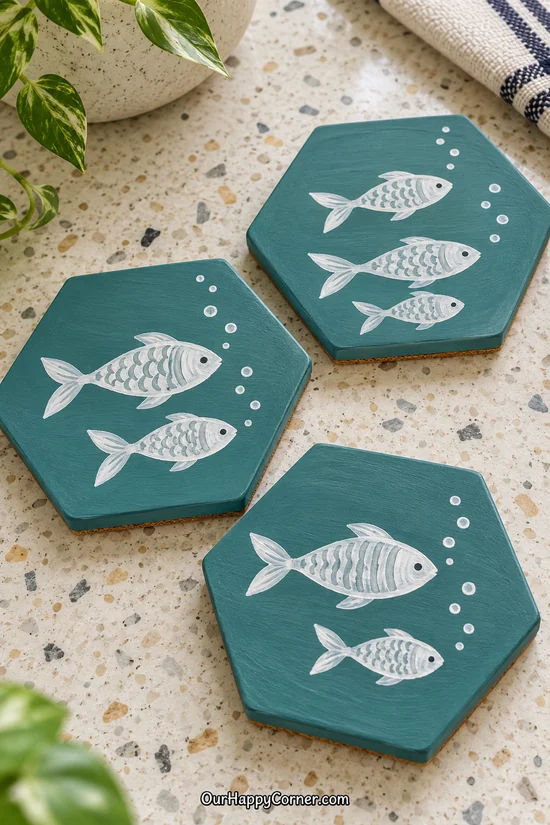
Paint colors: Muted teal and white.
Little white fish on teal have a playful seaside feel that works well in a kitchen or casual dining space. Repeating a simple silhouette keeps the painting manageable.
Paint the base teal and draw two or three oval fish bodies with small triangular tails.
Fill the shapes with white and let them dry. Use teal to add a small eye and a few short lines inside each body.
Scatter a handful of tiny white bubbles nearby, leaving room between the fish. You don’t need to fill every open patch for the design to feel finished.
Try pointing one fish in the opposite direction on each coaster. It gives the repeated motif a little movement while keeping the palette and brushwork straightforward.
22. Mauve Coasters With Wavy Cream Bands
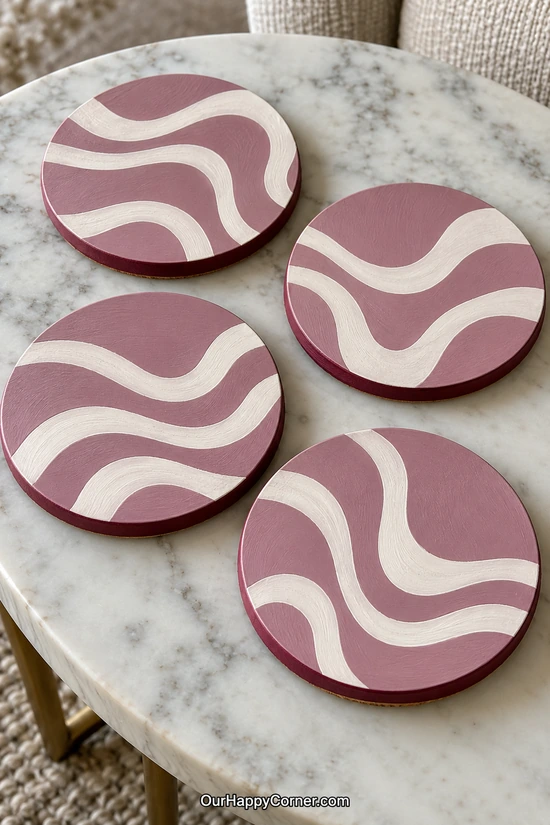
Paint colors: Mauve, warm white, and burgundy.
Wide, wavy bands are a relaxing choice when you want to paint without planning a detailed picture. Mauve and cream give the curves a soft, grown-up feel.
Paint the coaster mauve, then lightly sketch two or three flowing lines across the surface.
Use those lines as guides for broad cream bands, letting the width change a little as the curves turn. A flat brush can cover the area more smoothly than a fine liner.
Let the first cream layer dry before adding another where the mauve shows through. Paint the narrow edges burgundy for a deeper finishing accent.
Change the direction of the waves across the set. They’ll still look connected, and you won’t have the pressure of reproducing the same curve four times.
23. Yellow Bee and Daisy Coasters
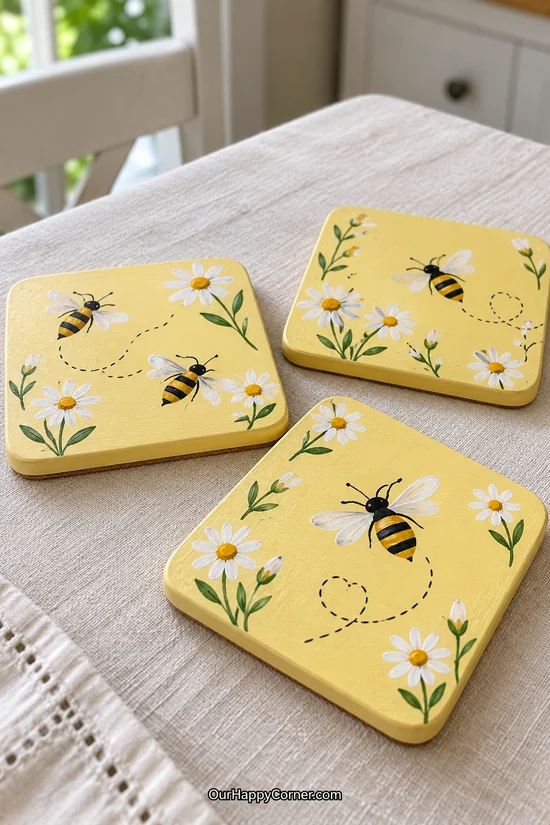
Paint colors: Pale yellow, white, mustard, black, and green.
Tiny bees and daisies make a sunny combination, with enough detail to enjoy without needing a whole garden scene. The pale yellow background keeps the set bright.
Paint the base yellow and add a few small oval bee bodies, leaving room for flowers around them.
Give each bee two or three black stripes and a small dark head. Add pale wings with short oval strokes once the body color is dry.
Make the daisies with white petals around mustard centers, then paint a few green stems and leaves. A dotted flight trail can connect the smaller spaces.
Keep the bees larger than the dots in the trail so they remain easy to recognize. Painting a few clear motifs will be more satisfying than squeezing in lots of tiny ones.
24. Red and Pink Checkerboard Coasters
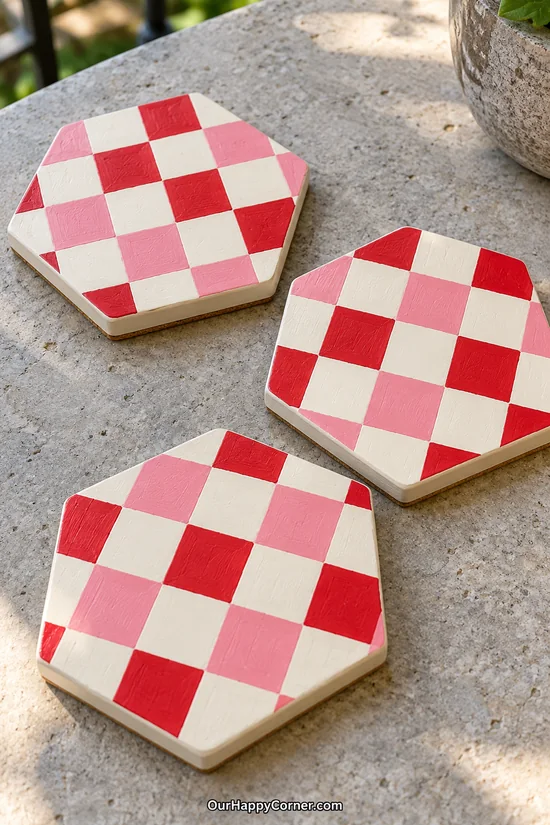
Paint colors: Cream, pink, and red.
Red and pink checks have a bolder feel than traditional blue gingham. This version uses separate colored squares, so the pattern is easy to plan before you begin.
Paint the base cream and lightly divide the surface into an even grid with a ruler and pencil.
Leave alternating squares cream, then fill the others with pink and red. Follow the same color arrangement across the set if you want a more coordinated finish.
Let neighboring squares dry before tidying their shared edges. A small flat brush helps you reach the corners without making the grid lines thicker.
You can choose a larger grid for fewer squares and quicker painting. This is a good option when you like a graphic pattern more than little illustrated motifs.
25. Pink Flamingo Coasters
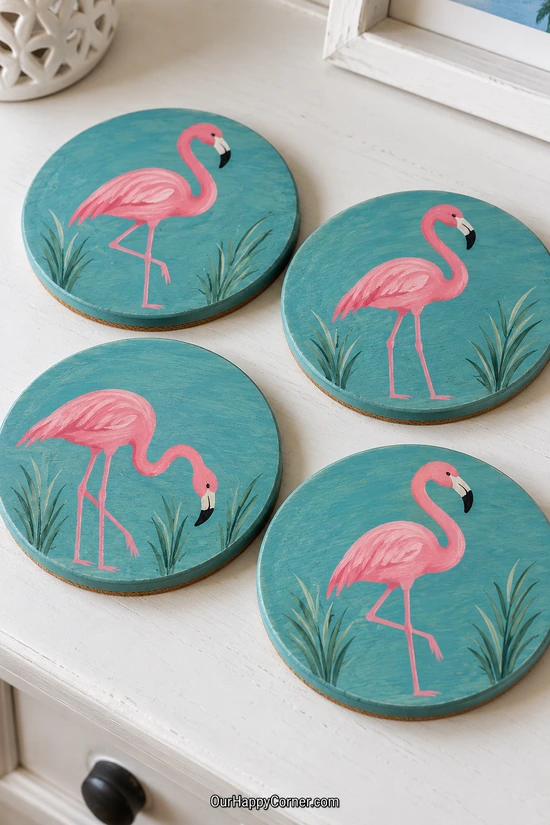
Paint colors: Turquoise, light pink, deeper pink, green, and black.
Pink flamingos against turquoise bring a cheerful vacation feel to a small everyday object. A single bird on each coaster gives the curved neck and long legs plenty of space.
Paint the turquoise base and sketch an oval body with a curved neck rising from one end.
Fill the bird with pink, then add a slightly deeper pink wing. Use a small brush for the head and a short beak with a dark tip.
Paint two slim legs underneath, letting one bend if you want a different pose. A few green grass strokes near the bottom can help settle the bird into the design.
Keep the neck a little thicker in your first sketch than you think you need. It’s easier to refine a clear curve than rescue an extremely thin, broken line.
26. Woodland Mushroom Coasters
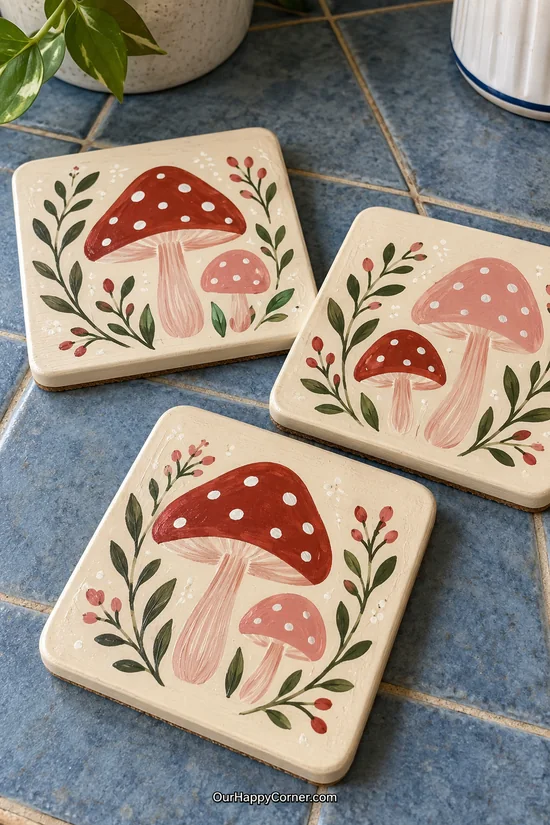
Paint colors: Ivory, brick red, dusty pink, cream, and olive green.
Red and pink mushrooms give this set a cozy woodland feel. The leafy sprigs around them add detail without requiring a full landscape.
Paint the base ivory and sketch one taller mushroom beside a smaller one. Use rounded umbrella shapes for the caps and gently tapered stems.
Fill the caps with brick red and dusty pink, then paint the stems pale cream with a few warmer strokes for definition.
Add small white dots once the caps are dry, followed by simple olive sprigs around the outside. Keep the dots different sizes so the pattern feels softly painted.
If you’re short on time, leave out the tiny decorative buds and concentrate on the two mushrooms. Their contrasting heights are enough to make a pleasing arrangement.
27. Lilac Butterfly Coasters
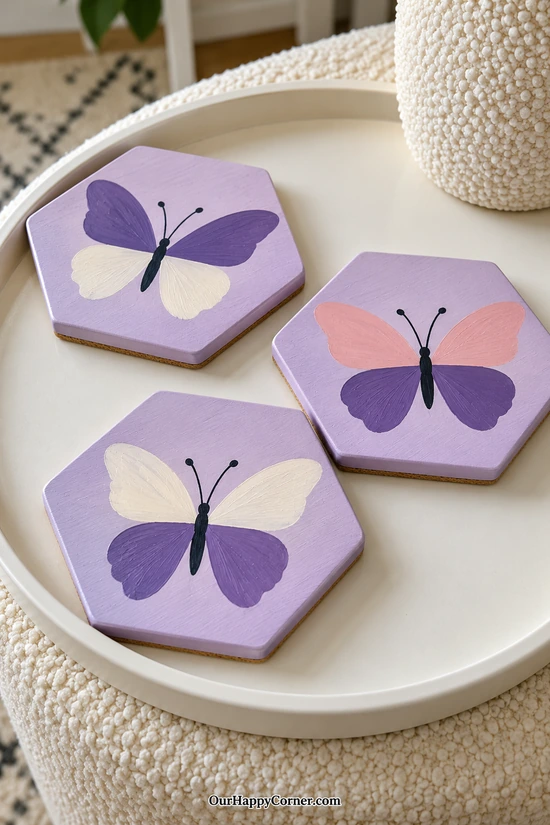
Paint colors: Lilac, lavender, pale pink, cream, and charcoal.
A large butterfly is a lovely way to use a few favorite pastel colors together. The wings can stay simple while still giving each coaster its own personality.
Paint the background lilac and mark a short vertical line for the butterfly’s body.
Sketch two larger upper wings and two smaller lower wings, then fill them with your chosen colors. Try lavender and cream on one coaster, and pink with purple on another.
Add a narrow charcoal body and two fine antennae after the wings dry. You can leave the wings plain rather than adding tiny dots or complicated markings.
Use a folded paper template if you want help balancing the two sides. It gives you a guide while still leaving room for the natural variation of painted edges.
28. Pink Tulip Coasters
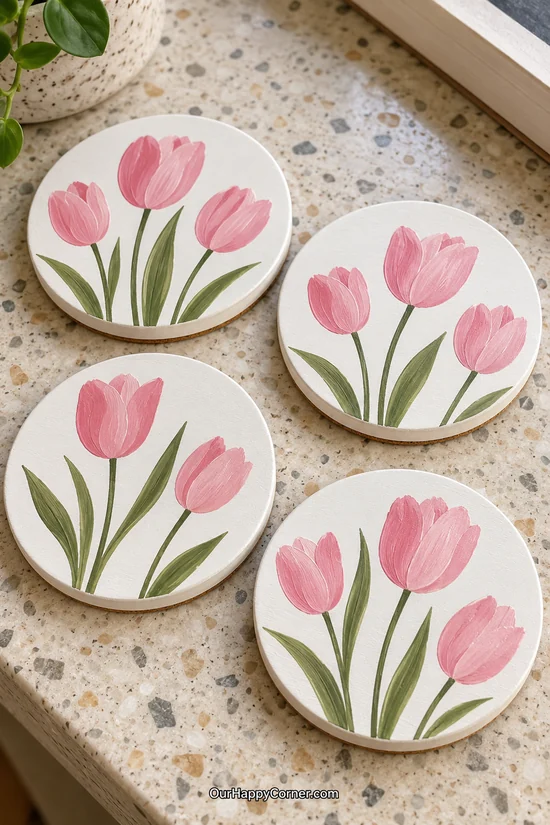
Paint colors: Ivory, light pink, rose pink, and olive green.
Tulips are a lovely starting point if you want to paint flowers with a clear, simple shape. Three stems on an ivory coaster feel fresh without looking crowded.
Paint the base ivory, then lightly mark three flower heads at slightly different heights.
Build each tulip from a rounded cup shape with a few pointed petal tips. Add one or two deeper pink strokes over the pale pink to separate the petals.
Paint slim green stems and long, tapered leaves that rise from the bottom. Let the leaves curve slightly instead of lining them up like straight stripes.
Leave open space above the flowers so the arrangement can breathe. You can repeat the same colors while changing the heights of the tulips across the set.
29. Charcoal Coasters With Pink Peonies
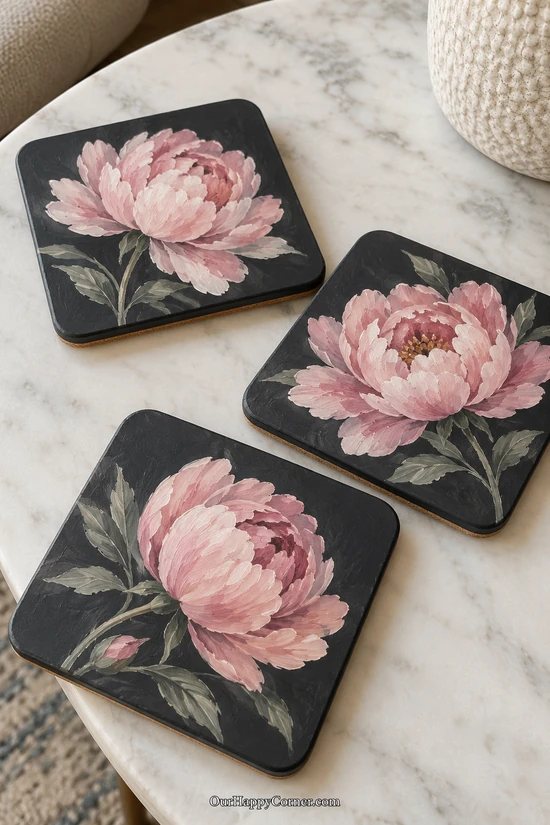
Paint colors: Charcoal, dusty pink, blush, cream, and muted green.
A large peony against charcoal is the most detailed floral option in this collection. It’s a lovely choice when you want to spend a little longer on one generous bloom.
Paint the base charcoal and mark a loose circle for the flower, leaving room for a few leaves beside it.
Start with darker pink curves near the center, then build outward with overlapping blush and pale pink petal strokes. Make the outer strokes broader than the inner ones.
Let some of the darker color remain visible between petals, and add just a few cream highlights. Muted green leaves give the flower a finished setting without competing with it.
Practice the layered strokes on paper before painting the coaster. You can also begin with a smaller flower and fewer petals, then add more once the basic shape feels right.
Finish Your Painted Coasters for Everyday Use
A pretty design deserves a finish that suits how you’ll use it. Choose a clear topcoat compatible with your painted wood, and check the manufacturer’s guidance for moisture exposure, cleaning, and contact with warm mugs.
Let the paint dry and cure as directed before coating it, then follow the topcoat’s own instructions for application and curing. A surface that feels dry may still need more time before it is ready to use or stack. DecoArt’s guide to clear craft finishes explains the difference between preparing a surface and protecting the finished painting.
Keep the area for glued cork backing clean and suitable for your chosen adhesive. Once the coating has cured, attach a thin cork sheet or evenly spaced cork pads so the coaster sits steadily and its wooden base doesn’t scrape the table.
Before making a whole batch as gifts, try one finished coaster with the type of cup you intend to use. If the coating becomes tacky or marks, check the product’s suitability and cure instructions before using the rest of the set. Wipe the coasters gently rather than soaking them or putting them in the dishwasher.
Frequently Asked Questions
Which coaster painting ideas are easiest for beginners?
Start with broad arches, loose leopard spots, sunbursts, or wavy bands. They use a small palette and let you practice basic shapes. Daisies are another friendly option once you’re comfortable repeating short petal strokes.
Can I use acrylic paint on wooden coasters?
Acrylic craft paint can be used on suitable prepared wooden blanks. Check your paint label for surface preparation, apply thin coats, and choose a compatible protective finish for the way you plan to use the coasters.
Do painted coasters need a protective finish?
For a set that will hold drinks, plan for a compatible protective topcoat rather than leaving decorative craft paint exposed. Check the product’s intended use carefully; a glossy appearance alone doesn’t tell you how it will handle moisture or a warm mug.
How long should I wait before using my painted coasters?
Use the full drying and curing schedule on your paint and topcoat labels. There isn’t one waiting time that fits every product or application. Allow for that finishing time if you’re making a set for a birthday, holiday, or housewarming gift.
Final Thoughts
The best coaster painting ideas are the ones you’ll enjoy seeing on your table after the painting is done. Pick a design that feels like you, whether that means a little pink bow, a blue wave, or a big flower against charcoal.
Start with one coaster if a full set feels like too much. Once you’ve tried the colors and brushwork, it’s much easier to decide what you’d like to repeat, simplify, or change for the others.
A few small differences will give your finished set its own character. Take your time with the finishing, let everything cure, and enjoy having something useful that you made yourself.