This post may contain affiliate links. If you make a purchase through these links, I may earn a small commission at no extra cost to you. Thank you so much for your support.
Hot afternoon, restless kids, and you need something that’ll actually hold their attention for more than five minutes? This paper plate watermelon craft is exactly that kind of activity, simple enough to pull together in minutes, but engaging enough to keep little hands busy from start to finish.

What makes this one a little different from your usual paper plate craft is the painting step.
There’s something about picking up a brush and going to town on a plate that kids find deeply satisfying. Add in the cutting-in-half reveal at the end, and you’ve got a genuine “wow” moment built right into the process.
It works great as a standalone summer activity or paired with our paper plate ice cream craft for a full fruity crafting afternoon.
Parent tip: Let the pink paint dry completely before moving on, rushing this step leads to smeared seeds and a sad watermelon. While it dries, kids can cut out their green squares and black triangles so nothing feels like waiting.
What Makes This Craft Worth Trying
Plenty of paper plate crafts are just cutting and gluing. This one adds painting to the mix, which opens up a whole different kind of engagement for kids. Here’s what they’re quietly working on while they’re having fun:
Brush control and painting confidence — staying inside the lines (loosely!) builds focus without pressure
Pattern recognition — alternating light and dark green around the rind introduces early sequencing skills
Fine motor precision — gluing small seed shapes in place is trickier than it looks, in the best way
Delayed gratification — waiting for paint to dry and building toward a reveal teaches patience in a low-stakes way
What You’ll Need
- 1 white paper plate
- Pink paint and a paintbrush
- Light green construction paper
- Dark green construction paper
- Black paper (for seeds)
- Glue stick or school glue
- Scissors
How to Make the Paper Plate Watermelon Craft
Step 1: Cut your pieces while you prep

Before anything touches paint, get your paper pieces ready. Cut small squares from both shades of green for the rind and tiny triangles from black paper for the seeds.
Prepping these first means kids won’t be sitting around waiting when it comes time to glue.
Tip: For younger kids, pre-cut the pieces yourself and let them focus on the painting and gluing steps.
Step 2: Paint the watermelon flesh

Using pink paint, fill in the center of the paper plate roughly the inner two-thirds. Leave the outer rim bare for now; that’s where the rind will go. Don’t worry about perfect edges.
A little imperfection around the border actually looks more natural once the green pieces go on.
Tip: Prefer a deeper, more vivid watermelon? Swap pink for red paint. Both look great.
Step 3: Cut the plate in half

Once the paint is completely dry, cut the plate straight down the middle.
This is the moment kids get genuinely excited, suddenly it looks just like a real watermelon slice. Set both pieces flat and ready for decorating.
Step 4: Add the seeds

Glue the small black triangles onto the pink area of each slice. Kids can scatter them randomly or line them up in rows, either way works and both look great.
This is usually the step where they start saying “it actually looks like a watermelon!”
Step 4: Build the rind
Glue the green squares along the curved edge of each slice, alternating light and dark green as you go.
Press each piece down firmly. The two-tone pattern is what makes the rind look so realistic, so it’s worth taking a little extra time here.
Tip: Slightly overlapping the squares gives the rind a more layered, realistic feel.
Step 5: Let it dry and show it off

Set both slices flat and give the glue a few minutes to dry.
Once they’re ready, display them side by side on the wall or hand them straight to the kids for some pretend play. Either way, they’re going to be proud of what they made.
Ways to Mix It Up
The basic version is a winner on its own, but these variations add a fun twist:
Give it a face — draw on eyes and a smile with a black marker for an extra cheerful result
Go full summer spread — pair it with the paper plate ice cream craft for a whole pretend-play food collection
Make it sparkle — a light sprinkle of red or green glitter over the wet paint adds a juicy sheen
Matching game — make two identical watermelons, cut into different shapes, and use them as a simple puzzle
Keep the Creativity Going
If this one was a hit, here are a few more easy paper plate projects that use similar skills:
☀️ Paper Plate Sun Craft — a cheerful beginner project that pairs perfectly with this one
🍦 Paper Plate Ice Cream Craft — another food-themed favorite with lots of room for creativity
🐠 Paper Plate Fish Craft — uses the same repeating-shapes technique as the watermelon rind
🐢 Paper Plate Turtle Craft — great follow-up for kids who loved the layering steps here
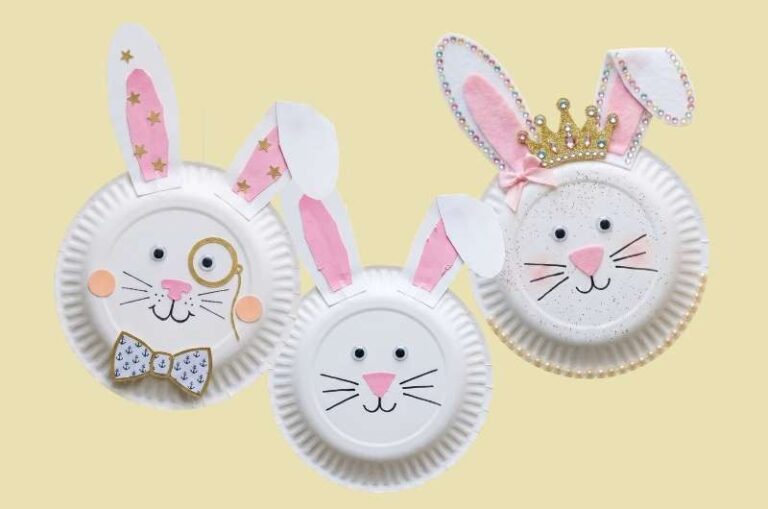
🐰 Easy Bunny Craft for Kids — simple, fun, and endlessly customizable

Final Thoughts
What sets this craft apart from most paper plate projects is that cutting step at the end, it turns something flat and circular into something that actually looks like food, and kids find that genuinely magical.
Add in the painting, the patterned rind, and the seed placement, and you’ve got a craft with enough variety to keep different ages engaged at the same time. Keep a few paper plates in reserve. They’re going to want to make another one.