This post may contain affiliate links. If you make a purchase through these links, I may earn a small commission at no extra cost to you. Thank you so much for your support.
Winter crafts for kids can turn a cold afternoon into something to look forward to, especially when the supplies are already tucked away in a drawer.
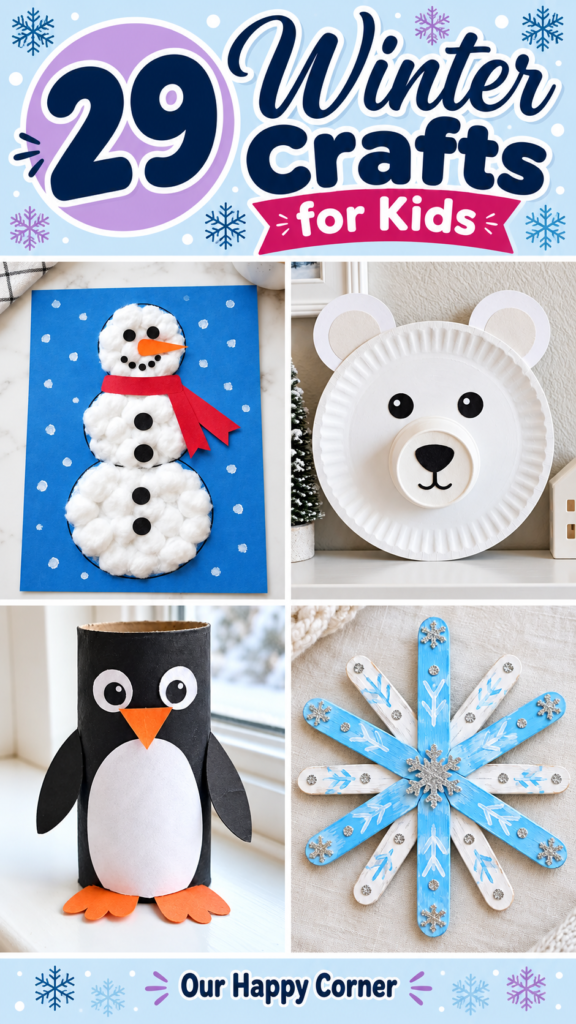
A few paper plates, scraps of yarn, and a little paint can become fluffy snowmen, snowy owls, colorful mittens, or a whole tiny mountain scene.
You do not need to set up every project at once. Pick the one your child is excited about, clear a little space, and enjoy making something together.
These ideas include quick paper crafts, textured painting, and a few small builds. Each one has its own supplies and steps, with room for children to choose colors and add their own details.
Gather a Few Everyday Winter Craft Supplies
Start with cardstock, colored paper, white school glue, child-friendly scissors, washable paint, and a protected work surface. Paper plates, clean cardboard tubes, yarn, tissue paper, and a paper egg carton will cover many of the projects below.
Thicker paper is worth using when a craft has lots of glue, salt, or paint. Save thin cardboard from food boxes for mitten shapes, skate blades, and little hidden supports.
Put out only what you need for the project you choose. A small tray for paper scraps and a spot for drying artwork make the afternoon easier to manage.
Adults can prepare firm cardboard cuts and punched holes, while kids take charge of decorating.
Use paper eyes instead of loose small embellishments for children who still put things in their mouths, and choose washable supplies labeled for their age.
Choose a Winter Craft That Fits Your Afternoon
For younger children, start with cotton ball snowmen, sponge-painted hats, or torn paper villages.
You can prepare the main shapes first and let them enjoy the gluing and decorating.
Kids who like a little challenge may enjoy lacing snowflakes, building paper-strip snowmen, or assembling standing mountains. Leave extra time for those projects so the folding and joining do not feel rushed.
If siblings want different activities, keep a few free printable winter coloring pages nearby. They are also handy while glue and paint are drying.
Winter Crafts for Kids
1. Cotton Ball Snowman
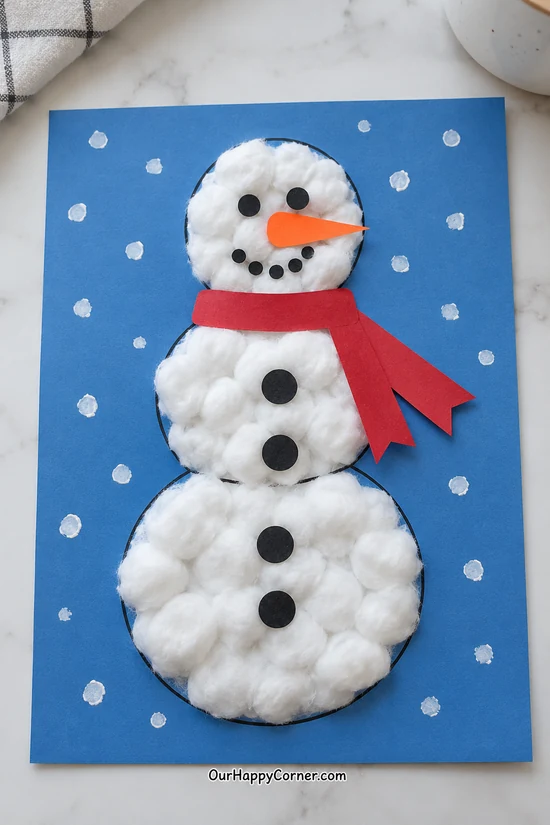
A cotton ball snowman is a lovely place to start when you want something little hands can help with right away. The fluffy body gives the project plenty of texture without needing much paint.
Draw the circles first and let your child decide how snowy to make them. A red scarf and an orange carrot nose bring the face together, while paper buttons keep the decorations easy to handle.
You can tear larger cotton balls into smaller pieces to fill the edges. Leave the finished snowman flat until the glue dries, then hang it with your other winter artwork.
Supplies: Blue cardstock, cotton balls, white school glue, white paint, black and orange paper, red paper, scissors, pencil.
How to make it:
- Draw three touching circles on blue cardstock, making the bottom circle largest. Spread a thin layer of glue inside each circle.
- Press cotton pieces into the glue, keeping the three-part snowman shape recognizable.
- Cut and glue on black eyes, a smile, buttons, an orange carrot nose, and a red paper scarf.
- Dab white snow dots around the snowman and leave the sheet flat to dry.
2. Coffee Filter Snowflakes
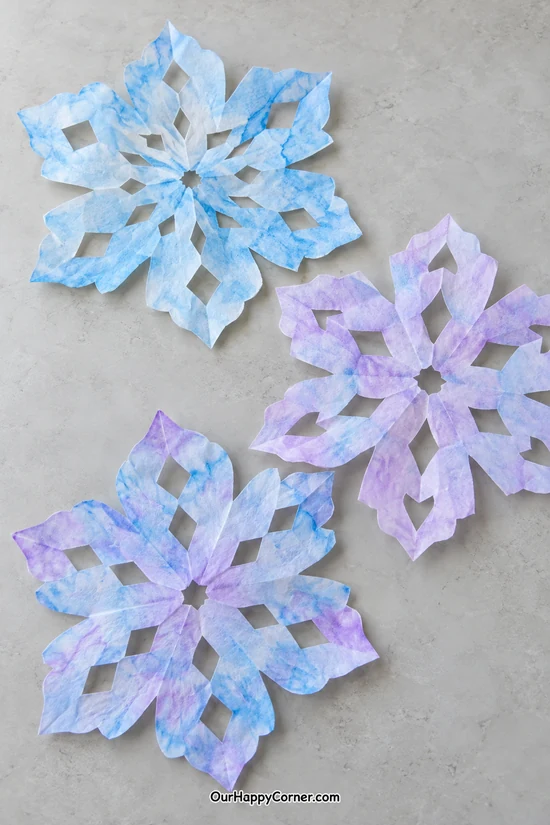
There is something satisfying about opening a folded filter and discovering the snowflake inside. Even a few small cuts can turn into a pretty pattern.
Coffee filters take watercolor beautifully, giving the blue and lavender soft, cloudy edges. Keep the paint watery but use it sparingly so the paper does not become difficult to lift.
An adult can help with the thicker folded sections while kids choose where the smaller cuts go. Once dry, these look lovely taped to a window or grouped on a wall.
Supplies: Round white coffee filters, pale blue and lavender watercolor, paintbrush, scissors, washable work mat.
How to make it:
- Flatten a round filter, fold it in half, then fold the semicircle into thirds to make a six-layer wedge.
- Snip small triangles or rounded notches from the folded edges, leaving connecting paper between cuts.
- Carefully open the snowflake and brush on touches of pale blue and lavender.
- Dry flat on a protected surface before moving or displaying it.
3. Paper Plate Polar Bear
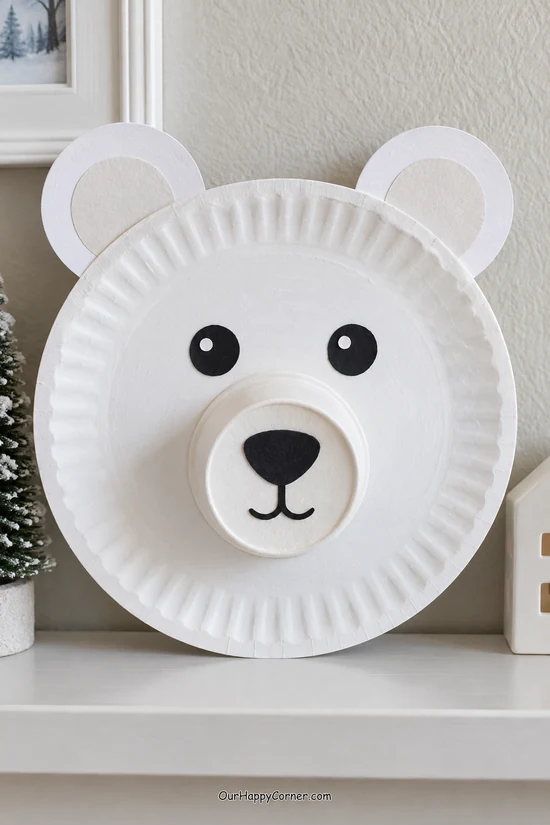
This polar bear gets its friendly expression from a big nose and two simple eyes. The raised muzzle gives an ordinary paper plate a little extra character.
Use white cardstock ears so they stay round instead of drooping. A very shallow paper cup base makes a lightweight muzzle that can be glued securely to the plate.
Let your child choose whether the bear looks sleepy, surprised, or cheerful. You can add a hanging loop on the back once everything is dry, or display the face flat on a winter art board.
Supplies: White paper plate, white cardstock, white paper cup, black paper, glue, scissors, black marker.
How to make it:
- Cut two round ears with small tabs and glue the tabs behind the top of the plate.
- An adult cuts the bottom from a white paper cup, leaving a shallow rim about half an inch tall.
- Glue the cup’s open rim onto the plate so the closed circular base faces outward as a muzzle.
- Add a black nose, a drawn mouth, and two paper eyes. Let the bear dry flat.
4. Mitten Garland
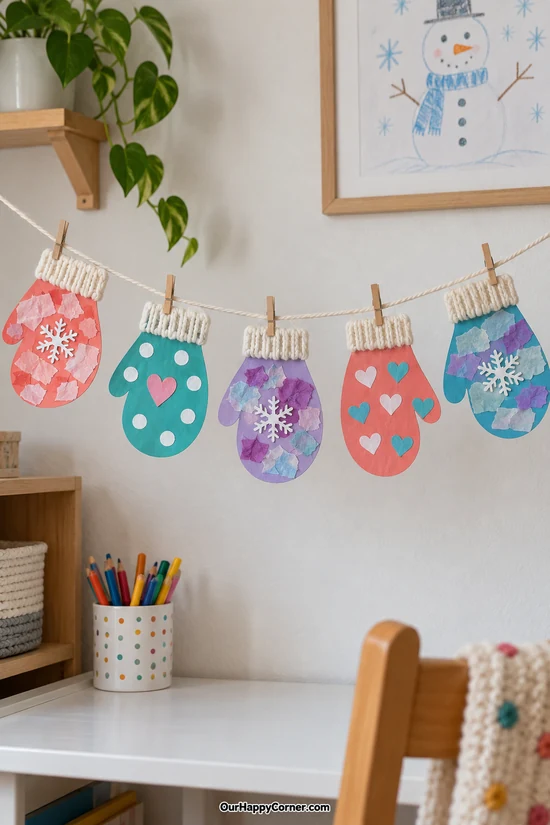
A mitten garland lets everyone contribute a small piece to one cheerful display. Different patterns make it feel more personal than a row of matching mittens.
Start with a shared mitten outline, then put out a few paper colors and tissue scraps. Yarn cuffs add a cozy touch without asking children to knit or sew.
Keep the decorations light so the cutouts hang comfortably from the string. It is a sweet choice for a classroom wall, a playroom shelf, or a winter birthday backdrop.
Supplies: Colored cardstock, tissue paper, yarn, paper shapes or stickers, glue, scissors, cotton string, mini clothespins.
How to make it:
- Trace and cut five or more mitten shapes from colored cardstock.
- Decorate each mitten with tissue pieces, dots, hearts, or snowflake stickers.
- Cut short yarn lengths and glue them side by side across each cuff. Dry flat.
- An adult hangs the string securely, then clips the mittens along it with small gaps.
5. Painted Winter Tree
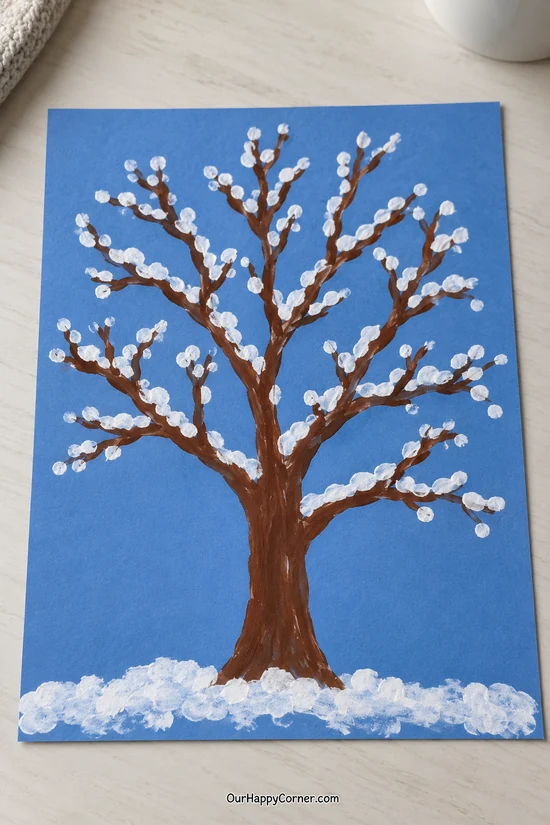
A bare tree is a good reminder that winter art does not need to be complicated to feel special. Brown branches and dotted white snow stand out beautifully against blue paper.
Let the branches grow in different directions instead of trying to make both sides match. That little bit of unevenness gives the tree a more natural shape.
Cotton swabs make it easy to add snow without covering all the branches. You could make one tree together or line up several paintings to create a small winter forest.
Supplies: Blue cardstock, brown and white washable paint, paintbrush, cotton swabs, protected work surface.
How to make it:
- Paint a trunk that narrows toward the top, then add larger branches and smaller twigs.
- Let the brown paint dry so the snow stays white.
- Dip a cotton swab lightly into white paint and dab snow along the upper sides of branches.
- Paint a snowy bank along the bottom and leave the artwork flat to dry.
6. Cardboard Tube Penguin
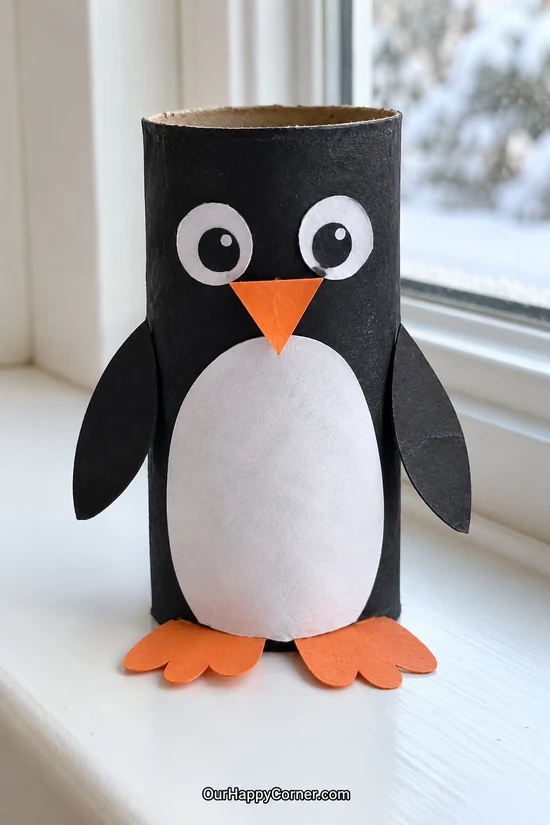
A cardboard tube makes a sturdy little penguin body with very little building. The white belly and orange feet do most of the work of turning it into a character.
Use a short, clean tube so the proportions stay compact. Broad paper feet give the penguin a place to stand and make a useful surface for attaching the tube.
Children can change the eye placement to give each penguin its own expression. Make a few together and you have the beginnings of a pretend snowy animal scene.
Supplies: Clean cardboard tube, black washable paint, white, black, and orange cardstock, glue, scissors.
How to make it:
- Paint the outside of the tube black and let it dry upright.
- Glue on a white oval belly, two eyes, and a small orange triangular beak.
- Cut two black flippers with extra inner tabs and glue the tabs onto the tube’s sides.
- Cut broad orange feet joined by a small hidden center pad, glue the tube’s lower rim to the pad, and let it set.
7. Tissue Paper Winter Suncatcher
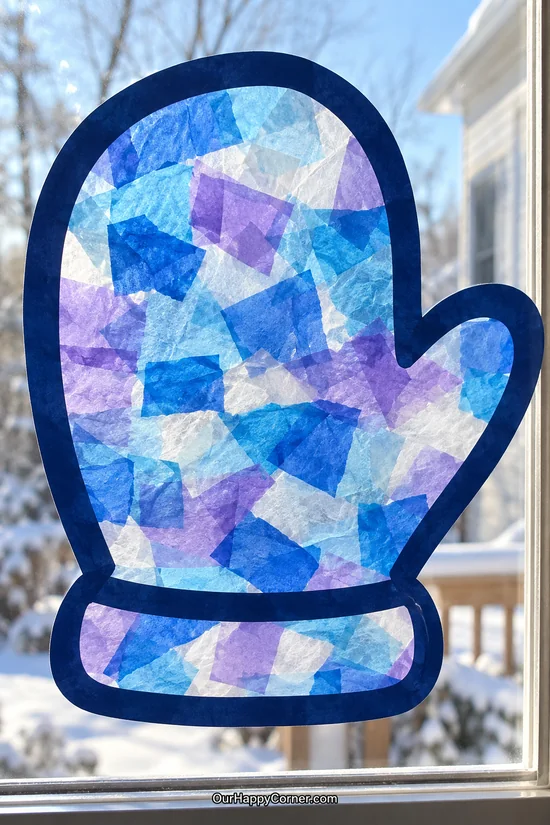
A tissue paper mitten looks especially pretty when daylight passes through it. Overlapping pieces create little changes in color that children can discover as they work.
The dark paper outline keeps the shape clear even when the middle is full of tiny scraps. Blue, white, and lavender feel wintry, but your child can choose a brighter mix too.
This is a good project for using tissue pieces left from other crafts. Stick the finished mitten to a window where everyone can enjoy the light coming through it.
Supplies: Dark blue cardstock, blue, white, and lavender tissue paper, clear contact paper, scissors, removable window tape.
How to make it:
- Cut a large mitten outline with an open center, leaving a border about three-quarters of an inch wide.
- Place the frame onto the sticky side of clear contact paper.
- Fill the opening with small tissue pieces, overlapping some while keeping the layer fairly thin.
- Cover with a second contact-paper sheet, smooth gently, trim around the frame, and tape to a window.
8. Popsicle Stick Snowflake
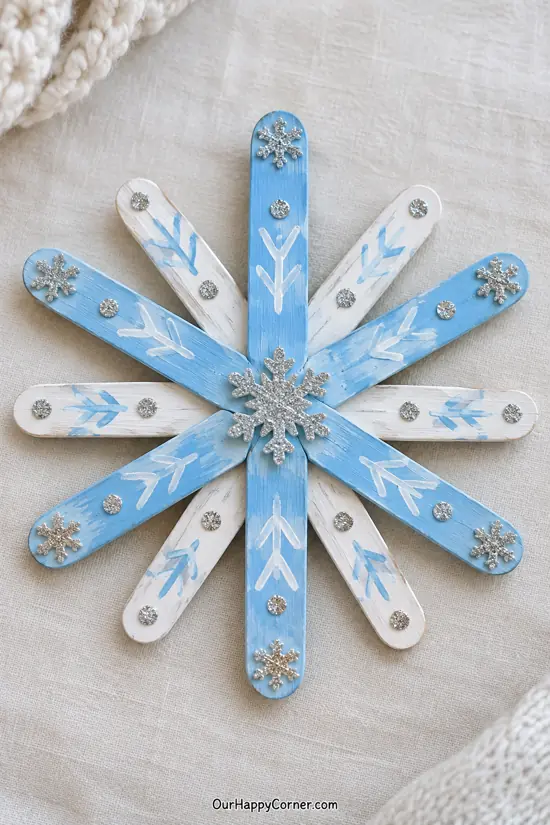
Craft sticks turn a snowflake into something children can paint and decorate on both sides. The layered center is also a useful introduction to building with flat pieces.
For this fuller design, six sticks cross at the middle to create twelve rays. Arrange them before gluing so there is a little space between every pair of ends.
Silver stickers add sparkle without loose glitter covering the table. You can keep the snowflake flat as a decoration or add a ribbon loop after the joins have dried completely.
Supplies: Six craft sticks, white and blue washable craft paint, tacky craft glue, silver stickers, brush, optional ribbon.
How to make it:
- Paint three sticks blue and three white, then let them dry.
- Arrange all six with their centers overlapping and the ends evenly spread.
- Glue the sticks together at the center, adding one layer at a time and keeping the snowflake flat.
- Add silver stickers and simple painted branch marks. Attach an optional hanging loop to the back once dry.
9. Bubble Wrap Snowy Owl
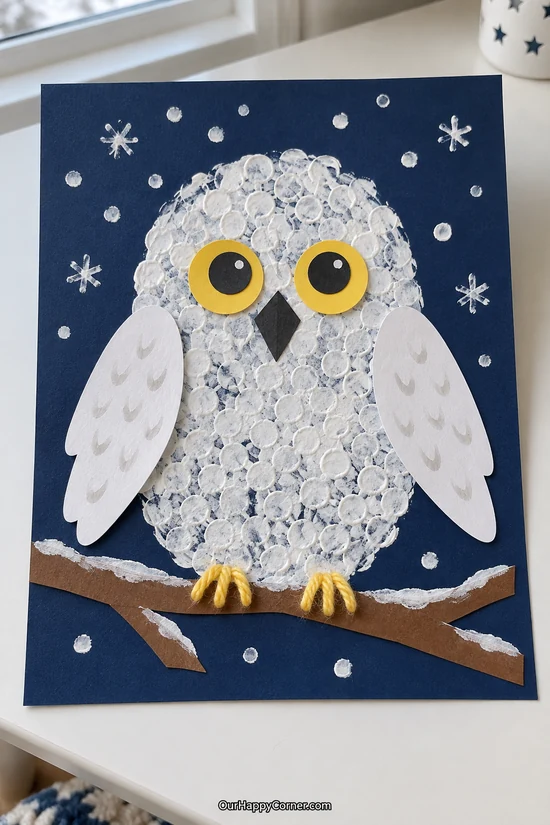
Save a small piece of bubble wrap for this snowy owl. Its printed circles give the body a feather-like texture that is much more interesting than a plain white oval.
Bright yellow eyes help the face stand out against the pale body. Paper wings and a brown branch turn the print into a complete little scene.
You do not need a perfect impression for this to work. Gaps and lighter patches make the owl feel fluffy, so let kids enjoy the stamping rather than covering every spot.
Supplies: Navy cardstock, bubble wrap, white washable paint, white, yellow, black, and brown paper, glue, scissors, optional yellow yarn.
How to make it:
- Brush a thin layer of white paint onto bubble wrap and press it onto navy paper within a large oval area.
- Lift the wrap straight up and let the print dry.
- Glue on white wings, yellow-and-black eyes, and a small dark beak.
- Add a brown paper branch under the owl and paper or yarn feet over the branch, then dab on a little snow.
10. Paper Strip Snowman
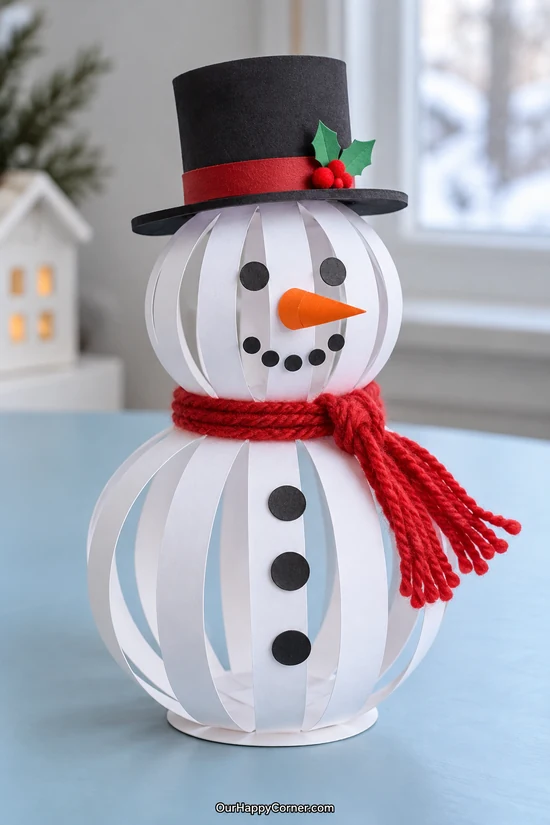
This snowman is a fun next step for kids who enjoy building rather than making a flat picture. Curved paper strips form two airy shapes with plenty of room to see how the construction works.
Cardstock holds the curves more reliably than thin printer paper. A smaller head and a broad base help the finished snowman stay balanced.
The scarf hides the join between the two sections and adds a cozy finish. Keep the hat light so it does not pull the head out of shape.
Supplies: White cardstock, black and orange paper, tacky glue, scissors, ruler, red yarn, optional small paper holly shapes.
How to make it:
- Cut six equal white strips for the body and six shorter, narrower strips for the head. Glue each set into a crossed arrangement at its center.
- Curve the free ends up and glue them together at the opposite pole to make two hollow rounded shapes.
- Glue the larger shape to a flat cardstock disk and attach the smaller shape above it. Hold each join until secure.
- Add paper facial features, buttons, a lightweight paper hat, and a short yarn scarf fixed with glue.
11. Salt-Painted Snowflakes
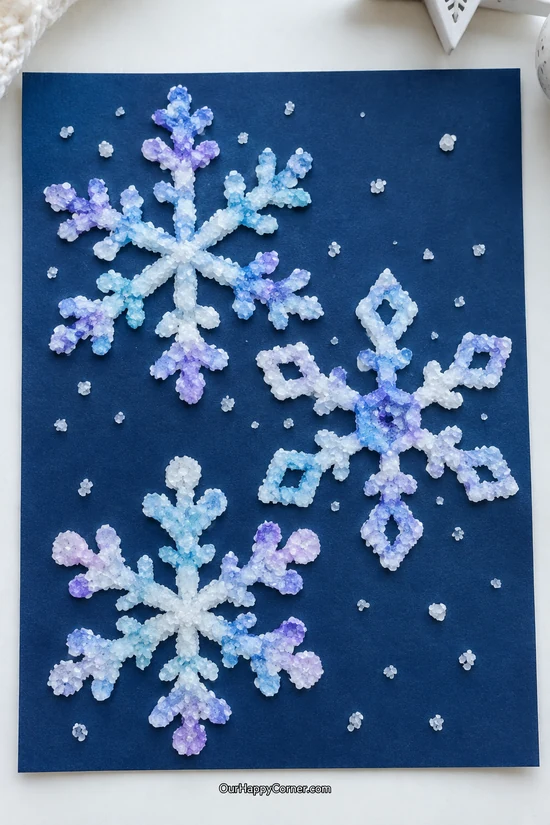
Salt painting gives snowflakes a frosty texture that ordinary paint cannot quite match. The color spreads along the salty lines, which is often the part children enjoy most.
Use thick cardstock and keep the design fairly open. Three large snowflakes are easier to paint neatly than a sheet packed with tiny ones.
Touch the color onto the salt instead of brushing back and forth. The finished surface is delicate, so this artwork is happiest displayed somewhere it will not be handled often.
Supplies: Dark blue cardstock, white school glue, table salt, blue and purple watercolor, small brush, tray.
How to make it:
- Draw large snowflakes with school glue, using six main arms and a few short branches.
- Place the paper in a tray, sprinkle salt over every glue line, and gently tip off the excess.
- Let the glue and salt set, then touch a lightly loaded watercolor brush to the lines.
- Allow the artwork to dry flat without rubbing or pressing the raised snowflakes.
12. Sponge-Painted Winter Hat
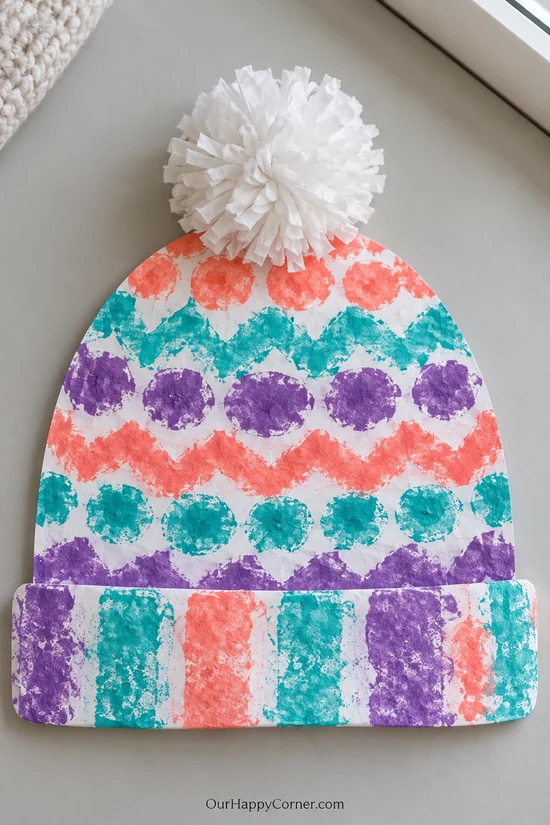
A paper winter hat is a cheerful way to use colors beyond the usual winter blues. Coral, teal, and purple make the stamped pattern feel playful and bright.
Small sponge pieces leave soft, imperfect shapes that suit a child’s artwork. A separate cuff gives the hat a more finished outline without adding much cutting.
The tissue pom-pom is the finishing touch, and it can be as fluffy as your child likes. Make different hats for a group display and let everyone choose their own color combinations.
Supplies: White cardstock, coral, teal, and purple washable paint, small sponge pieces, white tissue paper, glue, scissors.
How to make it:
- Cut a rounded hat shape and a separate wide cuff from white cardstock.
- Dip sponge pieces lightly into paint and stamp rows of dots or simple shapes across both pieces.
- Once dry, glue the cuff over the lower edge of the hat.
- Scrunch small tissue pieces and glue them into a fluffy pom-pom at the top.
13. Torn Paper Snowy Village
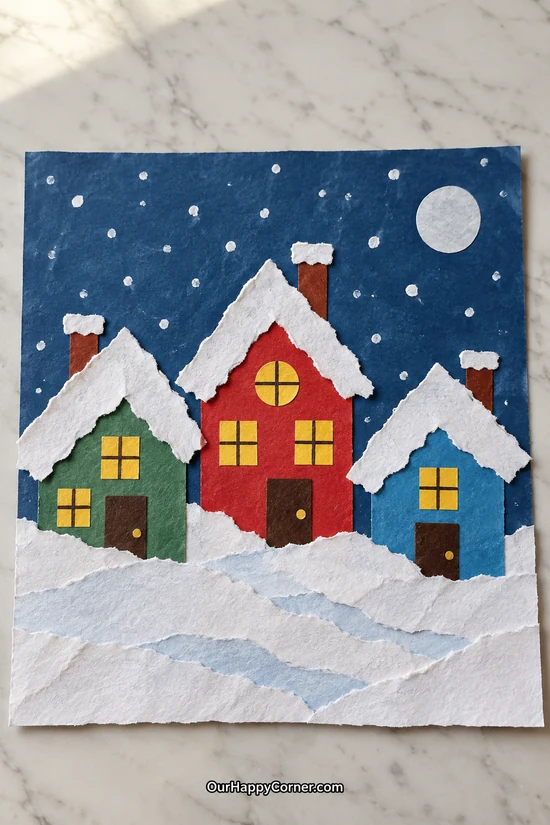
A snowy village gives children lots of little decisions to make without needing careful drawing. They can choose house colors, window shapes, and how deep the snow should be.
Torn white paper makes convincing snowy roofs and soft banks across the foreground. Layering the pieces gives the village depth while keeping the whole project flat.
You can leave the houses simple or add doors, chimneys, and a moon. This is a lovely shared project if each child makes a house for one larger village.
Supplies: Navy cardstock, red, green, blue, yellow, brown, and white paper, glue stick, scissors, white paint.
How to make it:
- Cut three house fronts in different heights and glue them across navy cardstock.
- Add yellow windows, small doors, and narrow chimneys.
- Tear white paper into snowy roof shapes and glue them over the house tops.
- Layer torn white strips across the bottom, then add a paper moon and a few painted snow dots.
14. Yarn-Wrapped Cardboard Mittens
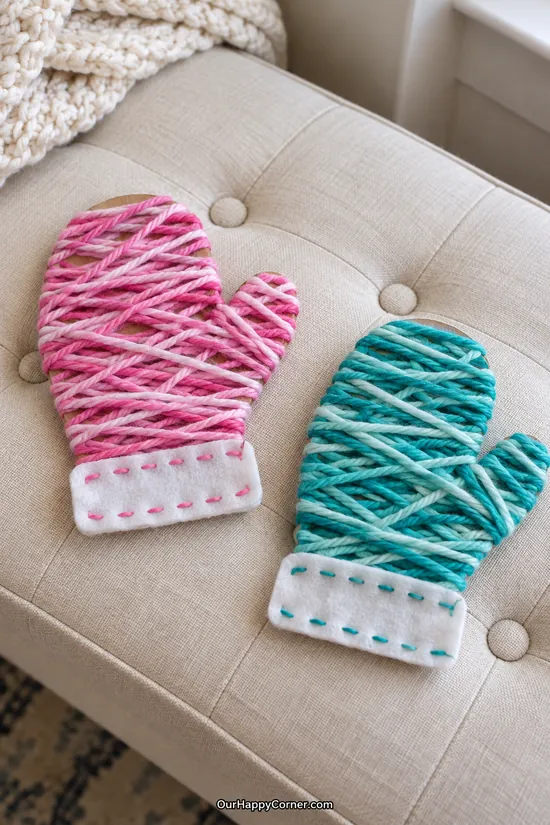
Wrapping yarn around a mitten is a calming change from painting and gluing lots of tiny pieces. The thick strands build a cozy texture quite quickly.
Keep the cardboard thumb broad so it still looks like a mitten after wrapping. Small notches around the edge can help the yarn stay where your child puts it.
A felt cuff covers the lower edge and gives you a place to add a few simple stitches if desired. The mittens also make sweet winter decorations when displayed as a pair.
Supplies: Thin cardboard, pink and teal chunky yarn, white felt, glue, scissors, pencil, optional blunt yarn needle.
How to make it:
- Trace two broad mitten shapes onto cardboard and cut them out. Add a few tiny edge notches if the yarn slips.
- Tape or glue one yarn end to the back, then wrap across the body and thumb in several directions.
- Secure the final end on the back with glue.
- Glue white felt across each cuff and add optional simple yarn stitches through pre-punched holes.
15. Paper Plate Snow Globe
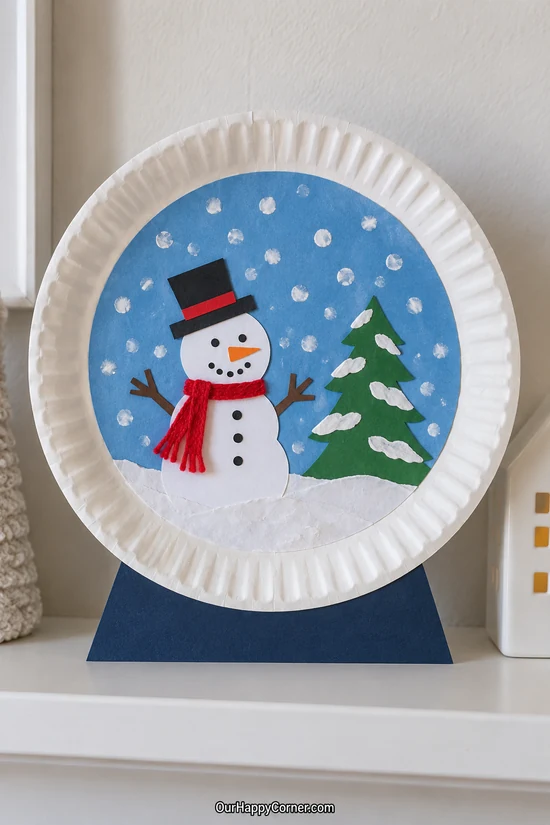
You can capture the charm of a snow globe without using a jar or water. A paper plate gives this winter scene its round shape and a ready-made border.
Keep the snowman and tree large enough to recognize at a glance. Torn white snow, painted dots, and a little yarn scarf add texture without making the scene crowded.
The blue paper base finishes the snow globe silhouette. Display it against a wall or on an art board, since the flat paper base is decorative rather than a freestanding support.
Supplies: White paper plate, blue cardstock, green, white, black, orange, and brown paper, red yarn, glue, scissors, white paint.
How to make it:
- Cut a blue circle to fit inside the plate and glue it down.
- Build a small paper snowman and evergreen on the circle, adding torn white snow along the bottom.
- Glue on the snowman’s hat, face, arms, buttons, and short yarn scarf, then dab white snowfall around the scene.
- Glue a broad blue trapezoid behind the lower edge of the plate and let the whole piece dry flat.
16. Fork-Painted Polar Bear
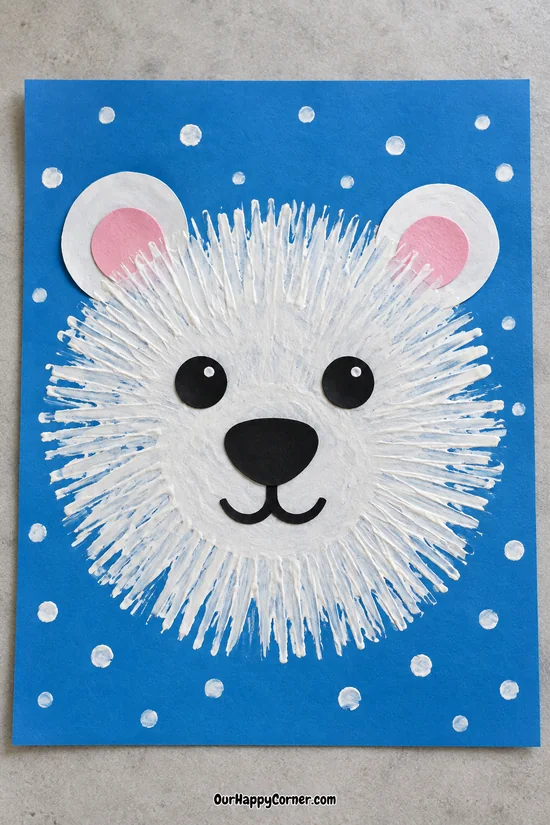
A fork makes wonderfully shaggy fur for this friendly polar bear. It is a fun painting tool when children are ready to try something beyond a brush.
Start with a white center and drag the paint outward in short strokes. Leaving some blue between the outer marks helps the furry edge stay clear.
Round paper ears and a large black nose keep the face easy to assemble. If you are choosing winter crafts for kids who love messy art, this one deserves a spot on the table.
Supplies: Blue cardstock, white washable paint, fork used only for crafts, white, pink, and black paper, glue, scissors.
How to make it:
- Paint a broad white circle in the center of blue cardstock.
- Dip the fork into a small amount of paint and pull short strokes outward around the circle.
- Let the paint dry, then glue on round ears with pink centers.
- Add black eyes, a broad nose, and a curved paper or drawn mouth, plus a few white snow dots around the bear.
17. Accordion Paper Penguin
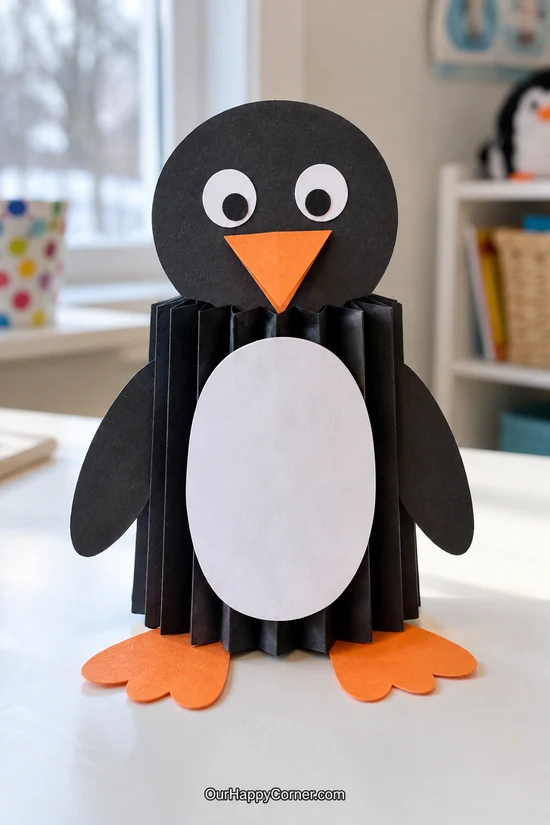
This penguin has a pleated body that makes it feel different from the cardboard tube version. It is a good choice for children who enjoy folding paper into a shape they can stand up.
Use a broad strip of black paper and keep the folds roughly even. A small hidden cardboard base gives the pleats something firm to attach to.
The oval belly sits across the front folds, while the head and flippers overlap their attachment points. You can make the expression silly or sweet just by moving the eyes.
Supplies: Black paper, white and orange cardstock, thin cardboard, glue, scissors, ruler, optional paper eyes.
How to make it:
- Accordion-fold a wide strip of black paper with vertical creases, then join its short ends into a loose pleated cylinder.
- Glue its lower edge onto a small cardboard base hidden beneath the body.
- Cut a round black head, white belly, black flippers, and orange beak and feet.
- Glue the body parts in place with generous overlapping tabs and let the penguin dry standing on its base.
18. Winter Animal Tracks Painting
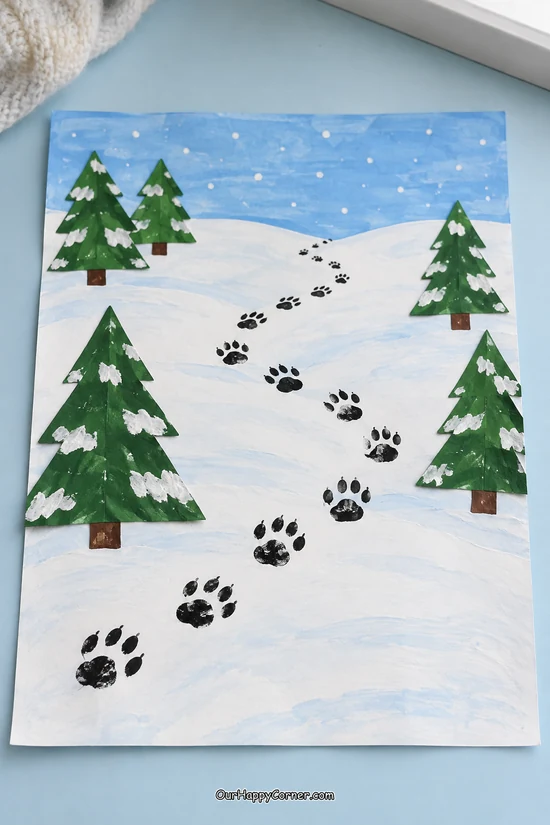
A trail of little paw prints turns a snowy picture into a story. Your child can decide which animal crossed the clearing and where it was going.
Use one simple paw stamp repeatedly rather than drawing every print from scratch. A winding trail adds movement and leaves room for evergreen trees along the sides.
This is also a nice chance to talk about the tracks you might find outdoors. Keep the artwork playful, and let the child invent the story behind the prints.
Supplies: White cardstock, blue, white, and black washable paint, green and brown paper, thin cardboard, glue, scissors.
How to make it:
- Paint a pale blue sky and soft snowy banks, leaving plenty of white space.
- An adult cuts a small cardboard paw pad and toe shapes, then glues them onto a firm cardboard handle block to make a stamp.
- Once the glue is dry, dab the stamp lightly with black paint and print a winding trail.
- Glue paper evergreens beside the trail and add white painted snow to their branches.
19. Cardboard Ice Skates
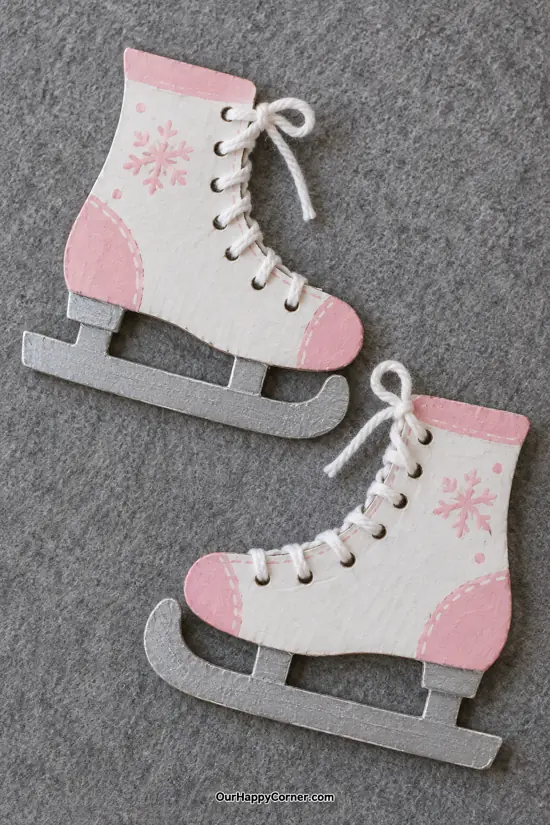
These little skates combine decorating with a bit of lacing practice. Pink trim and silver blades make the finished pair feel special without needing expensive materials.
Keep the boot and blade shapes broad enough to cut from cardboard. The two small supports between each boot and blade are important because they make the skate construction believable.
Punch the lace holes before painting so the surface stays tidy. Children can thread the yarn slowly, and an adult can help with the bow at the end.
Supplies: Thin cardboard, white, pink, and silver craft paint, white yarn, hole punch, glue, scissors, pencil.
How to make it:
- Draw and cut two boot shapes, two blades, and two short blade supports for each skate.
- Punch a row of lace holes along each boot front, then paint the boots white with pink trim.
- Paint the blades and supports silver. Glue the supports behind the boots and blades with overlapping joins.
- Thread white yarn through the holes, tie the ends, and leave the pair flat to dry.
20. Egg Carton Penguins
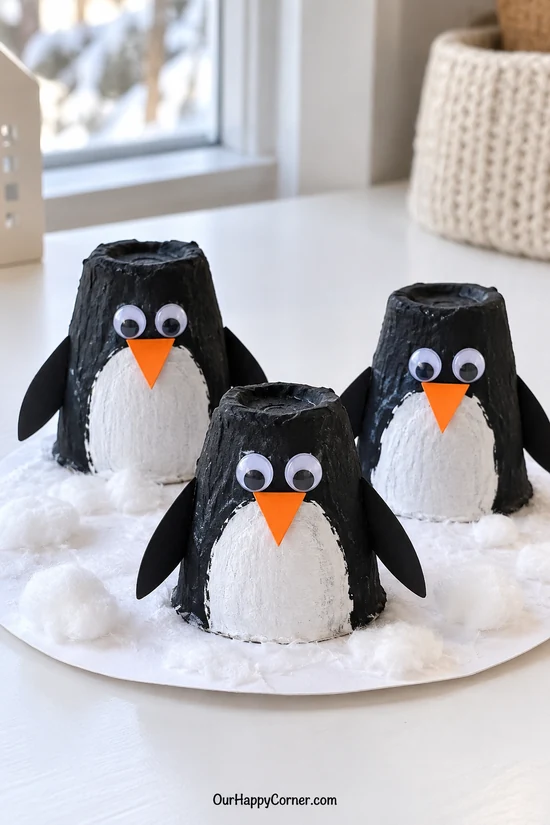
Egg carton penguins are small enough to make as a whole little group. Their uneven cardboard texture gives them a handmade charm before you add any details.
Turn the cups open-side down so the wider edge becomes the base. White belly patches, paper flippers, and orange beaks make the characters recognizable with just a few additions.
A snowy cardboard platform keeps the group together for display. Give each penguin a different eye direction and they soon seem to be looking around their winter home.
Supplies: Clean paper egg carton, black and white washable paint, black and orange paper, paper or googly eyes, cardboard base, cotton, glue, scissors.
How to make it:
- An adult separates three carton cups and trims their open edges so they rest steadily.
- Paint them black, let dry, then add white belly patches to the fronts.
- Glue on eyes, orange triangular beaks, and black flippers with small overlapping tabs.
- Glue the cups open-side down onto a white cardboard base and add cotton snow around them.
21. Paper Bag Hibernating Bear
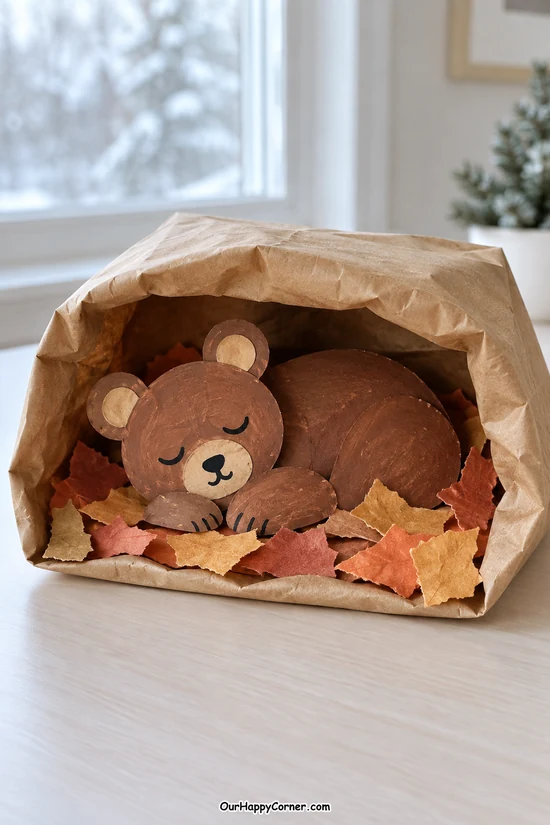
A paper bag becomes a cozy cave with a sleeping bear tucked inside. It is a sweet winter project for children who enjoy making little homes for their characters.
The crumpled bag does not need to look smooth or perfect. Its soft folds help the cave feel snug, while torn paper leaves give the bear a place to rest.
Make the bear from simple overlapping circles and ovals. Closed eyes finish the sleepy expression, and the cave can become a prop for a winter story afterward.
Supplies: Brown paper lunch bag, brown and tan cardstock, autumn-colored paper scraps, black marker, glue, scissors.
How to make it:
- Open the bag and lay it on its broad side with the opening facing forward. Gently roll the opening outward to help it stay open.
- Cut a bear body, round head, ears, muzzle, and front paws from cardstock.
- Glue the bear together, draw closed eyes and a nose, and fold a small hidden support behind the body if needed.
- Tuck it into the bag on torn paper leaves and glue the contact points so the scene stays together.
22. Snowman Name Garland
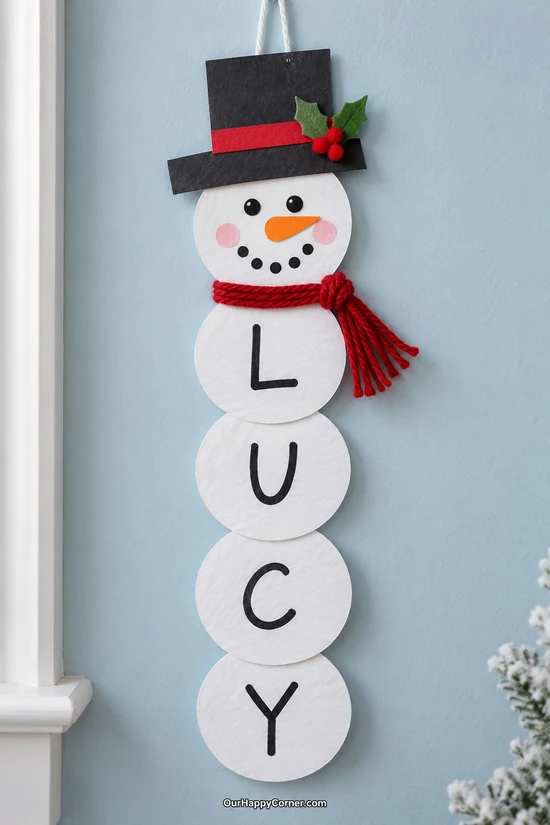
A snowman name craft gives children a winter decoration that belongs just to them. Each letter gets its own snowball, so short and long names create different snowman bodies.
Write the letters clearly and leave a little room around each one. Children can help arrange the circles in order before anything is glued.
A paper hat and yarn scarf give the head a friendly finish. This works especially well on a bedroom door or classroom display where everyone can spot their own name.
Supplies: White and black cardstock, orange paper, black marker, red yarn, glue, scissors, short hanging loop.
How to make it:
- Cut one large white head circle and one white body circle for every letter of the child’s name.
- Write one uppercase letter on each body circle and arrange them in the correct order beneath the head.
- Overlap the circles slightly and glue them together, adding a narrow cardstock strip on the back for reinforcement.
- Add the face, hat, and glued-on scarf, then attach a short hanging loop to the reinforced back.
23. Northern Lights Winter Art
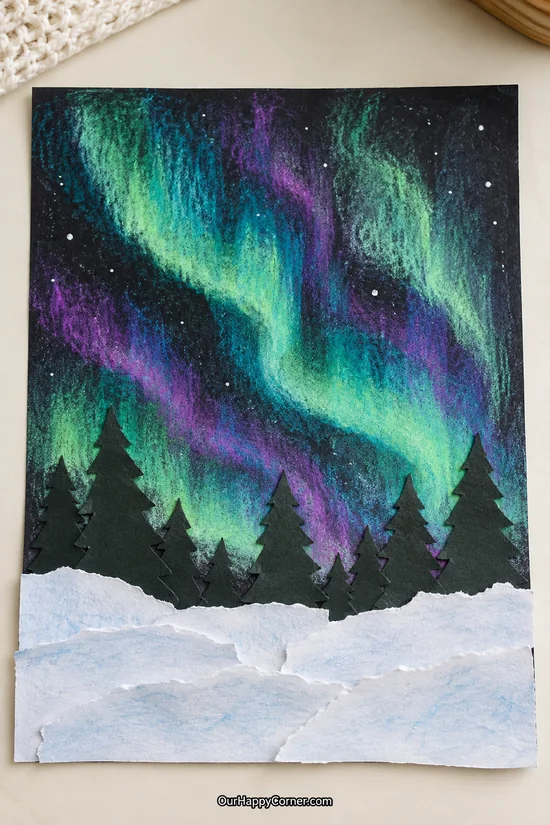
Northern lights art brings a richer mix of colors to a winter craft session. Green, teal, and purple sweep across dark paper while the snowy foreground keeps the scene grounded.
Chalk pastels make it possible to blend the colors without filling a cup with paint water. Let children experiment on a scrap first so they can see how lightly the color can be spread.
Dark evergreen silhouettes provide a crisp contrast to the soft sky. The finished picture feels dramatic, but the individual steps remain approachable for school-age kids.
Supplies: Black cardstock, green, teal, and purple chalk pastels, dark green paper, white paper, glue, scissors, blending tissue.
How to make it:
- Draw loose bands of green, teal, and purple chalk across the upper part of the black cardstock.
- Use folded tissue to blend each band gently upward, keeping some dark sky visible.
- Cut evergreen silhouettes and glue them along the lower edge of the sky.
- Layer torn white paper snowbanks in front of the tree bases and handle the chalk surface by its edges.
24. Paper Plate Walrus Collage
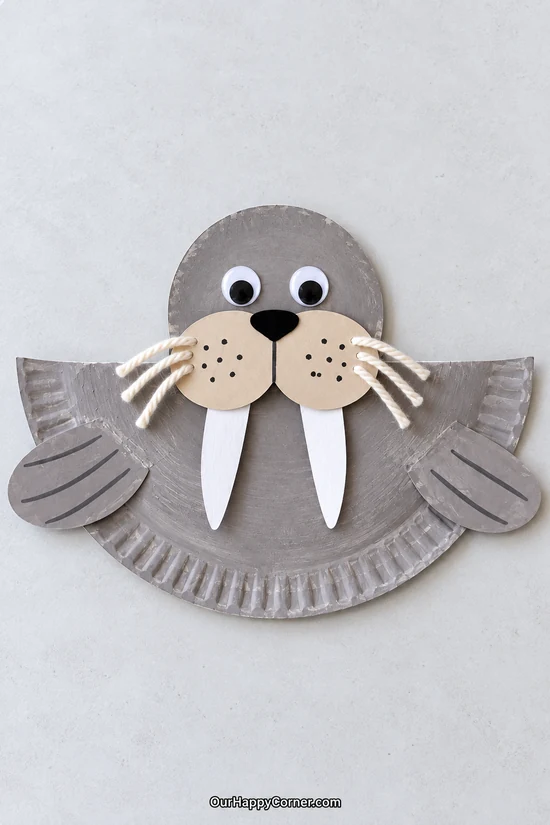
A walrus is a fun change when you have already made plenty of snowmen and penguins. The long white tusks and yarn whiskers give this face its personality.
Keep this project as a flat collage rather than trying to balance it on the plate edge. The paper flippers overlap the plate, giving them a proper place to attach.
Gray paint can be a little patchy and still look lovely on the textured plate. Once dry, the whole craft can go straight onto a winter art display.
Supplies: Paper plate, gray and cream cardstock, gray washable paint, white and black paper, googly eyes, white yarn, glue, scissors, black marker.
How to make it:
- Cut a paper plate in half and paint one half gray, along with two cardstock flippers and a round head if needed.
- Lay the semicircle flat with its straight edge at the top. Glue the head behind the upper center and overlap each flipper onto the plate front.
- Add two cream muzzle circles, eyes, a black nose, and two white paper tusks tucked beneath the muzzle.
- Glue short yarn whiskers onto the muzzle, draw small dots, and leave the collage flat until secure.
25. Winter Cardboard Binoculars
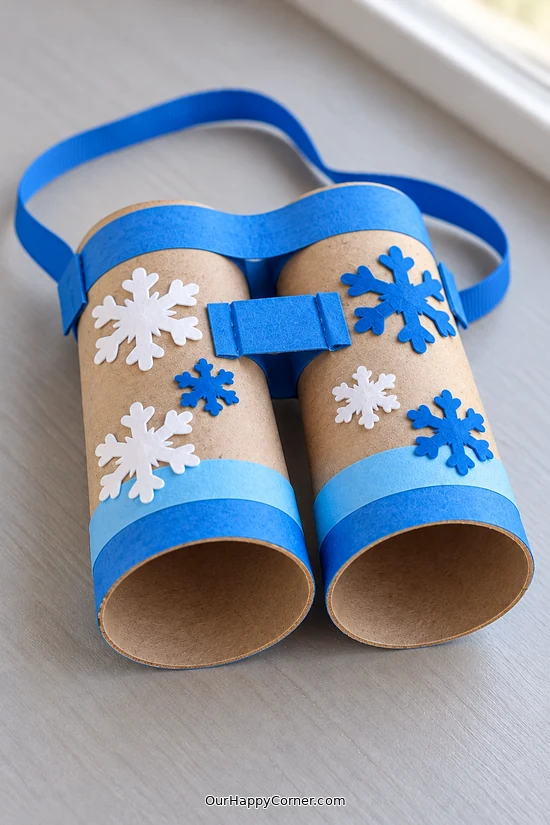
Pretend binoculars give children something to play with after the glue dries. The connecting bridge and blue carrying loop help these look like one finished object rather than two decorated rolls.
Keep both tubes straight and their openings clear. Paper bands and a folded cardboard bridge hold the pair together without changing the shape of the rolls.
Snowflake decorations make them fit a winter wildlife theme. Invite your child to spot birds through a window or take them along for supervised pretend exploring.
Supplies: Two clean cardboard tubes, blue paper, blue and white paper snowflakes, thin cardboard, glue, tape, short blue ribbon.
How to make it:
- Decorate the tubes with blue paper rims and paper snowflakes, keeping all openings uncovered.
- Place the tubes parallel with a small gap and glue a folded cardboard bridge across their upper middle, using tabs that overlap both tubes.
- Secure a wide blue paper band around the pair near the rear and allow every join to dry.
- Tape a short ribbon loop securely to the outer sides as a hand-carrying strap, keeping it too short to wear around the neck.
26. Winter Bird Collage
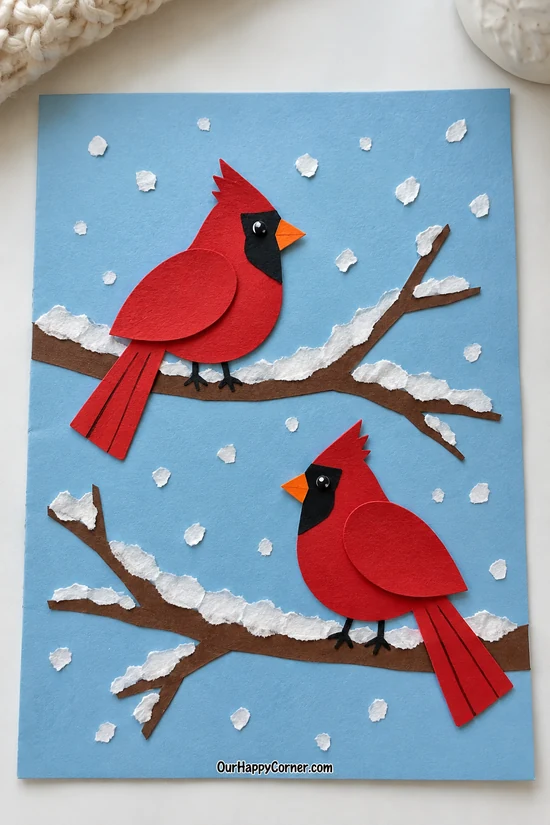
Red cardinals bring a welcome pop of color to a snowy craft display. Their pointed crests and dark face patches make them recognizable from simple paper shapes.
Build each bird from a rounded body, a smaller head, a wing, and a long tail. The pieces can overlap naturally, so there is no need to cut a complicated all-in-one outline.
Snowy branches give the birds a place to perch. You can add one cardinal or two, leaving enough blue paper around them for the red shapes to stand out.
Supplies: Light blue cardstock, red, black, orange, brown, and white paper, glue, scissors, paper or small googly eyes.
How to make it:
- Glue branching brown paper strips across light blue cardstock.
- Cut rounded red bodies, crested heads, wings, and long tail shapes, then assemble the birds on the branches.
- Add black face patches, small orange beaks, eyes, and thin black feet touching the branches.
- Glue torn white snow along the tops of the branches and scatter small white paper pieces around the birds.
27. Paper Icicle Garland
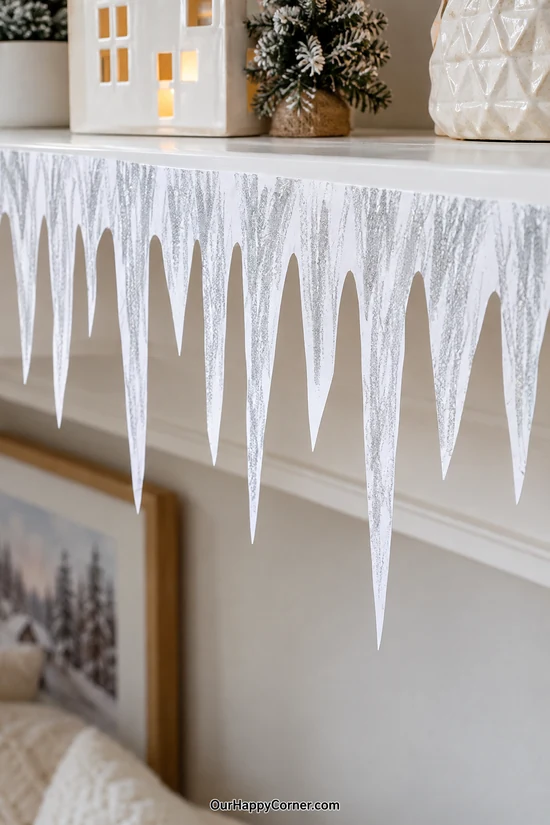
Paper icicles are a simple way to give a shelf or display board a winter edge. Varying the lengths helps the garland look more natural than a row of identical triangles.
Keep the icicles joined to one wide top band so the whole strip is easy to handle. Silver crayon adds a frosty shimmer without weighing the paper down.
This is a useful cutting project for children who are ready for longer lines. Hang the garland where it can be enjoyed without being brushed or pulled as people pass.
Supplies: White paper or lightweight cardstock, silver crayon, pencil, scissors, removable tape.
How to make it:
- Mark a wide horizontal band along the top of a long paper strip.
- Draw long tapered icicles below it, alternating shorter and longer points.
- Cut away the spaces between the icicles while leaving the top band intact.
- Shade lightly with silver crayon and tape the top band securely to a shelf front or display board.
28. Standing Snowy Mountain Scene
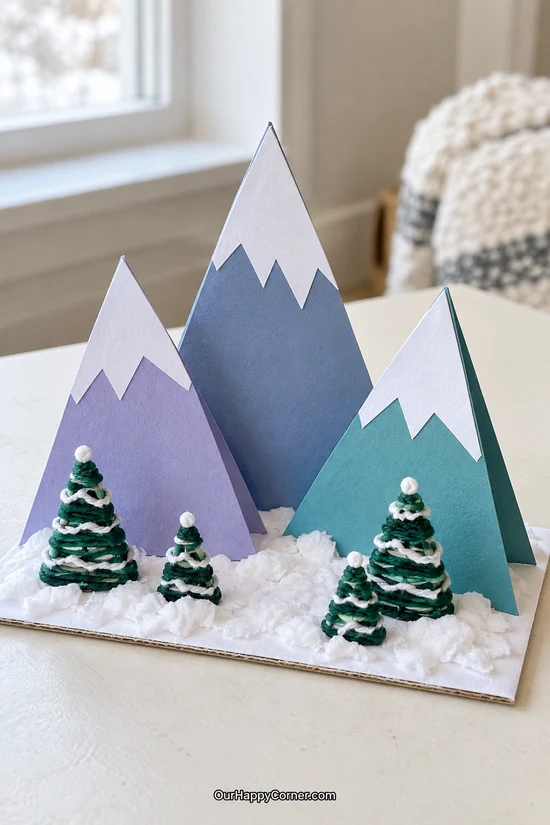
Standing mountains turn a few paper shapes into a little winter landscape. Different heights and overlapping positions help the scene feel bigger than its cardboard base.
Folded side panels support the mountains, so the triangles do not have to balance on a thin edge. White paper snowcaps make the peaks clear with very little decorating.
The small yarn-wrapped trees add another texture if you want a fuller scene. Children can arrange all the pieces before gluing and decide where the snowy path might lead.
Supplies: Slate blue, lavender, teal, and white cardstock, cardboard base, glue, scissors, white tissue, optional green and white yarn and small paper cones.
How to make it:
- For each mountain, fold cardstock in half and cut a tall triangle with the peak on the fold, creating two joined triangular faces.
- Open each mountain slightly like a tent and glue folded bottom tabs to the cardboard base.
- Add white paper snowcaps to the fronts and torn white tissue around the mountain bases.
- For the trees, wrap small cardstock cones with green yarn, glue them to the base, and add short white yarn snow accents.
29. Lacing Snowflake Cards
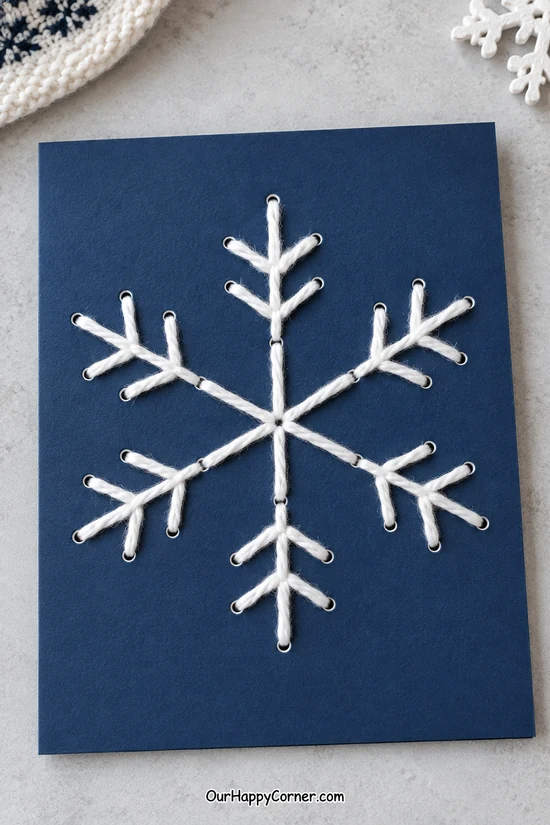
A laced snowflake is a lovely quieter project for children who enjoy working carefully. White yarn against navy cardstock makes every stitch easy to see.
Prepare the holes first so children can focus on following the pattern. Six main arms and a few short branches are enough to create a clear snowflake shape.
Keep the yarn gently snug rather than pulling it tight enough to bend the card. You can display the finished piece as winter artwork or attach it to the front of a larger greeting card.
Supplies: Navy cardstock, white yarn, blunt plastic yarn needle, pencil, small hole punch, tape, optional blank greeting card.
How to make it:
- Sketch a six-armed snowflake and mark holes at the center, arm ends, branch junctions, and branch tips.
- An adult punches the marked holes, leaving enough cardstock between nearby holes.
- Tape the yarn end to the back, then lace the main arms and smaller branches through the prepared holes.
- Secure the final end on the back and cover the reverse with another cardstock sheet or mount it onto a blank card.
Final Thoughts
The best winter crafts for kids are the ones they enjoy making, whether the snowflakes come out uneven or the penguin ends up with a wonderfully silly face. Choose a few favorites and let the finished pieces build into a cheerful winter display over time.
For another cozy activity, try our Christmas coloring pages for kids during the holiday season. And if you like keeping a collection of ideas for each season, save our fall crafts for kids for later in the year.