This post may contain affiliate links. If you make a purchase through these links, I may earn a small commission at no extra cost to you. Thank you so much for your support.
Winter sewing projects are a lovely way to spend a quiet afternoon and make something you’ll reach for all season.
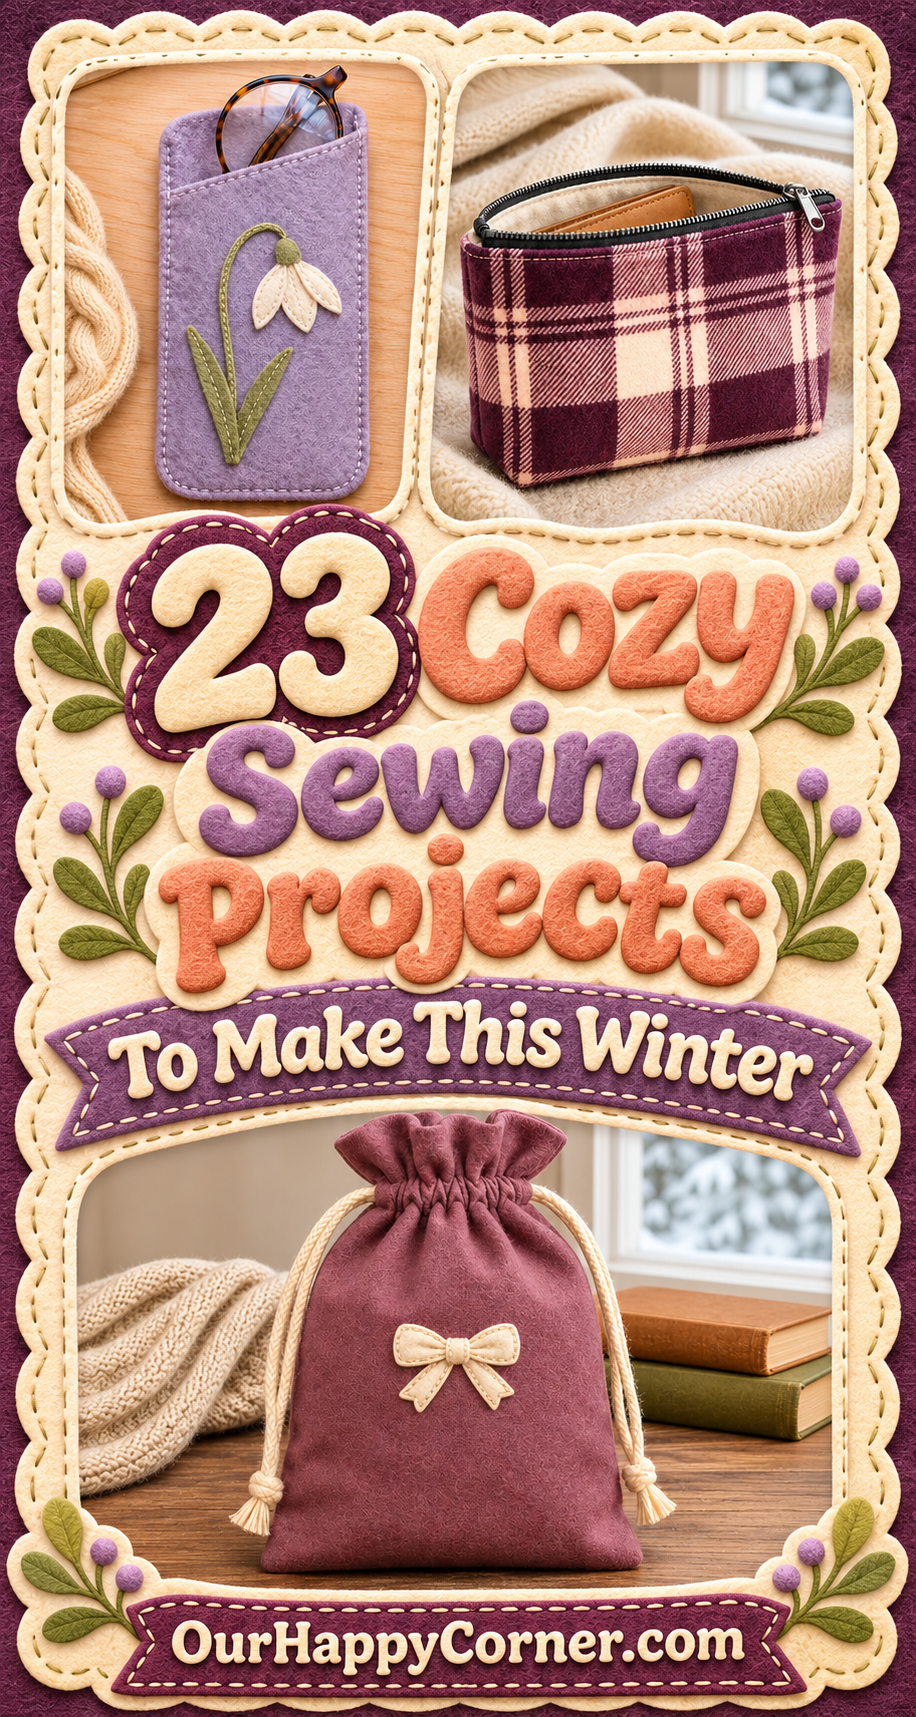
I’ve included cozy pieces to wear, simple ways to warm up a room, and little gifts you can make with the fabric you already have.
If you’re just getting started, the bread basket liner and felt glasses case are both good first projects. If you have a little more sewing time, try the quilted table runner or the lined laptop sleeve.
Each idea has a photo and steps to help you make it. Start with whichever one makes you want to pull out your sewing machine or reach for a needle and thread.
Before You Start Sewing
Before starting these winter sewing projects, gather a fabric marker, sharp scissors, a tape measure, pins or clips, and thread to match your fabric.
Prewash cotton and flannel the way you plan to wash the finished piece. Check the care label on wool and velvet before you wash or press them.
For clothes and fitted pieces, choose your pattern first and use its size chart, fabric requirements and seam allowances. The steps here explain the construction shown in the photos.
If you’re using batting, lining or several layers of fabric, try a short test seam on a scrap stack before you sew the actual project.
Cozy Clothing and Everyday Sewing Projects
1. Cranberry Plaid Flannel Pajama Pants
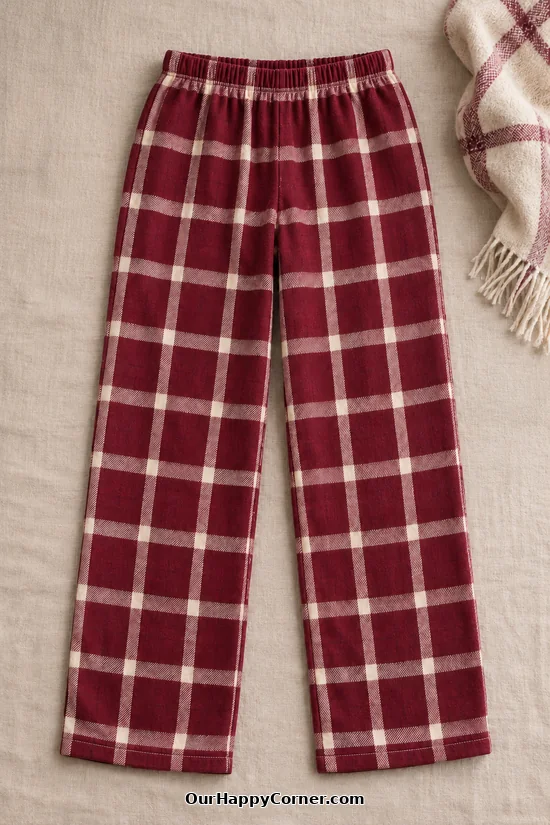
These cranberry plaid pajama pants are the pair I’d reach for on a slow Saturday morning.
Brushed cotton flannel feels soft inside, and the straight legs leave room to move.
Use a pull-on pajama pants pattern in your size and check its fabric chart before shopping.
Matching the big cream lines at the side seams makes the plaid look especially tidy.
How to make it:
- Prewash the flannel, then lay the pattern pieces on a single layer so you can align the plaid and cut mirrored pieces.
- Sew each front to its matching back at the side seam and inseam.
- Turn one leg right side out and slip it into the other leg with right sides together. Sew the continuous crotch seam.
- Fold the waistband to form a casing and leave an opening for the elastic. Fit the elastic, stitch its ends securely together, then close the opening.
- Try on the pants, mark both hems, and turn and stitch them to the same length.
Helpful tip: Baste the plaid side seams before machine stitching if the lines tend to shift.
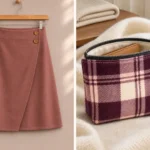
2. Dusty Rose Wool Wrap Skirt
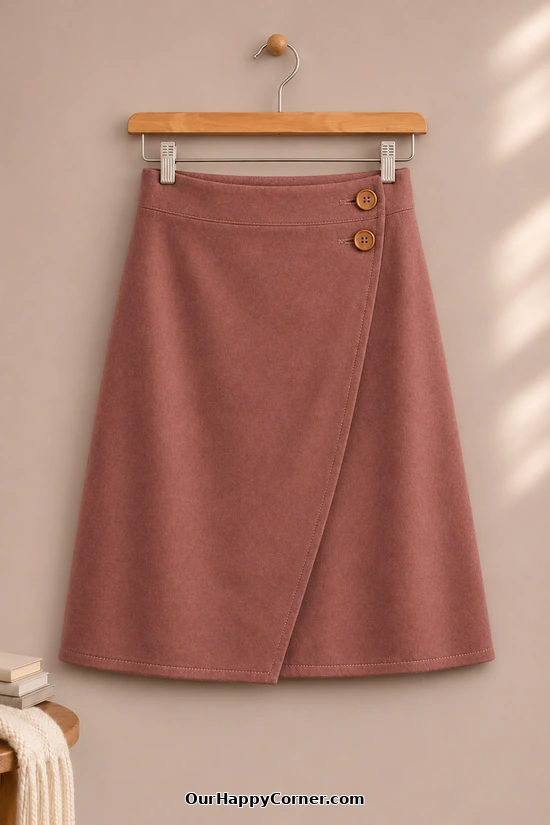
A dusty rose wrap skirt is one of those winter sewing projects you can wear straight away with tights and boots.
The diagonal overlap gives the front some shape, and the two buttons are easy to see against the wool.
Pick a woven wrap-skirt pattern with a shaped waistband, a generous overlap, and an inside fastening.
A medium-weight wool blend is a good choice if you want the skirt to hang softly.
How to make it:
- Cut the back, overlapping fronts, waistband and facing from the pattern. Apply interfacing where directed.
- Sew any darts and join the side seams, then finish the raw edges and press them with a pressing cloth.
- Finish the front edges and attach the waistband and facing. Try the skirt on before marking the closures.
- Add the inside fastening and two outer buttons with corresponding buttonholes. Check the overlap while sitting, then hem the skirt.
3. Berry Corduroy Pinafore
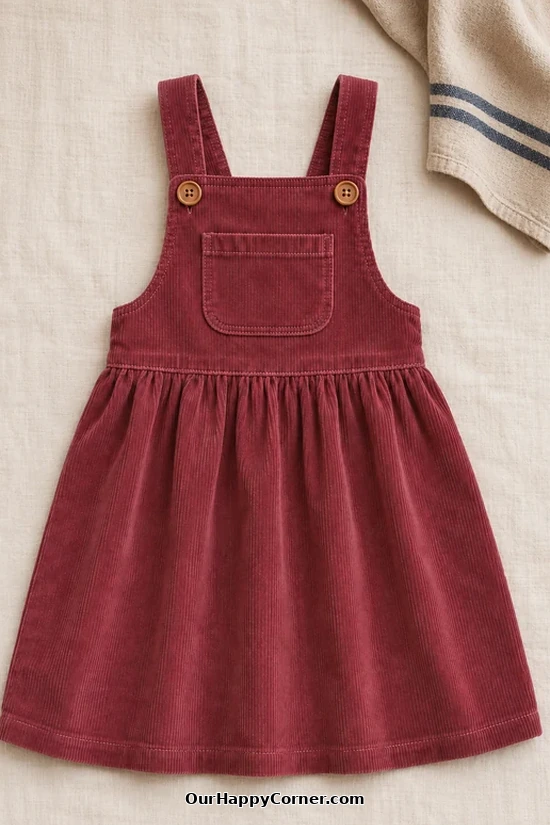
The berry corduroy and little bib pocket give this pinafore the look of a dress you can layer all winter.
I’d wear it over a long-sleeved tee on milder days or a thin turtleneck when it gets colder.
Choose a pinafore pattern with a gathered skirt, bib pocket and buttoned shoulder straps.
Fine-wale corduroy gathers more easily than a thick, wide-wale fabric.
How to make it:
- Lay all pattern pieces in the same nap direction. Cut and interface the bib or straps where the pattern calls for it.
- Turn the pocket edges under and topstitch the pocket to the bib before adding the facing.
- Sew and turn the straps, attach them at the back, and finish the top edge according to your pattern.
- Join the skirt panels, gather the waist to fit the bodice and sew them together. Try it on to mark the strap length, then add the buttonholes, buttons and hem.
4. Sherpa-Lined Plaid Dog Coat
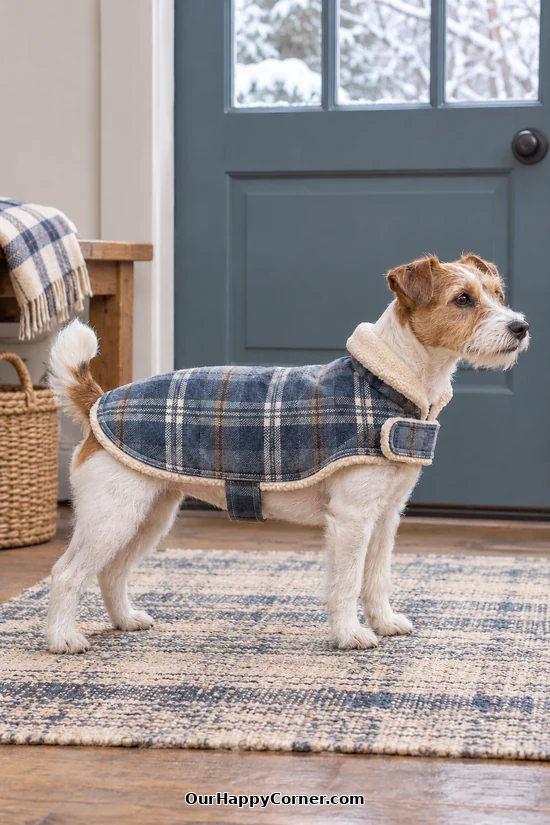
I love how the cream sherpa peeks out around the edges of this blue plaid dog coat.
The chest and belly tabs make it easy to put on before a chilly walk.
Use a dog-coat pattern that fits your dog’s back length, neck and chest measurements.
Pick a washable woven outer fabric and a soft sherpa lining that your machine can stitch comfortably.
How to make it:
- Measure your dog standing and check the paper pattern against those measurements before cutting the outer and lining.
- Make the chest and belly tabs and baste them at the pattern’s attachment points. Sew the outer and lining right sides together, leaving a turning gap.
- Clip the curves, turn and topstitch the edges, closing the gap.
- Fit the coat on your dog and mark the hook-and-loop closures. Sew them in place and check that the coat clears the legs and allows free movement.
5. Flannel Pocket Hand Warmer Covers
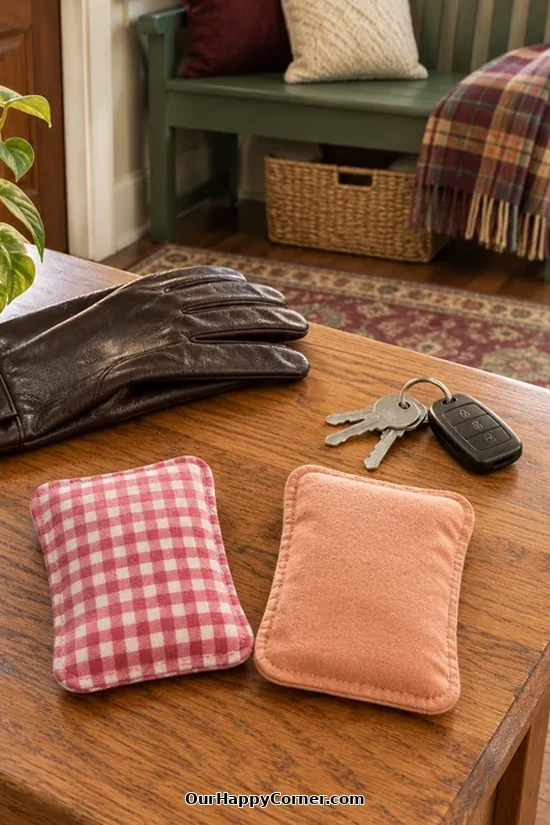
These little pink and peach flannel covers are among the quickest winter sewing projects in the list.
They slip over reusable pocket warmers and make a handy pair to tuck beside your gloves.
Measure the heat packs you already own, including their thickness, before drawing the rectangles.
A plain back and gingham front make it easy to use two small scraps from your fabric basket.
How to make it:
- Cut one front and two overlapping back pieces for each cover. Add seam allowances and enough ease to slide the pack in comfortably.
- Hem the two back edges that will overlap. Lay them over the front, right sides together, to make an envelope opening.
- Stitch around the edge, trim the corners and turn through the opening.
- Insert the warmer for use only as its manufacturer allows. Remove the cover before activating, reheating or recharging the pack unless its instructions expressly permit the cover.
See Fire and Rescue NSW heat pack guidance for more details.
6. Navy Star Flannel Sleep Mask
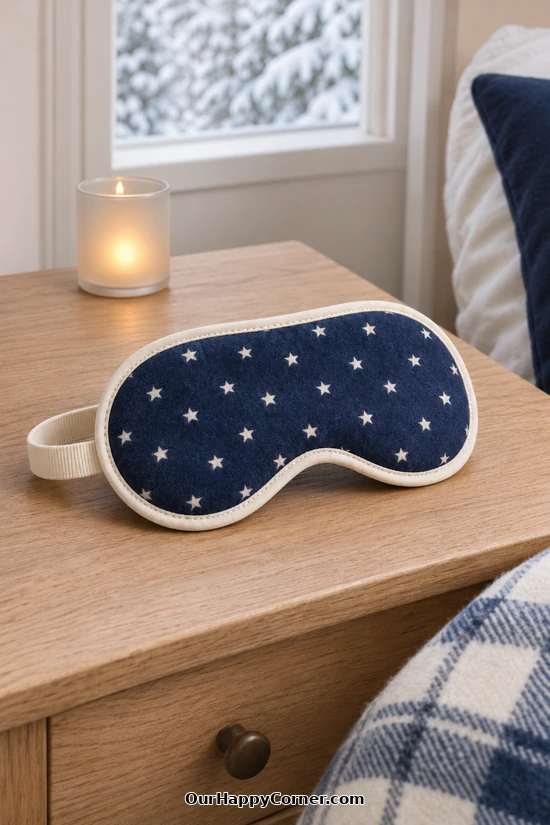
The navy stars and cream trim give this sleep mask a sweet little night-sky look.
It’s a small project you can sew for yourself or tuck into a winter care package.
Use a sleep mask template with a shallow curve over the nose and soft elastic that sits comfortably behind your head.
A dark lining and a thin layer of batting help block light without making the mask bulky.
How to make it:
- Cut the template from flannel, lining and thin batting. Baste the layers with the wrong sides of the fabrics facing the batting.
- Measure the elastic around your head, allowing room to attach each end, and baste it to the lining at the sides.
- Wrap soft bias binding around the raw edge and stitch it down, keeping the loose elastic away from the needle.
- Try it on and check that the elastic is comfortable and the binding sits smoothly over the nose.
Winter Sewing Projects for a Cozy Home
7. Blue and Cream Door Draft Stopper
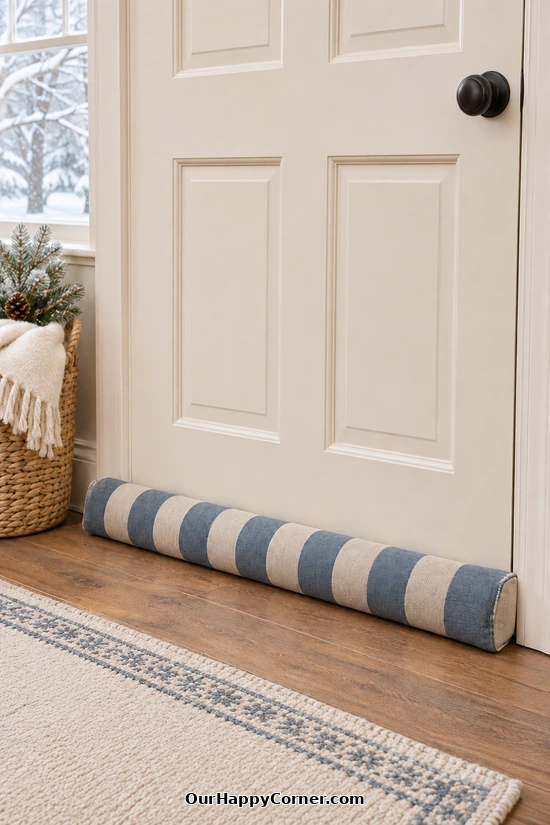
A striped draft stopper is one of my favorite winter sewing projects for a room that always feels a little chilly.
The blue and cream fabric looks good against the wood floor, and a long cylinder fits neatly along the bottom of the door.
Use a sturdy woven fabric like canvas or home decor cotton and measure the gap you want to cover.
Save your smaller fabric scraps for the filling, and add a little weight in a securely sewn inner pouch if needed.
How to make it:
- Measure the width of the door and cut a rectangle to that length plus end seam allowances. Make its short dimension the desired circumference plus the long seam allowances.
- Cut two circles to fit the ends, allowing for seams. Fold the rectangle right sides together, align the stripes and sew the long seam.
- Pin and sew on the end circles, leaving a turning gap in one seam. Turn and fill evenly.
- Close the gap with a strong ladder stitch and lay the stopper against the inside of the door.
8. Berry and Peach Patchwork Table Runner
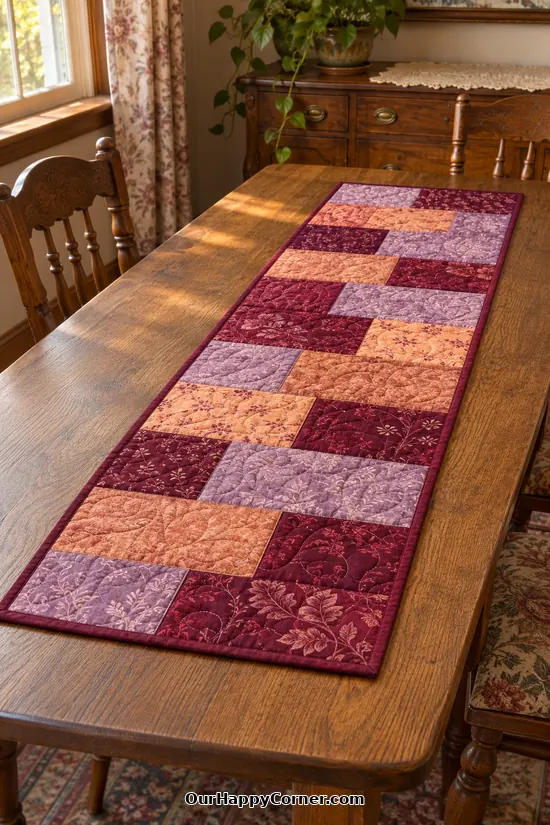
Berry, peach and lilac fabrics make this table runner feel warm enough for winter dinners.
The large rectangular pieces are a nice way to show off prints you’d hate to cut into tiny squares.
Pick a finished length that leaves room for place settings at each end of your table.
Quilting cotton, a thin batting and burgundy binding give you the look shown here.
How to make it:
- Cut rectangles in a few coordinating prints and arrange them in rows of the same width, staggering the joins.
- Sew the blocks into rows with a quarter-inch seam allowance. Press, join the rows and check that the top lies flat.
- Layer the patchwork with batting and backing, baste, and quilt through the layers in gentle curves or straight lines.
- Square the edges and bind them with burgundy fabric, mitering the corners as you go.
9. Red Striped Rod-Pocket Valance
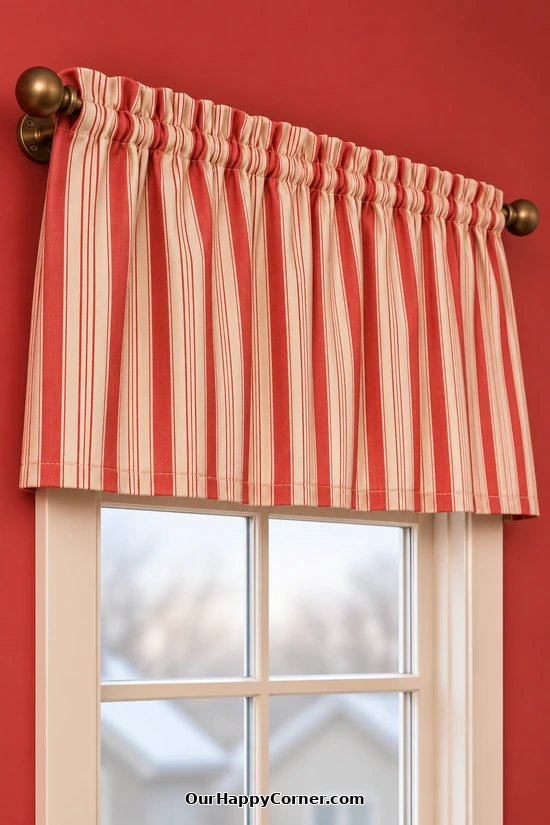
This short red and cream valance is an easy way to bring a bit of color to a kitchen window.
The upright stripes draw attention to the soft gathers at the top, and the lower panes stay open to the light.
For a gently gathered finish, aim for a finished panel width around one and a half times the rod span.
Measure the rod itself before you mark the pocket so the panel will slide on easily.
How to make it:
- Cut your fabric to the chosen width plus side hems, and to the desired drop plus the bottom hem, pocket and top ruffle allowances.
- Double-fold and stitch the sides and bottom, keeping the stripes vertical.
- Turn the top edge under and fold down enough fabric for the pocket and ruffle. Stitch along the lower fold and add a second row above it to form the pocket.
- Slide it onto the rod and spread the gathers evenly before rehanging it.
10. Mauve Ruffled Velvet Pillow Cover
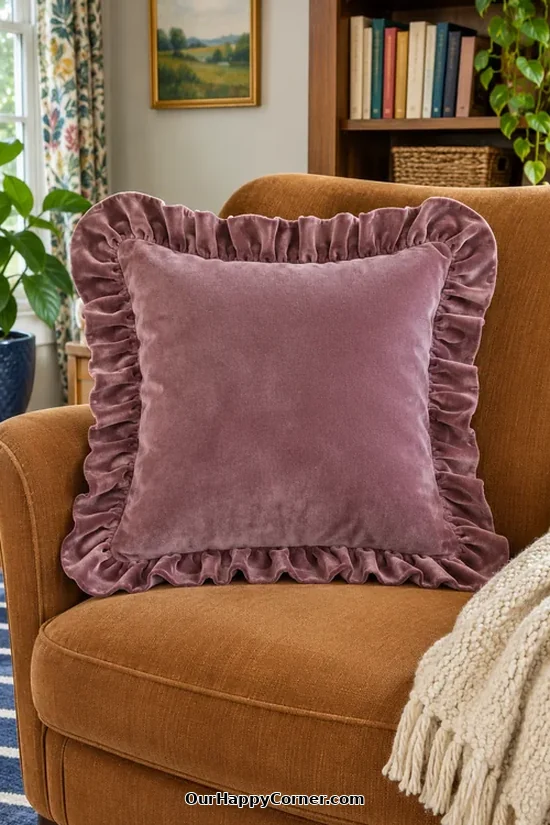
A wide ruffle makes this mauve velvet pillow feel right at home on a favorite reading chair.
I like it as one of the winter sewing projects that can change the look of a room without buying new cushions.
Choose a washable velvet if you want to take the cover off and clean it regularly.
An envelope back lets you skip a zipper and makes it easy to reuse a pillow insert you have.
How to make it:
- Cut one front and two back pieces to fit your insert, allowing for seams, hems and a generous back overlap.
- Cut velvet strips twice the desired ruffle depth plus seam allowances. Join them into a loop about one and a half times the pillow perimeter, fold lengthwise and gather the raw edges.
- Baste the ruffle to the front, keeping its folded edge toward the center. Hem the back pieces and place them over the front with right sides together and the hems overlapping.
- Sew around the cover, clip the corners, turn through the back opening and add the insert.
Helpful tip: Use clips and baste the velvet first if the layers creep as you sew.
11. Plaid Quilted Chair Cushion
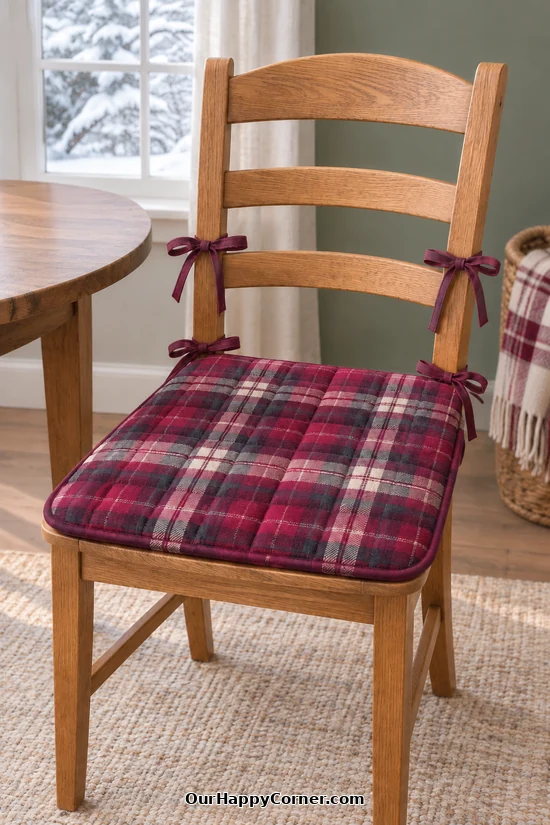
A burgundy plaid seat cushion makes a wooden chair feel much nicer on a cold morning.
The deep red ties and binding pick up the plaid without adding another print.
Make the paper template from your own chair seat and mark where the ties need to wrap around the back uprights.
Use cotton flannel or woven plaid for the top and a stable cotton backing.
How to make it:
- Trace the seat shape with rounded corners and add the allowance needed for trimming after quilting.
- Layer the top, batting and backing, baste, then quilt a grid through the layers. Trim to the seat shape.
- Make folded fabric ties and attach them at the marked back corners. Bind the cushion edge, catching the anchored ends securely.
- Put the cushion on the chair and tie it to the uprights. Check that the front edge stays within the seat.
12. Floral Quilted Hot Water Bottle Cover
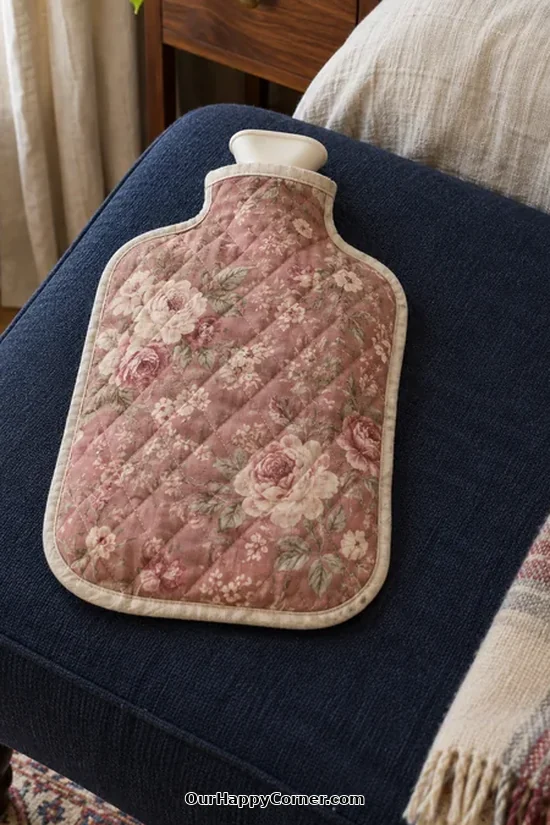
The faded floral print and cream edging make this hot water bottle cover feel like a sweet winter gift.
Use the actual bottle as your guide so the cover fits around its shoulders and neck.
A lightly quilted cotton exterior gives you the texture shown without making the seams too thick.
Make an overlapping opening on the back so the cover can come off for washing.
How to make it:
- Trace the outline of an empty bottle on paper. Allow ease for its filled thickness, then add the seam or binding allowance.
- Cut one quilted front and two overlapping quilted back pieces. Bind the edges that form the back opening.
- Layer the front and overlapping backs wrong sides together, baste the perimeter, then finish the outside edge with flexible bias binding.
- Slip in the empty bottle to check the fit and keep the stopper accessible. Follow the bottle maker’s directions for filling and use.
See NSW Government hot water bottle safety guidance for more details.
Winter Sewing Projects for the Kitchen
13. Red Gingham Quilted Oven Mitts
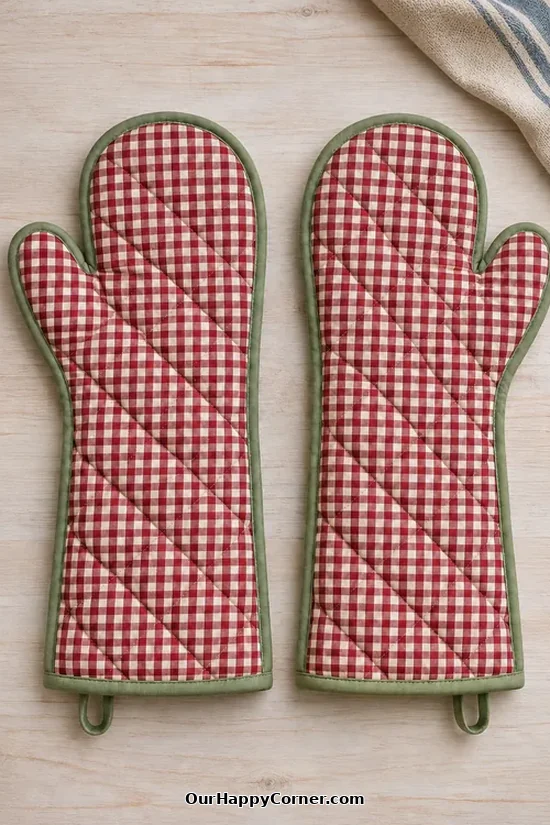
The sage binding is my favorite detail on these red gingham oven mitts.
The longer cuffs give you room to cover more of your wrist when you pull a tray from the oven.
For this project, start with an oven mitt pattern and use the heat-resistant layers specified in the batting maker’s tutorial.
Cut mirrored pieces for each mitt so the thumbs and gingham line up when you assemble them.
How to make it:
- Quilt cotton outer fabric, cotton batting, heat-resistant insulated batting and cotton lining together in the order specified by the batting maker.
- Cut two mirrored quilted shapes for each mitt. Put the outer fabrics together and stitch the perimeter, leaving the cuff open.
- Clip carefully into the thumb curve, turn right side out and bind the cuff with sage cotton bias tape. Catch a folded hanging loop in the cuff binding.
- Repeat for the second mitt. Follow the batting maker’s use instructions and keep the finished mitts dry and away from direct flame.
See The Warm Company’s oven mitt tutorial for more details.
14. Blue Striped Bread Basket Liner
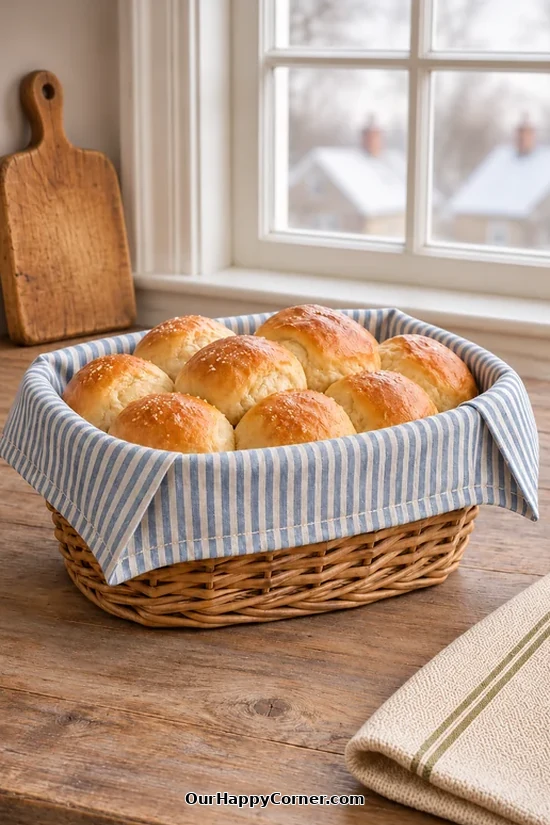
This striped liner is a little detail that makes a basket of warm rolls look even more inviting.
You can make one for the wicker basket you already have and take it out to shake off crumbs after dinner.
The corners drape over the rim, so a neatly hemmed rectangle works beautifully here.
Use washable cotton or a cotton-linen blend, and prewash it before you measure and cut.
How to make it:
- Lay a tape measure across the basket from one rim, down the inside, across the base and up to the opposite rim. Repeat in the other direction.
- Add the overhang you want on each side plus a hem allowance, then cut the rectangle with the stripes straight.
- Double-fold each edge and press. Miter the corners if you’d like a flatter finish, then stitch all the way around.
- Center the liner in the basket and ease the fabric into the corners before adding the rolls.
15. Burgundy Insulated Casserole Carrier
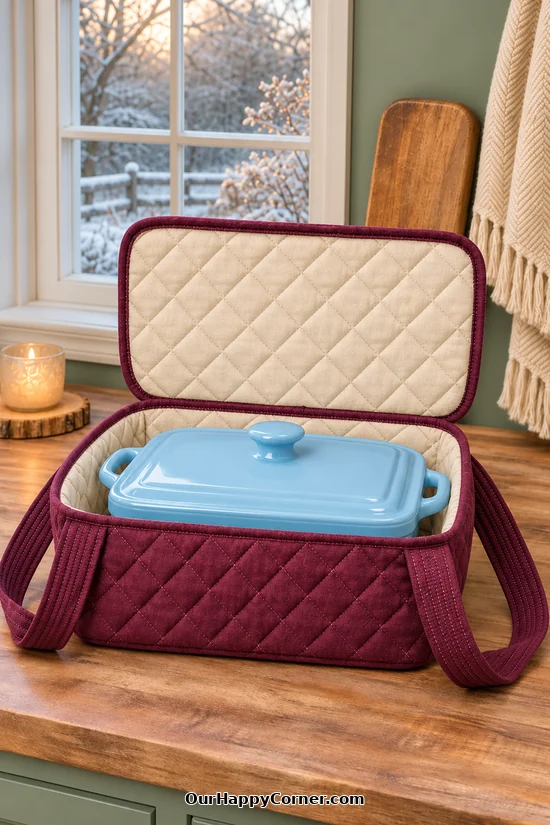
A casserole carrier is one of those winter sewing projects you’ll be glad to have when you’re bringing dinner to someone’s house.
The burgundy quilted outside looks lovely around the blue dish, and the plain cream lining keeps the inside simple.
Choose a rectangular carrier pattern with a hinged zip lid and reinforced handles.
Measure your covered dish at its widest points, including the handles and lid knob, before you cut.
How to make it:
- Cut the base, sides and lid to your pattern’s dimensions, leaving room for the dish and the thickness of the quilted layers.
- Quilt the burgundy exterior with the specified insulating layer and cream lining. Baste and reinforce the handle ends where the pattern marks them.
- Install the zipper around the lid opening and join the remaining lid edge at the hinge. Sew the sides to the base and finish the inside seams.
- Check the fit with an empty, cool dish first. Follow the fabric and insulation maker’s use instructions when packing the carrier.
Handmade Winter Decor and Small Gifts
16. Quilted Arch Wall Hanging
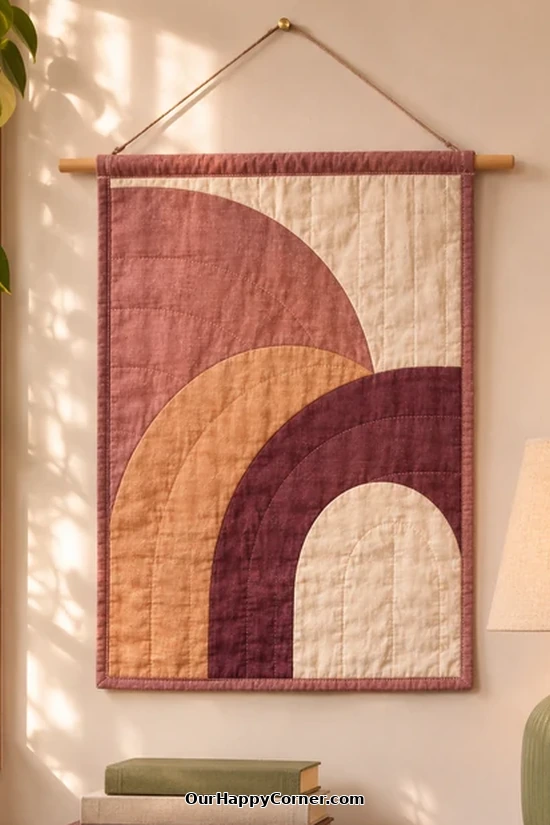
The curved shapes on this wall hanging are a nice change from square patchwork.
Rose, ochre and cream give it a warm look, with burgundy adding depth near the bottom.
If you’re new to curves, draw the arches on paper at full size first and use raw-edge appliqué.
A wooden dowel and a simple hanging cord finish it off without a frame.
How to make it:
- Draw the design and cut the arch shapes from cotton, using paper-backed fusible web as directed. Keep the edges that overlap long enough to tuck under the next piece.
- Position the arches on the background, fuse them and stitch around each shape to secure its edge.
- Baste the top with batting and backing. Quilt along the curves and add a few parallel lines across the background.
- Square and bind the panel, hand-sew a sleeve on the back, then slide in the dowel and add the cord.
17. Mini Felt Ice Skate Ornaments
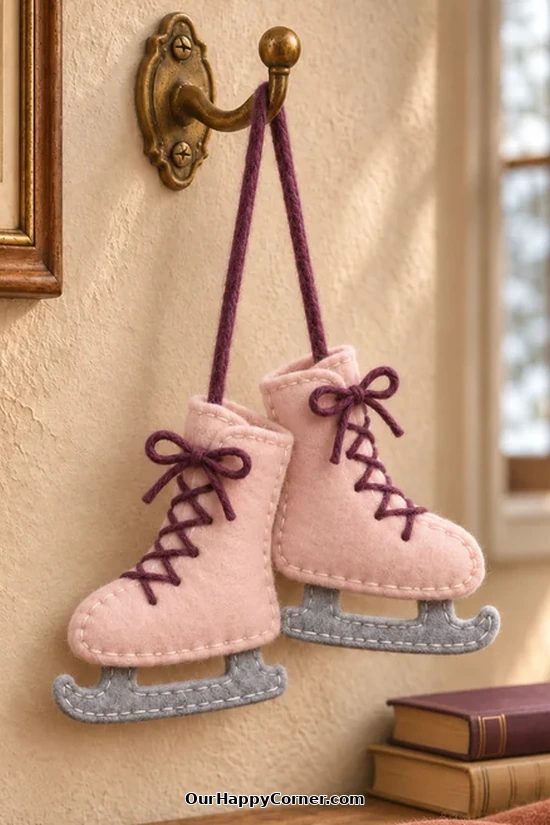
These mini pink skates are a small hand-sewing project for anyone who likes the look of winter decor.
The plum laces and gray felt blades are what make the boot shapes read as ice skates.
Hang the pair from a hook or tie one onto a winter gift.
Use wool-blend felt and embroidery floss so the small pieces hold their shape while you stitch.
How to make it:
- Draw a small boot and blade on paper. For each skate, cut two matching boot pieces and two matching blade pieces.
- Embroider the crisscross laces on the front boot piece and add a small bow.
- Stitch the two blade pieces together and sandwich their upper tabs between the boot layers. Tuck the ends of a hanging loop into the top.
- Stitch around the boot, adding a little stuffing if you want it to look padded. Repeat for the second skate.
18. Felt Penguin with a Lilac Bow
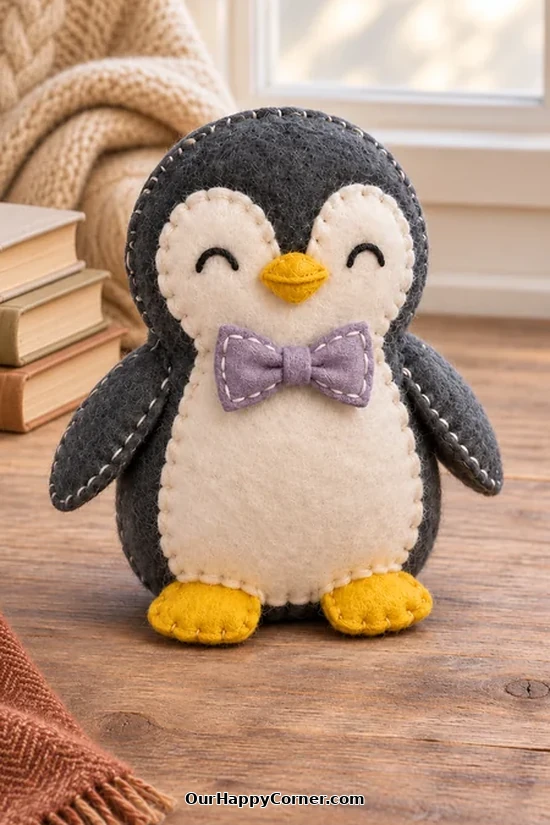
This little penguin looks sweet on a bookshelf, especially with that lilac bow.
Visible stitches around the edges suit the soft felt and give you a chance to practice sewing by hand.
Make the body from charcoal felt, with cream face and belly pieces and golden yellow feet.
Embroider the eyes so they sit flat against the face.
How to make it:
- Cut two body shapes and the face, belly, wings, beak, feet and bow pieces from felt.
- Appliqué the cream pieces onto the front, embroider the eyes, then attach the beak and bow.
- Baste the wings and feet between the front and back layers where you want them to sit. Blanket stitch around the body, leaving a gap for stuffing.
- Add small tufts of filling until it stands or sits the way you like, then stitch the gap closed.
19. Felt Winter Village Garland
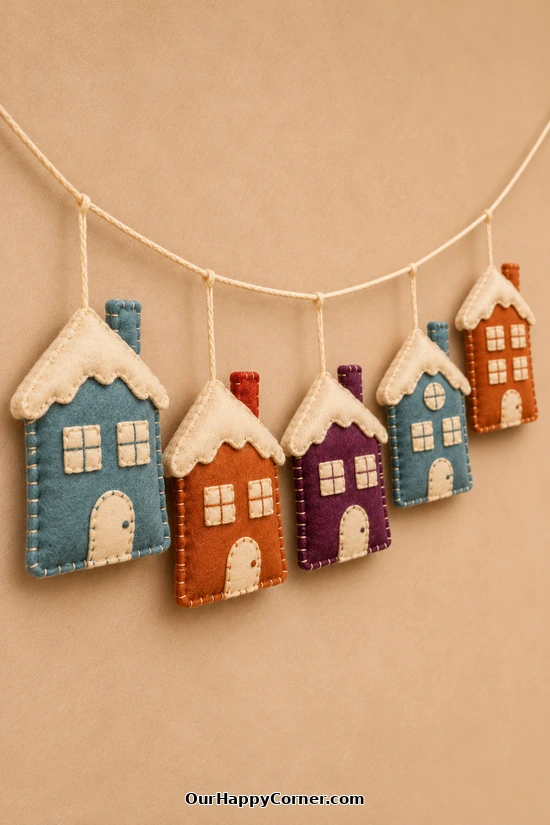
If you like winter sewing projects you can pick up for a few minutes at a time, these little felt houses are a lovely choice.
The teal, rust and plum houses share cream roofs, but the different windows give each one its own character.
You can make five as pictured or add more for a longer shelf or mantel.
Use wool-blend felt, embroidery floss and a cord that will carry the weight of the houses.
How to make it:
- Draw house fronts, roof pieces, doors and windows. Cut two body shapes for each house.
- Sew the doors and windows onto the fronts and embroider the windowpanes. Layer and stitch on the cream roofs.
- Stitch each front and back together, adding a tiny amount of stuffing if you like and catching a hanging loop at the top.
- Tie or thread the houses onto the main cord and space them out before hanging it.
20. Mauve Drawstring Gift Sack with a Bow
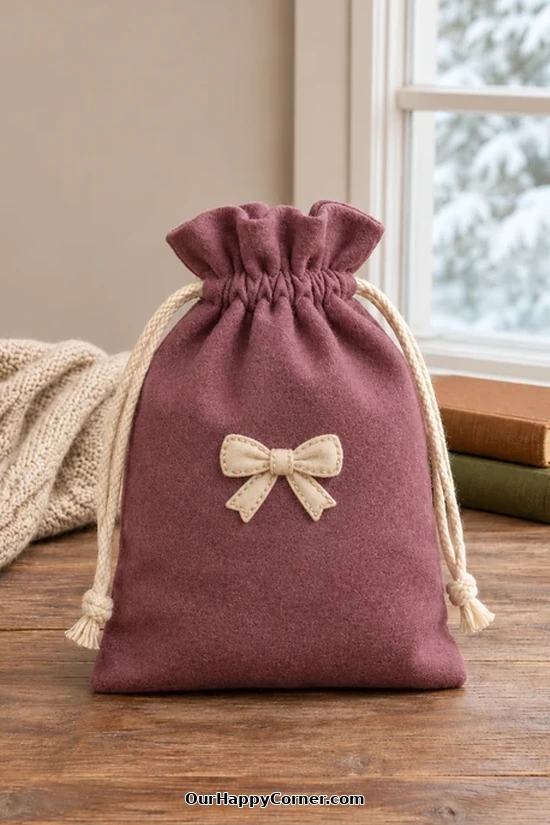
The little cream bow gives this mauve gift sack a pretty finish you can use all winter.
I like a drawstring bag for gifts that are awkward to wrap, like a pair of gloves or a soft scarf.
Choose a soft woven fabric or brushed cotton that gathers without getting too bulky.
Decide what you’re putting inside before cutting so the top has room to cinch above the gift.
How to make it:
- Cut two rectangles to fit the gift, allowing for seams and a wide fold for the casing.
- Cut the felt bow pieces and stitch them onto the front before joining the bag.
- Sew the side and bottom seams right sides together, leaving the casing exits open. Turn and fold the top down to form the casing, then stitch it in place.
- Thread two cords through the casing from opposite sides and knot their ends so the bag closes when you pull them.
21. Plum Plaid Flannel Zip Pouch
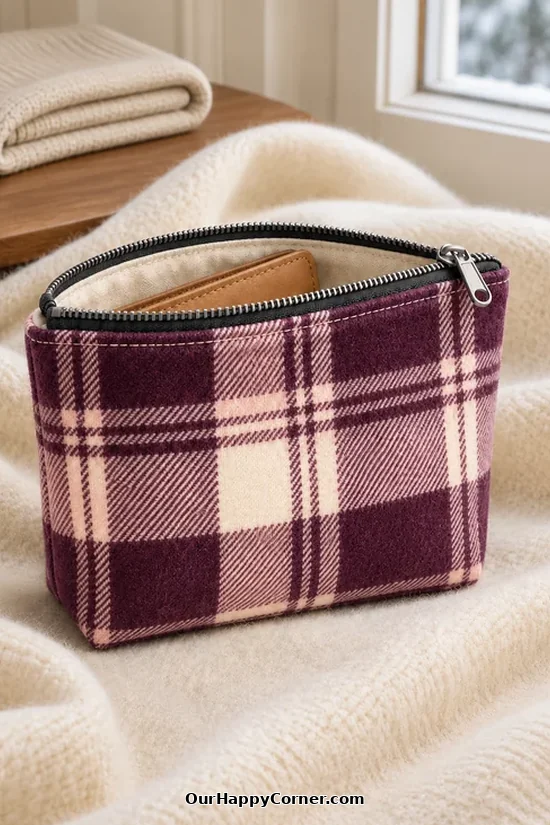
This plum plaid pouch is one of the winter sewing projects I’d make with leftover flannel from a larger project.
The black zipper gives the soft plaid a defined edge, and the cream lining makes smaller items easier to see.
Choose a size that fits what you actually carry, whether that’s a few sewing supplies or your everyday bits and pieces.
Lightweight interfacing helps the pouch keep its shape without making it stiff.
How to make it:
- Cut two flannel outer rectangles and two lining rectangles. Apply interfacing to the flannel and match the plaid before stitching.
- Sandwich the zipper between one outer piece and one lining piece, sew, then repeat on the other side. Press away from the zipper and topstitch.
- Open the zipper halfway. Sew the two outer pieces together and the two lining pieces together around their edges, leaving a gap in the lining.
- Box the bottom corners if you want the pouch to stand. Turn through the gap, stitch it closed and tuck the lining inside.
22. Lavender Wool Felt Glasses Case
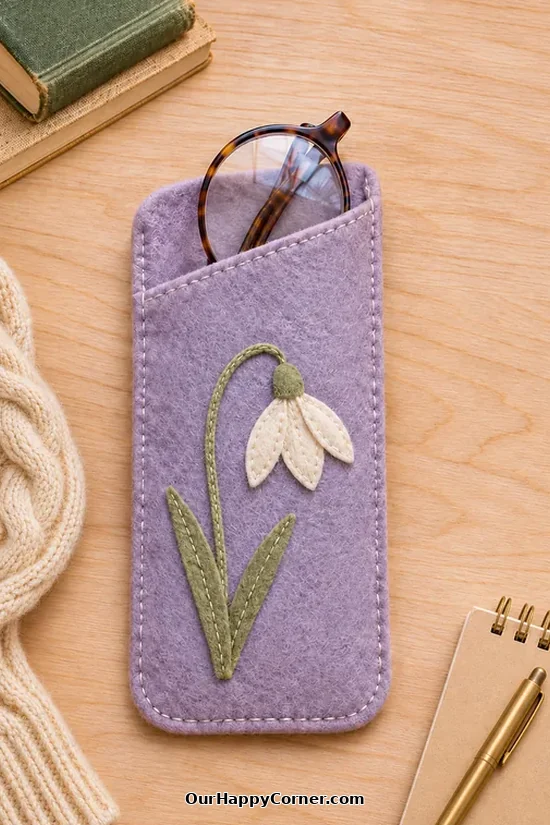
The little cream flower is a sweet detail on this lavender glasses case.
Its slanted opening leaves enough of the frames visible to grab them easily.
Wool felt is firm enough for a slip case, and you can sew the whole project by hand.
Use the folded glasses to measure the width and length, leaving room for the frames and the side stitching.
How to make it:
- Cut a tall back and a slightly shorter front with a slanted upper edge from wool felt.
- Cut the petals and leaves, then stitch them to the front. Add the stem with embroidery thread or a thin felt strip.
- Put the front and back together and stitch along the sides and bottom, leaving the slanted edge open.
- Slide the glasses inside to check the fit. Keep any knots and loose thread ends away from the lenses.
23. Dusty Rose Quilted Laptop Sleeve
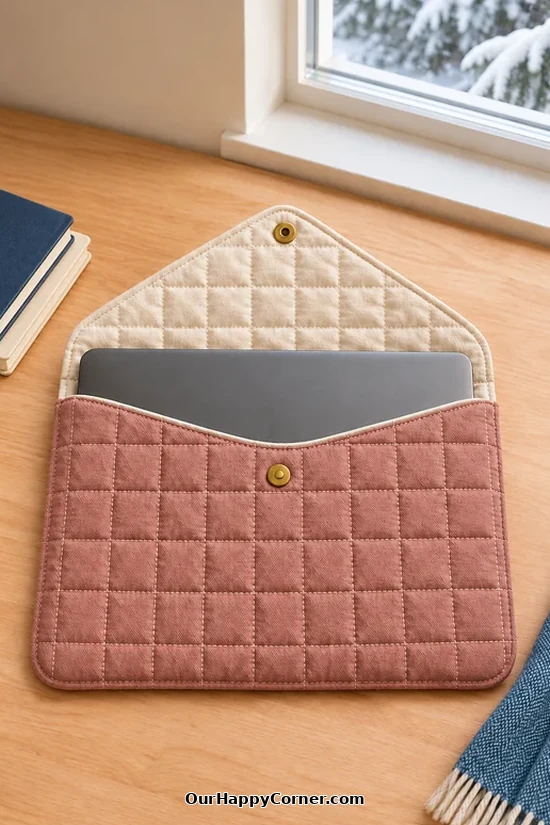
This envelope-style sleeve gives a closed laptop a soft layer to slip into a tote.
The dusty rose squares, cream flap lining and brass snap are all part of the pictured design.
Measure the laptop closed, including its thickness, so it can slide in without pulling at the seams.
Choose a low-profile snap and back its hardware with a fabric guard so it doesn’t rub against the laptop.
How to make it:
- Make a paper pattern for the front and the back with its pointed flap, adding room for thickness, quilting and seam allowances.
- Quilt the outer pieces with batting and lining. Trim to the pattern, then bind or finish the front opening and flap edges.
- Install the snap halves where they meet when the flap closes, reinforce the fabric and cover any hardware on the inside.
- Join the sides and bottom, finish the seam edges and check the fit with the laptop closed.
Helpful tip: Use a piece of cardboard cut to the laptop’s dimensions for your first fitting.
More Cozy Projects to Make
If you have smaller pieces left from these winter sewing projects, save them for a zip pouch, a felt appliqué, or one of these fabric scrap sewing ideas.
For another quiet afternoon indoors, try these winter crochet projects and make something warm with yarn.
Final Thoughts
Pick one of these winter sewing projects you’ll enjoy using or giving away. A little felt ornament or a basket liner is a lovely place to start, and you can always save the bigger makes for another weekend.