This post may contain affiliate links. If you make a purchase through these links, I may earn a small commission at no extra cost to you. Thank you so much for your support.
Ceramic cup painting ideas are a lovely way to turn a plain mug into something you’ll look forward to reaching for each morning. A few cherries, a bold blue flower, or a simple painted pattern can give an everyday cup a little personality.
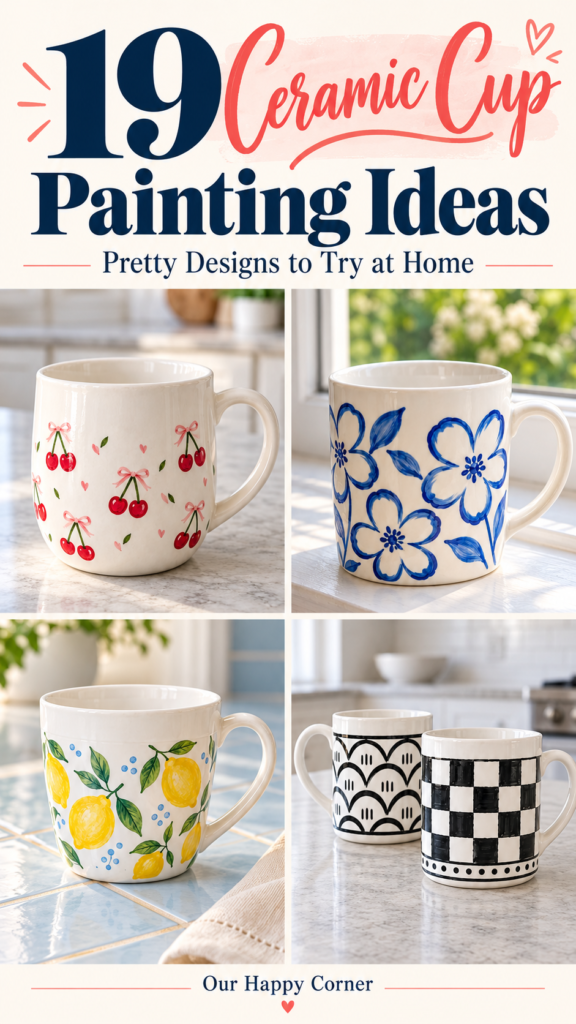
You don’t need to begin with a complicated picture. Small repeated motifs and broad shapes are easier to practice, and they leave you room to enjoy the painting instead of worrying about every tiny mark.
This collection includes pretty florals, bright fruit, graphic patterns, and a playful matching pair. Some designs are quick to sketch, while others give you a chance to spend a little longer with the details.
Choose the cup you would happily keep for yourself, then adjust the colors to suit your kitchen or the person you’re making it for. A handmade cup doesn’t have to look factory-perfect to feel thoughtful.
Before You Start Painting Your Cup
The designs below are planned for the outside of plain glazed ceramic cups. Look for a smooth cup with enough room for the motif you want to paint; a low teacup suits a spreading branch, while a taller mug gives flowers more height.
Choose paints or markers specifically labeled for glazed ceramic or porcelain, such as a suitable porcelain-paint system. Ordinary craft paint and a general clear varnish aren’t a substitute for a product intended for this surface and use.
Keep the inside, drinking edge, and the area your lips touch undecorated. Pébéo’s Porcelaine 150 guidance limits decoration to surfaces that will not contact food; plan the artwork lower on the exterior so it stays clear of those areas.
Follow the cleaning, drying, curing, and care instructions for your exact paint. Only heat-set a cup if both the paint directions and the cup manufacturer allow it, and use the specified schedule rather than a general baking recipe.
Gather a Few Basic Supplies
- Plain glazed ceramic mugs or cups with smooth exteriors
- Porcelain or ceramic paint, or suitable markers, in your chosen colors
- A small flat brush for bands and a small round brush for shapes
- A fine brush or compatible paint marker for small details
- The cleaning supplies specified by your paint manufacturer, plus a lint-free cloth
- Paper for practicing motifs and planning a repeating pattern
- A ruler and paper strip for checking the spacing of checks or stripes
- A removable marking method approved for your surface and paint system
Wash and prepare the cup as your paint label directs, let it dry thoroughly, and avoid touching the area you’re about to paint. Practice the motif on paper first, then place the largest shapes before adding the little accents.
Work in thin layers and let each one dry as directed before painting over it. Use the same paint range and its approved mediums when mixing colors or adding layers, rather than combining products with different curing requirements.
Give the finished cup its full curing time before using or wrapping it. For example, DecoArt Glass Paint has its own curing and optional heat-setting directions for glazed ceramics; another product may follow a different schedule. Clean your finished cup according to the directions for both the paint and the cup.
Ceramic Cup Painting Ideas to Try
Pick the design that catches your eye and use the suggested colors as a starting point. You can simplify the smaller details, change the palette, or repeat the motif on a second cup to make a set.
1. Cherries and Pink Bows
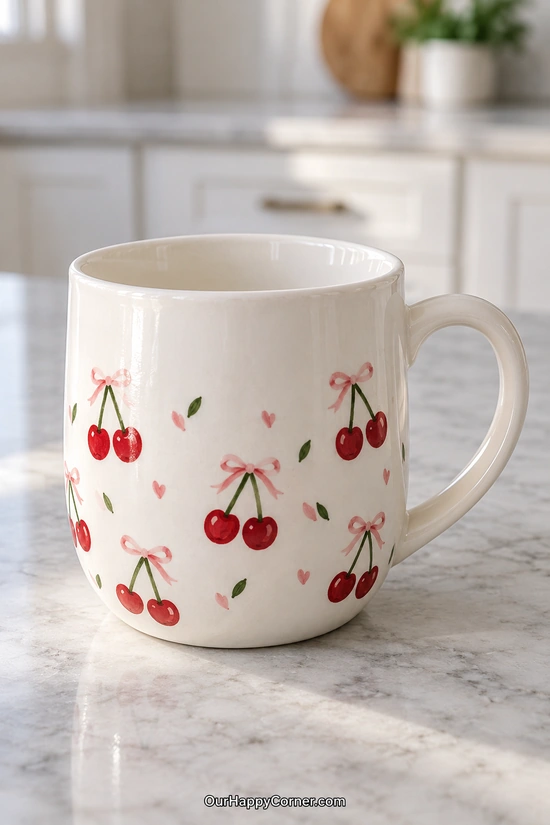
Paint colors: Cherry red, soft pink, olive green, and white.
Cherries and tiny bows make a lovely combination if you want a cup that feels playful without being covered in a busy pattern. The little motifs leave plenty of white ceramic showing between them.
Start with pairs of rounded red cherries, then connect each pair with two thin green stems. Keep the fruit fairly small so you have room to repeat the design around the cup.
Add a pink bow where the stems meet, using two small loops and two short tails. A tiny white highlight on each dried cherry gives it a little shine.
Turn the mug as you plan the next pair rather than trying to reach around the handle. A few pink hearts and green leaves can fill the wider gaps, but you don’t need one in every space.
If you like sweet little motifs, these ceramic cup painting ideas are a lovely starting point for a handmade gift. Our tote bag painting ideas have more fruit and bow designs you can try on another everyday accessory.
2. Cobalt Blue Wildflowers
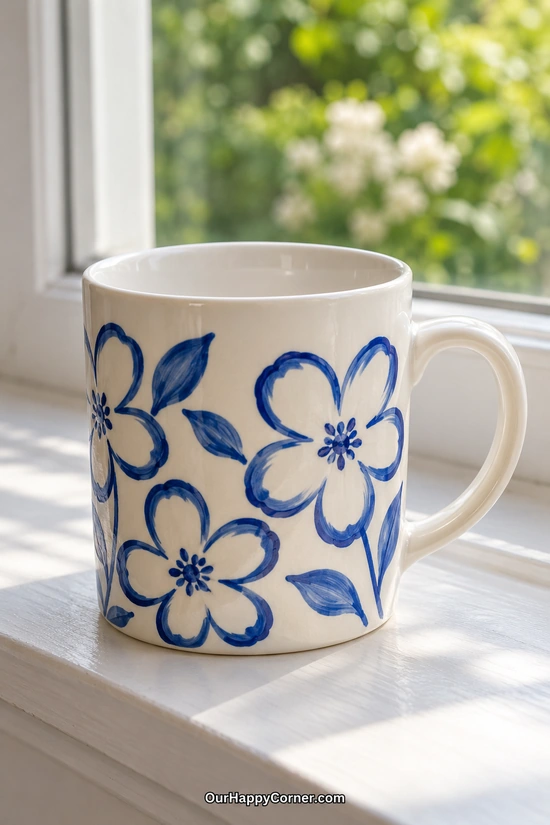
Paint colors: Cobalt blue and white.
A few large blue flowers can make a plain white cup feel special without asking you to paint a whole bouquet. This is a good choice if you enjoy strong contrast and a small paint palette.
Lightly plan one large flower on the front and a smaller one beside it, using a surface-appropriate removable guide if needed. Leave a generous clear band under the rim.
Paint each flower as an open outline with five broad, rounded petals. A small round brush gives you room to vary the width of the blue line as it curves.
Dot the centers and add a few simple leaves between the flowers. Keep the petals mostly white so the outline remains the strongest part of the design.
Among these ceramic cup painting ideas, this one is easy to simplify to a single flower. Practice the outline on paper first so you can paint the curves with fewer stops.
3. Lemons With Little Blue Dots
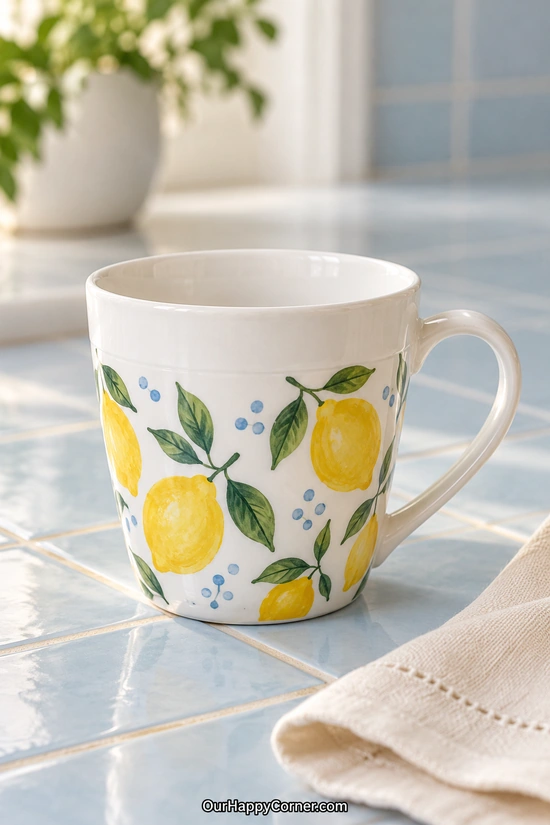
Paint colors: Lemon yellow, olive green, deeper green, and pale blue.
Yellow lemons and little blue dots bring a sunny kitchen feel to a plain ceramic cup. The blue accents make the fruit design feel a little different from a simple lemon-and-leaf repeat.
Paint two or three oval lemons around the lower exterior, giving each one slightly pointed ends. Let the yellow dry before adding another thin coat if the first looks patchy.
Connect the fruit with narrow green stems and pointed oval leaves. A darker stroke along one side of a leaf gives it definition without needing lots of shading.
Use the tip of a small brush to add a few pale blue dots in groups of two or three. Keep their spacing loose rather than arranging them into a perfect grid.
This is one of those ceramic cup painting ideas that works beautifully as a small matching set. Move the lemons around on the second cup while keeping the same colors and approximate fruit size.
4. Soft Pink Gingham
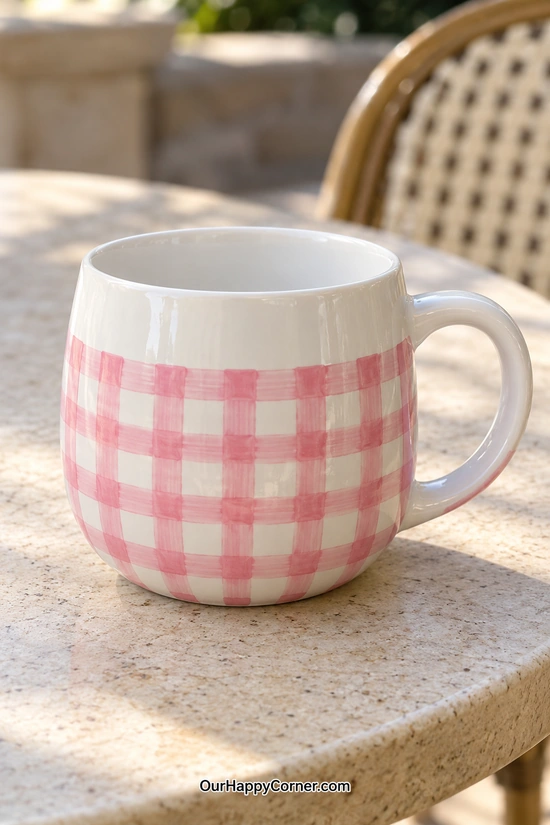
Paint colors: Soft pink, deeper pink, and white.
Pink gingham gives a mug a cozy, familiar look that works well for a quiet morning coffee. You can make the checks fairly large, which keeps the painting manageable on a curved surface.
Plan evenly spaced horizontal and vertical bands around the lower part of the cup. A strip of paper wrapped around the outside can help you compare the spacing before you paint.
Paint the bands with soft pink, leaving white squares between them. After the first layer dries, deepen the little squares where the bands cross.
Work on one visible section at a time and turn the cup when that area is ready to handle. Slightly uneven brush edges suit the pattern, so you don’t need to chase perfectly straight lines.
If you’re gathering ceramic cup painting ideas for a relaxed afternoon project, this is a lovely option. You can get the whole look from one pink shade, a second darker pink, and the original white cup.
5. Black-and-White Patterned Cups
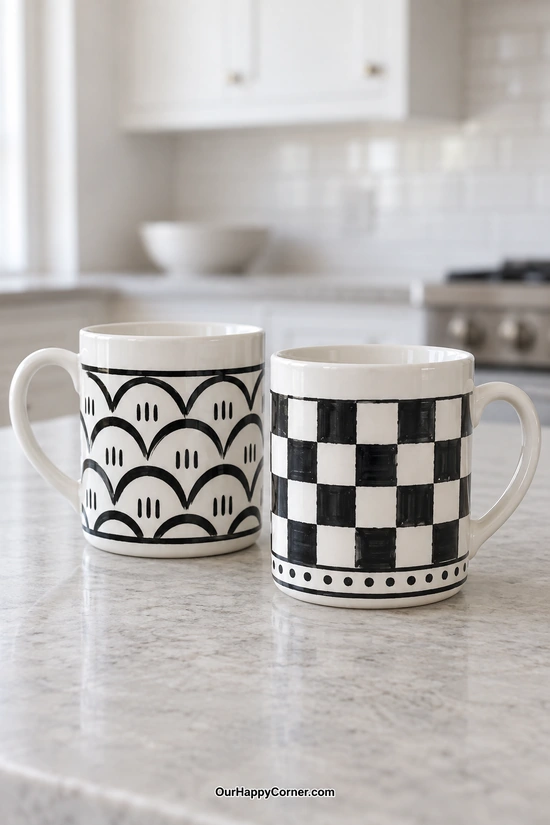
Paint colors: Black and white.
Black-and-white patterns give a pair of cups plenty of personality without needing bright colors. Mixing a checkerboard cup with a scalloped design makes the set feel connected while giving each one a different look.
For the checkerboard, lightly map out rows of similarly sized squares and fill alternating squares with black. Let the white ceramic form the lighter squares rather than painting over the entire cup.
Add a narrow dotted band near the base once the checks are dry. Keep the dots large enough to paint comfortably with a small brush or suitable paint marker.
On the second cup, repeat broad curved arches in stacked rows, then place short black dashes inside some of the spaces. Leave a clear gap below the rim on both cups.
These ceramic cup painting ideas suit someone who enjoys graphic patterns more than little pictures. Start with wider checks or arches if tiny repeated marks make your hand feel cramped.
6. Pink Tulip Garden
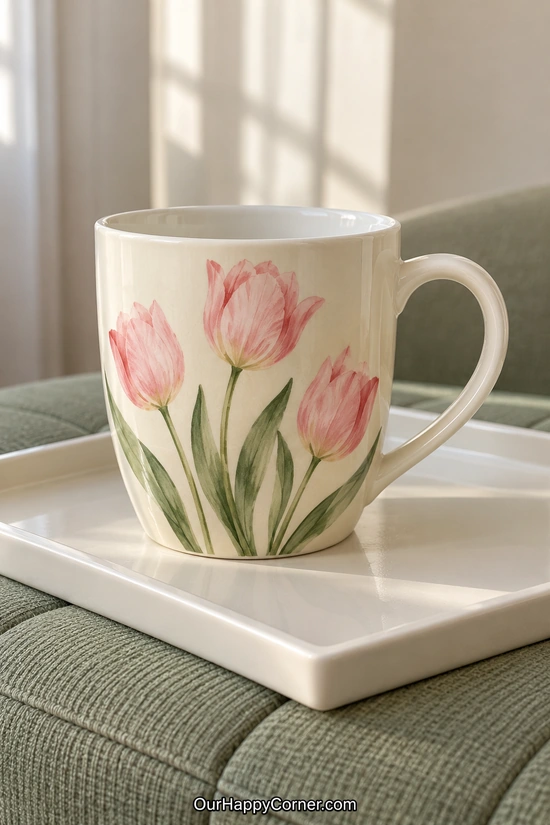
Paint colors: Pale pink, rose pink, and olive green.
Three tulips at different heights make a pretty little arrangement on a tall cup. The open white space above the flowers helps the stems feel light rather than crowded.
Place the tallest tulip slightly off center, then add shorter flowers to either side. Sketch only the main positions so you can adjust the spacing before committing to paint.
Build each flower head from a rounded pink cup shape with a few pointed petal tips. Add two or three deeper rose strokes after the lighter pink has dried enough for the next layer.
Paint slender green stems and long leaves that curve upward from the bottom. Let some leaves lean outward to soften the upright flowers.
You can keep the tulips quite simple and still get a lovely result. If floral ceramic cup painting ideas are your favorite, our jewelry box painting ideas offer more ways to use the same petal and leaf strokes.
7. Oranges and Blossoms
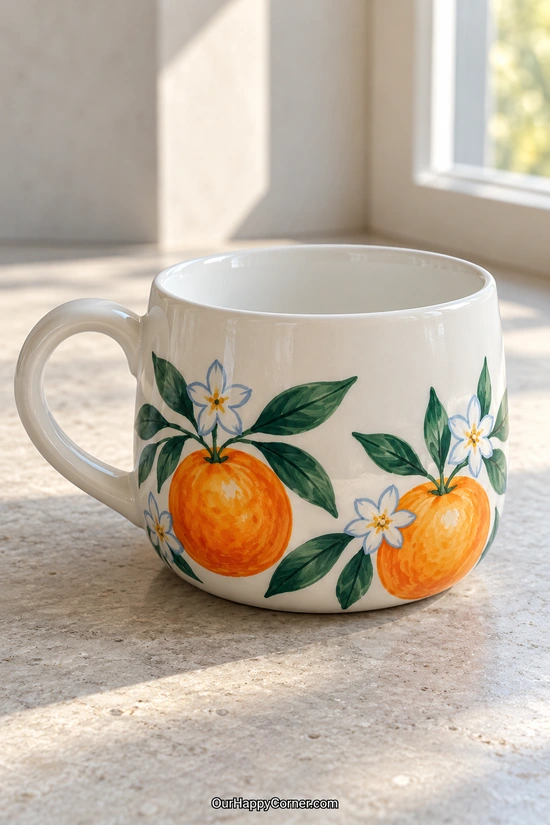
Paint colors: Orange, pale orange, dark green, white, yellow, and pale blue.
A couple of oranges with dark leaves give a rounded cup a cheerful Mediterranean feel. Small blossoms bring in another shape without competing with the fruit.
Paint two round oranges on the lower exterior, leaving room for leafy stems above them. Use a lighter orange for a few curved marks once the main color is dry.
Add dark green leaves with broad strokes, keeping their tips pointed. You can vary the angle of each leaf instead of trying to make matching pairs.
Paint small white blossoms nearby, using pale blue outlines where the white would disappear against the cup. A mustard-yellow dot in each center finishes them neatly.
For ceramic cup painting ideas with a little more detail, this design gives you plenty to enjoy without a complicated scene. Start with the oranges and leaves, then decide whether you want one blossom or several.
8. Terracotta and Blush Scalloped Stripes
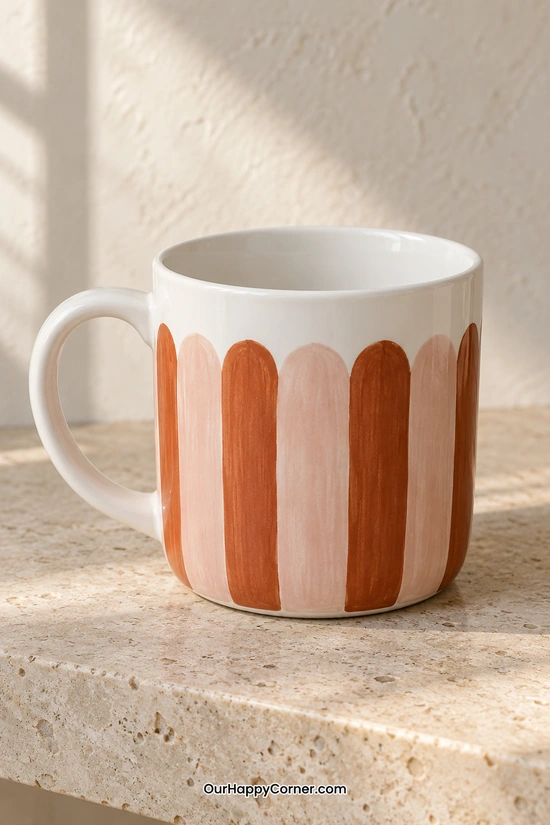
Paint colors: Terracotta and blush pink.
Broad stripes with rounded tops give a plain mug a warm, modern feel. The two-color design is especially useful when you want something decorative without painting lots of tiny shapes.
Plan alternating vertical panels around the cup, stopping comfortably below the rim. A paper strip can help you divide the circumference before transferring a few small guide marks.
Round the top of each stripe into a soft arch, then fill the panel with terracotta or blush. Use a small flat brush for the larger area and a round brush near the curved top.
Let the first coat dry before correcting any patchy areas. Avoid repeatedly brushing over paint that has begun to set, as that makes it harder to keep the surface even.
This is one of the more approachable ceramic cup painting ideas if you prefer broad brushwork. You can also borrow the warm palette for a larger project from our terracotta pot painting ideas.
9. Strawberries and Daisies
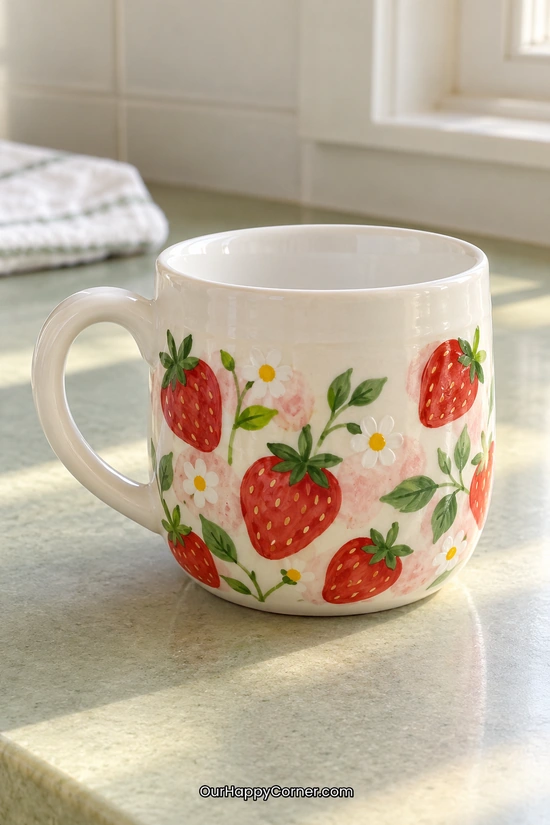
Paint colors: Strawberry red, pale pink, green, white, and yellow.
Strawberries and daisies make a lively combination for a rounded breakfast mug. The small pink patches behind the fruit soften the pattern and give it a relaxed, hand-painted feel.
Start with a few very pale pink patches, leaving plenty of untouched white around them. When they’re dry, add red berries in rounded heart shapes.
Paint green leafy tops and a few separate leaves between the strawberries. Small cream or yellow seed marks will make the berries recognizable without a lot of extra shading.
Place a handful of white daisies in the larger gaps, each with a yellow center. Keep some flowers smaller than the strawberries so the different shapes don’t all compete for attention.
You don’t have to cover the entire cup to get the effect. A cluster of three berries and two flowers on the front is a manageable version if you want to keep your first attempt simpler.
10. His-and-Hers Illustrated Cups
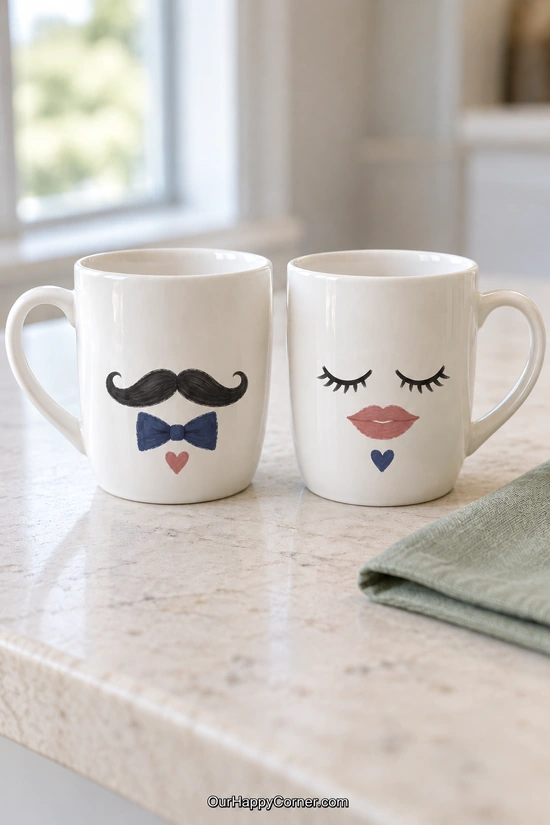
Paint colors: Black, navy, dusty rose, and white.
A mustache and bow tie on one cup, with eyelashes and lips on the other, makes a playful couple’s set without any lettering. The shared colors and tiny hearts bring the two designs together.
On the first cup, paint two curved black shapes that meet in the middle to make the mustache. Add a small navy bow tie below, using two broad triangles joined by a rounded center.
On the second cup, paint two curved closed-eye lines and a few short lashes. Add a simple dusty-rose lip shape underneath, leaving a narrow white line through the middle.
Finish the mustache cup with a rose heart and the other cup with a navy heart. Keep the illustrations at roughly the same height so the pair looks coordinated when placed side by side.
These ceramic cup painting ideas would make a sweet anniversary or Valentine gift. For another handmade present to give alongside the pair, browse our Valentine wood crafts.
11. Olive Branch Teacup
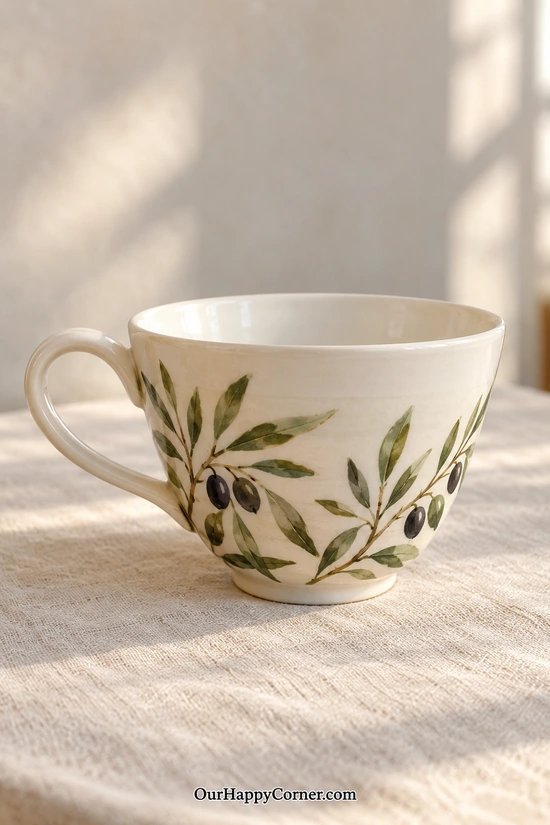
Paint colors: Olive green, muted brown, dark gray, and white.
Olive branches look especially lovely on a lower teacup, where the leafy stems can follow the curve of the bowl. The quiet palette is easy to enjoy throughout the year.
Begin with two gently curving branches across the lower exterior. Keep their main stems thin so the leaves remain the most visible part of the design.
Add narrow pointed leaves on alternating sides, turning some upward and others slightly outward. Using two greens gives the branch variety without needing a line down every leaf.
Place a few dark oval olives near the stems once the green has dried. A small pale highlight can help distinguish them from the leaves, but you can leave them flat if you prefer.
This design is easy to scale back to one branch on the front. Leave plenty of white ceramic above it so the finished cup still feels light and simple.
12. Ocean Waves With a Coral Sun
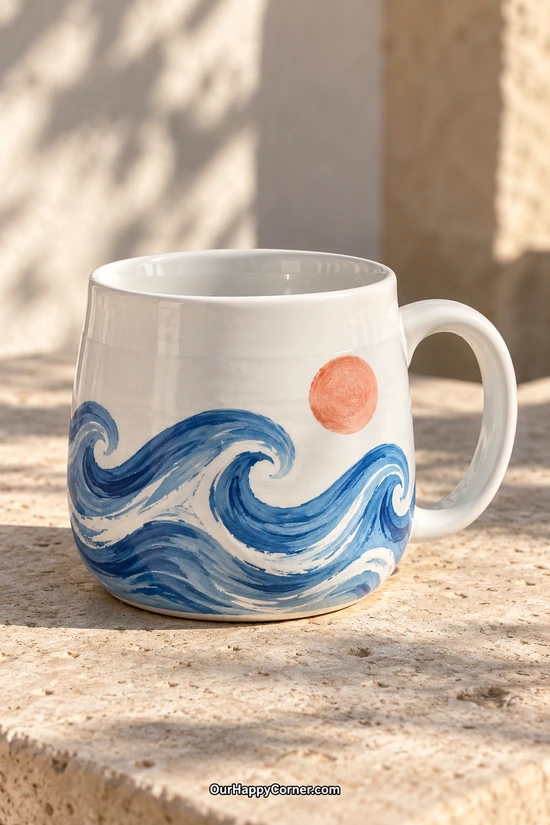
Paint colors: Medium blue, deep blue, pale blue, and coral.
A sweeping blue wave gives a rounded mug a coastal feel without needing shells or a beach scene. The small coral sun is enough to warm up the cool palette.
Start by marking one broad curling wave across the lower exterior. Paint the main shape medium blue, keeping an open white space inside the curl.
Add deeper blue strokes beneath the crest and lighter blue along the upper edge. Let the curved strokes follow the same direction so the water feels like it’s moving together.
Use a few broken white gaps to suggest foam rather than drawing dozens of tiny splashes. Paint a simple coral circle above the waves, well below the clear rim area.
This is one of the ceramic cup painting ideas you can make as loose as you like. A couple of confident curves often give a better sense of movement than repeatedly touching up every edge.
13. Burgundy Bows and Pink Dots
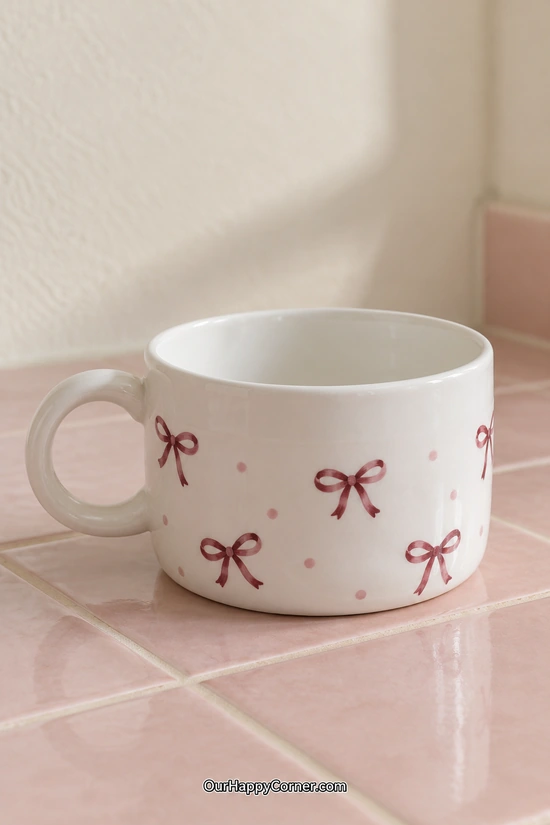
Paint colors: Burgundy and pale pink.
Tiny burgundy bows feel sweet but a little richer than an all-pastel design. The white space between them keeps the pattern from becoming too busy on a low cup.
Mark a few small points around the lower exterior for the bow centers. Leave more space than you think you need, especially near the handle.
Make each bow from two curved loops and two short tails, then add a small rounded knot in the middle. Keep the loops broad enough to read clearly from a little distance.
Add pale pink dots in a few of the open spaces after the burgundy dries. Turn some bows slightly so the pattern feels relaxed rather than arranged in strict rows.
A practice bow on paper will help you settle on a comfortable size. Once you find that repeat, the rest of the cup becomes a much calmer little project.
14. Woodland Mushroom Mug
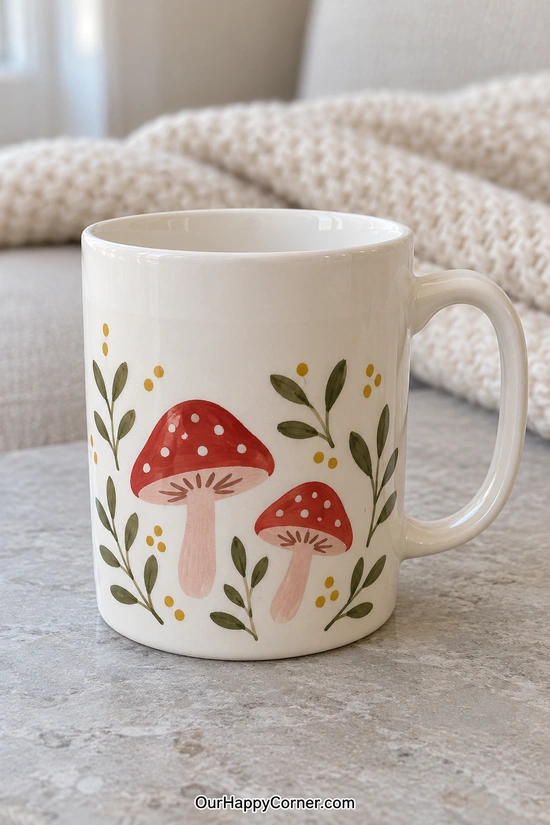
Paint colors: Brick red, dusty pink, pale peach, olive green, and mustard.
A pair of mushrooms and a few leafy sprigs make a cozy woodland design without a full illustrated landscape. One tall mushroom beside a shorter one gives the front a clear focal point.
Paint rounded cap shapes first, then add pale stems underneath. You can use brick red for the larger cap and dusty pink or a lighter red for the smaller one.
Dot the caps with white once the base colors are dry. A few short darker marks under each cap suggest the underside without turning it into a detailed drawing.
Add olive sprigs around the mushrooms, followed by a handful of mustard dots. Keep the stems and leaves simple so they frame the mushrooms rather than hiding them.
This design works well on a tall straight-sided mug because you have room for the two heights. For an easier version, paint one mushroom and one leafy sprig on each side.
15. Party Balloons and Confetti Cups
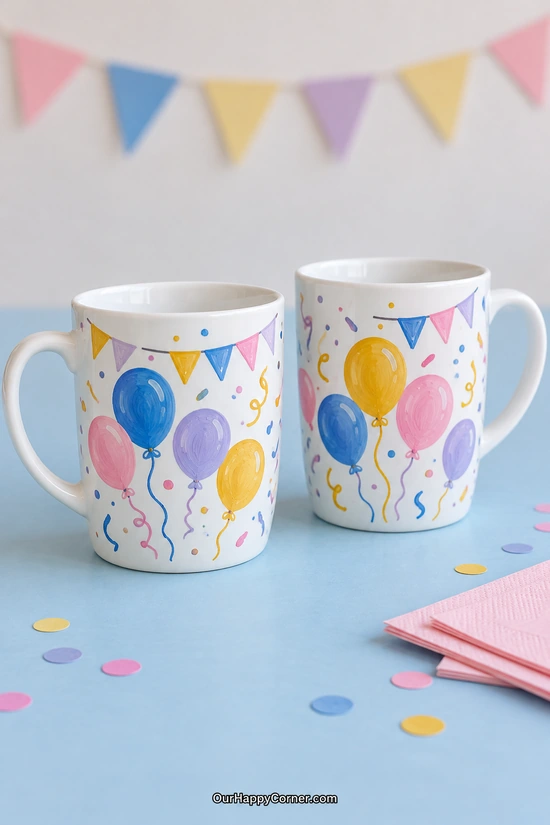
Paint colors: Pink, cobalt blue, lavender, yellow, and white.
Painted balloons and confetti make plain cups feel ready for a celebration. A matching pair can sit on a birthday breakfast table and still be a useful keepsake afterward.
Start with a few oval balloons around the lower exterior, leaving room between them for streamers. Add a small knot at the base of each balloon once its main color is dry.
Use a fine brush or suitable porcelain marker for the curling strings. A short curved line and a loop are enough to suggest movement without filling the entire space.
Paint a little pennant garland above the balloons, staying below the clear rim band. Finish with scattered colored dots and short dashes, repeating the same four colors across both cups.
These ceramic cup painting ideas are easy to adapt to the party palette you already have. For a simpler version, keep three balloons on the front and skip the garland altogether.
16. Flowing Lilac and Burgundy Ribbons
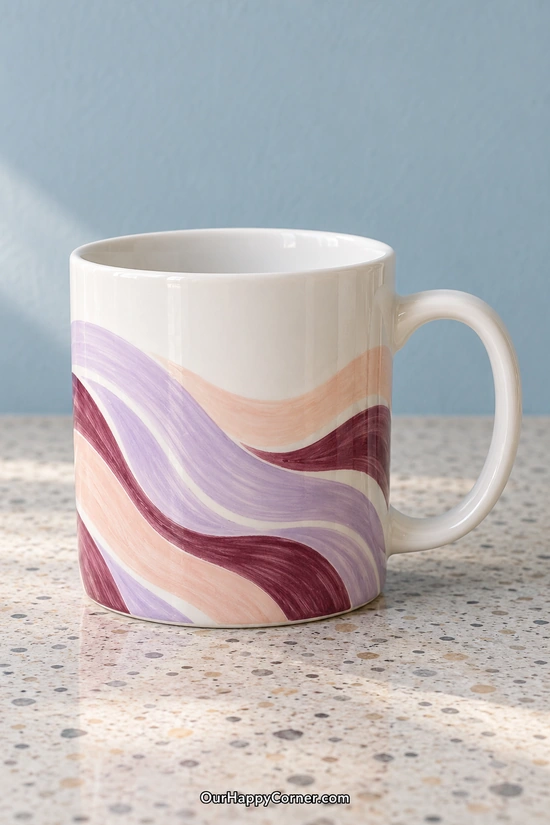
Paint colors: Lilac, pale peach, burgundy, and white.
Broad ribbons of color give a straight-sided mug a softer abstract look. Burgundy adds enough depth to keep the lilac and peach from feeling too pale.
Plan two or three long curves across the lower exterior before adding paint. Let them rise and dip gently instead of making a tight zigzag.
Fill the wider bands with lilac and peach, leaving narrow white spaces between some of them. Add one slimmer burgundy ribbon to give the lighter colors a stronger edge.
Work with the cup turned toward you so each curve feels comfortable to paint. Allow one section to dry before rotating it into your hand’s resting position.
You can choose just two colors if you’d like a quieter version. The flowing direction of the bands does most of the work, so you don’t need extra dots or outlines.
17. Goldfish Pond Teacup
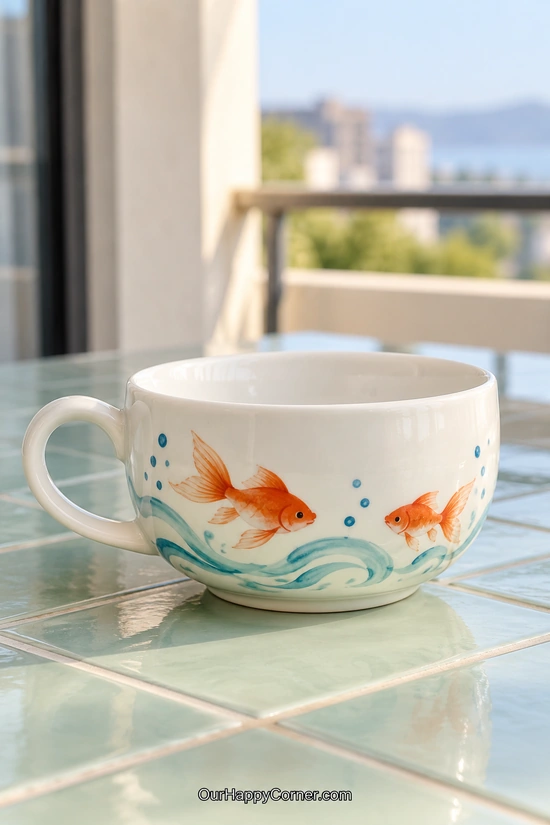
Paint colors: Orange, pale orange, teal, blue, and white.
Two little goldfish make a lovely unexpected design on a wide teacup. The lower profile gives their tails and the water lines room to spread across the outside.
Paint each body as a small orange oval that narrows toward the tail. Add a simple fan-shaped tail and one or two small fins rather than trying to draw every delicate edge.
Use a deeper orange near the head and a pale stroke along the body if you want a little definition. A single dark dot is enough for the eye.
Sweep a few teal curves below the fish and add small blue bubbles nearby. Keep the water lines loose so the fish stay easy to spot.
If detailed tails feel tricky, make them from two broad brushstrokes. The orange bodies against the cool water colors will still make the design clear.
18. Blue Checkerboard With Daisies
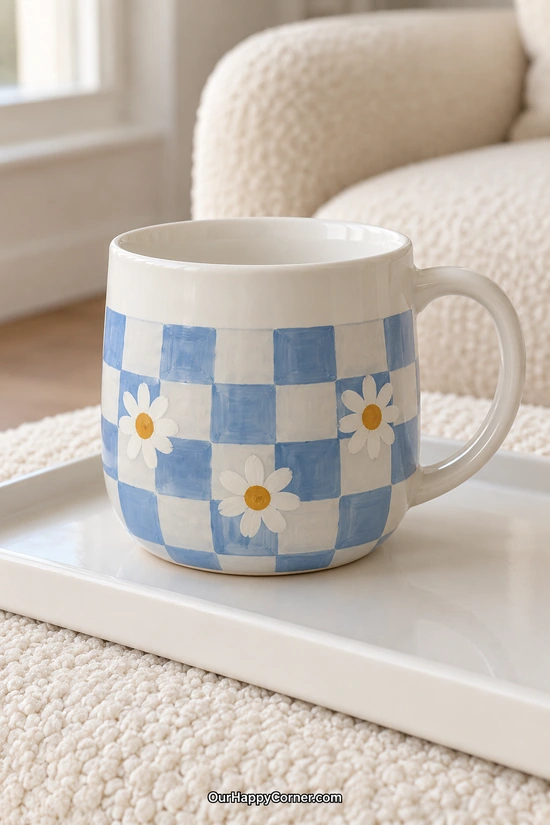
Paint colors: Pale blue, white, and mustard yellow.
A blue checkerboard becomes a little softer with three daisies painted over it. It’s a lovely choice if you like patterns but still want a small floral detail.
Map out a broad checkerboard band around the lower exterior and fill alternating squares with pale blue. Keep the top row comfortably below the rim.
Let the checks dry before placing the daisies, choosing spots where the white petals will show against blue. Start with a mustard dot for each center if that helps you plan the spacing.
Pull short white strokes around the centers to make the petals, then tidy the yellow dots once the white is dry. Vary the flower positions so they don’t all line up in one row.
Use larger checks if you want fewer squares to paint. The slightly uneven edges are part of the charm, especially when the flowers interrupt the grid.
19. Dusky Rose Folk Birds
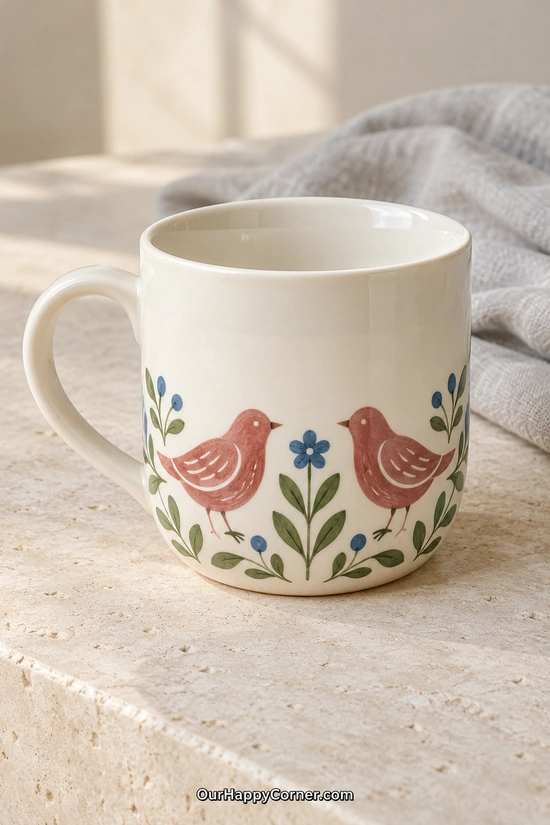
Paint colors: Dusky rose, muted blue, olive green, and white.
Two little folk birds facing a flower make a sweet finishing design for this collection. The simple silhouettes give the cup character without needing realistic feathers.
Paint the birds as rounded bodies with small heads, pointed beaks, and tapered tails. Keep them roughly the same size, with a little room between them for the flower.
Add a few curved white strokes inside each wing and a tiny pale eye. Their feet can be two short lines with little toe marks, rather than finely drawn legs.
Place a small blue flower between the birds, then add olive stems and leaves around the lower edge. A few blue buds connect the colors without filling all the white space.
Try the bird shapes on paper first if you haven’t painted them before. Once the rounded body and little tail feel right, the remaining marks are small finishing touches.
Final Thoughts
A favorite color or a small motif you love is enough to get started. Pick one design, practice the main shapes, and give yourself time to enjoy making something that will become part of your everyday routine.
Whether you choose a single painted cup or a matching pair, the small differences in your brushwork will make it your own. Let the paint finish curing, then enjoy keeping it or giving it to someone special.