This post may contain affiliate links. If you make a purchase through these links, I may earn a small commission at no extra cost to you. Thank you so much for your support.
If you’re looking for Easter crafts for kids, you’ve come to the right place.

Easter is the perfect time to get creative with fun and festive crafts that bring the holiday spirit to life.
Whether your child enjoys painting, cutting, gluing, or using their handprints for adorable keepsakes, these easy craft ideas will keep them entertained while making memorable decorations.
From cute bunnies and fluffy chicks to colorful Easter eggs and handmade greeting cards, we bring Easter crafts for kids that are simple to make using materials you likely already have at home.
If you need a quick afternoon activity or a special DIY project for an Easter party, these Easter crafts for kids will inspire creativity and holiday fun for children of all ages.
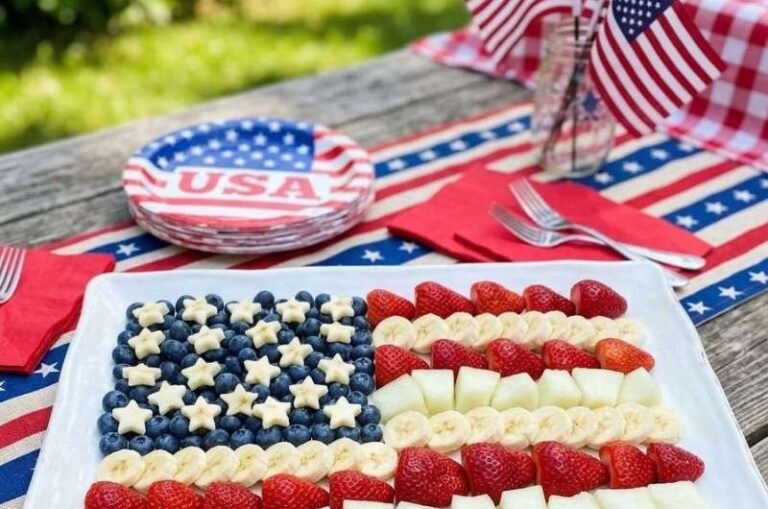
And if you’re looking for even more ways to celebrate, don’t miss our free Easter coloring pages, adorable printable Easter cards, and creative Easter charcuterie board ideas that are perfect for entertaining and gifting!
How to Make Easter Crafting Easy and Fun
Easter crafts are a great way to keep kids engaged, but a little planning helps make the process smoother. Here are some simple tips to keep things fun and stress-free:
Set Up a Crafting Space – Cover tables with a tablecloth or newspaper to catch messes. Keep wipes nearby for easy cleanup.
Use Kid-Safe Materials – Stick to washable paints, glue sticks, and blunt scissors for younger kids.
Encourage Creativity – Let kids choose colors, decorations, and designs to make their crafts unique.
Gather Supplies First – Having everything ready before starting keeps kids focused and prevents delays.
Make It a Group Activity – Crafting is more fun with siblings, friends, or parents working together.
Enjoy the Process – Not every craft will look perfect, and that’s okay. Focus on having fun and making memories.
Ways to Use Easter Crafts
Once the crafts are finished, what can you do with them? Here are some fun ways to put these adorable Easter crafts for kids to good use:
Easter Decorations – Hang Paper Chain Bunny Garlands and Easter Wreaths around the house to create a festive atmosphere.
Easter Egg Hunt Accessories – Use handmade Popsicle Stick Easter Baskets to collect eggs or hide DIY Paper Eggs around the yard.
Personalized Easter Gifts – Give grandparents or teachers a special Footprint Bunny or DIY Easter Card as a keepsake.
Easter Party Fun – Set up a crafting station where kids can make Paper Bunny Masks to wear at the celebration.
Classroom or Sunday School Projects – Many of these Easter crafts are great for group activities, helping kids learn about Easter in a creative way.
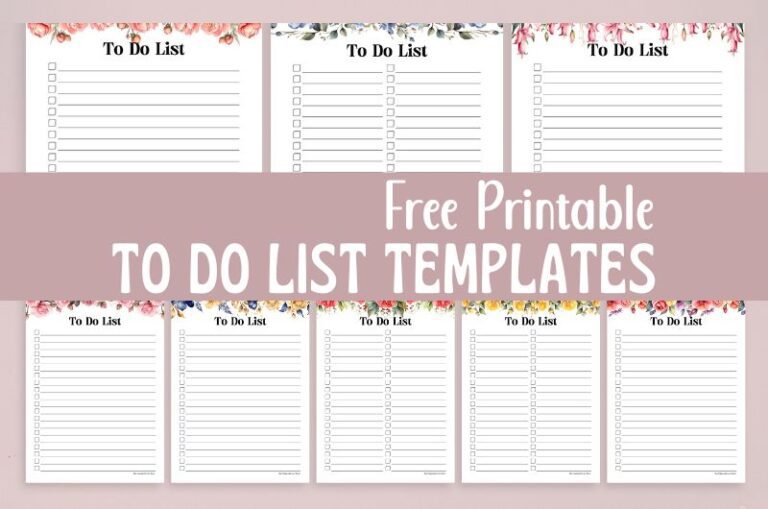
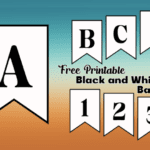
Templates to Help You Get Started


For even more creative ideas to try this season, don’t miss Easter Crafts for Kids: Fun, Easy, and Creative Ideas for a Memorable Spring | Rent | ApartmentGuide
Easter Crafts for Kids
Paper Bunny Masks
Who doesn’t love a bunny mask? These adorable paper bunny masks let kids get creative while making their own festive Easter disguises.

A simple Easter craft that uses a white paper base with soft pink inner ears and cut-out eyes. The facial features are minimal, making it a perfect option for kids who like a sleek and traditional bunny look.

As you can see from the two examples, there’s no right or wrong way to decorate them.
This second mask is more colorful and playful, with a mix of pastel-colored accents on the ears and forehead. It includes more expressive drawn-on details, like eyelashes and a rounded nose, adding extra charm.
How to Make It
Cut out the mask shape – Use sturdy cardstock or construction paper and cut out a bunny face with large ears. Make sure to cut out holes for the eyes.
Create the ears – Cut out two large bunny ears from paper and glue them onto the mask. Feel free to layer different colors for extra detail.
Add facial features – Use markers, stickers, or cutouts to make a cute bunny nose, mouth, and whiskers. Googly eyes are always a fun option too.
Attach a string – Punch small holes on the sides of the mask and tie an elastic string or ribbon so the mask stays on comfortably.
Decorate your bunny – Kids can personalize their masks however they like! Add patterns, extra colors, or even glitter to make each bunny unique.
Bunny Headbands
Bunny ears are a classic Easter craft, and kids can personalize their headbands in creative ways. These two designs show how simple materials like paper, pom-poms, and even folded paper shapes can completely change the look of the headband.

We have the headband decorated with soft pastel-colored pom-poms, giving it a gentle and playful look. The bunny ears are made from layers of white and pink paper, cut into a classic tall shape and attached securely to the headband.
The addition of pastel pom-poms along the base of the ears creates a soft and fluffy effect, making this version perfect for a delicate, springtime feel.

The second headband takes a bolder approach, with large folded yellow paper accents at the base of the ears. The bunny ears follow the same layered paper technique but appear more structured, with the tips slightly bent forward for added dimension.
The addition of the yellow paper details creates a striking contrast, making the ears pop. This version has a playful, dramatic look, resembling a mix of bunny ears and flower petals, making it stand out in an Easter celebration.
How to Make It
Use a plain headband as the base. A flexible plastic or fabric-covered headband works best.
Cut out two large bunny ears. Use white paper for the outer ears and pink paper for the inner ears, then glue them together for a layered effect.
Attach the ears to the headband. Secure them with glue or tape, reinforcing with extra strips of paper if needed.
For a soft, festive look, glue small pastel-colored pom-poms along the base of the ears.
For a bold, playful style, fold yellow paper into petal-like shapes and attach them around the base of the ears.
Let everything dry completely before wearing.
Pom-Pom Chicks

These pom-pom chicks are as cute as they are easy to make. Their fluffy texture gives them a soft, realistic look, and each chick has its own personality based on how the details are added.
Whether made with traditional yarn-wrapped pom-poms or pre-made fluffy materials, kids can have fun bringing their little chicks to life.
How to Make It
Make the pom-pom body. Use yellow yarn wrapped around a pom-pom maker or cardboard circle. Once full, tie it in the middle and trim to create a round, fluffy shape.
Add the face. Glue on small googly eyes and an orange felt or paper beak.
Create the feet. Cut out small orange paper or felt feet and glue them to the bottom.
Add extra details. A tiny feather on top or soft wing shapes can give each chick a unique look.
Let it dry and display. Once dry, arrange the chicks as part of your Easter decorations.
Toilet Paper Roll Bunnies
Toilet paper roll bunnies are a great way for kids to explore creativity while recycling materials. These two designs show how different techniques can achieve completely unique looks.

These bunnies have a clean and uniform style. The rolls are wrapped in pastel-colored paper, creating a smooth finish.
The faces are simple, with googly eyes, a small pink pom-pom nose, and thin black whiskers. The ears, made from white and pink paper, are attached inside the roll for a neat, structured appearance.

This one takes a more artistic approach. Instead of wrapping the rolls in colored paper, the bunnies are hand-painted with a mix of solid colors and soft brush strokes.
Some have added details like grass patterns, creating a more whimsical effect. The facial features include a mix of pom-pom noses, hand-drawn whiskers, and even varied eye expressions, making each bunny unique.
How to Make It
Wrap or paint the roll. For a smooth finish, cover the roll in colored paper, or use paint for a more artistic look.
Cut and attach the ears. Cut white paper ears with pink inner sections and glue them to the inside of the roll for a sturdy structure.
Add facial features. Use googly eyes, a pom-pom or paper nose, and draw whiskers with a marker.
Personalize with details. Leave the bunnies simple or add hand-painted designs like grass, patterns, or rosy cheeks.
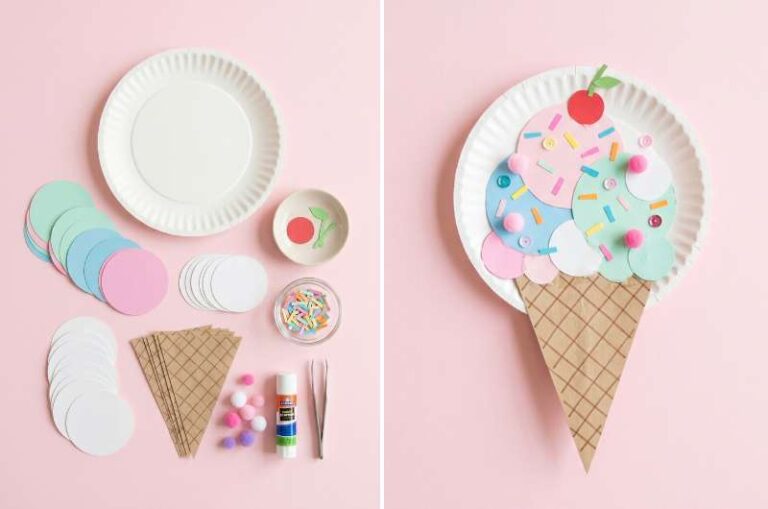
Paper Plate Easter Egg
This paper plate Easter egg craft allows kids to create a large, decorative Easter egg using simple materials. The mix of bright colors, textured paper cutouts, and glitter make it eye-catching and fun to design.

It features a layered pattern approach, with stripes, zigzags, and dots carefully arranged across the plate. The use of different materials – colored paper, gold glitter, and small confetti-like cutouts, adds depth and texture, making the design stand out.
Kids can follow a structured pattern or go for a free-form, abstract style, depending on their preference.
How to Make It
Paint or color the base. Use pastel-colored paints or markers to create a background pattern on the paper plate.
Cut out decorative shapes. Use construction paper to make zigzags, dots, and strips to layer on top.
Glue on details. Arrange the paper cutouts across the plate, mixing colors and patterns for a vibrant look.
Add extra texture. Apply glitter, stickers, or crumpled tissue paper for a unique, textured effect.
Let it dry and display. Once finished, hang it on a wall or use it as a festive Easter decoration.
Sticker and Marker Easter Eggs
These Easter egg crafts allow kids to express their creativity in different ways, whether using stickers and soft pastels or bold, vibrant marker designs.

What we have here is eggs are decorated with stickers and minimal hand-drawn details. Each egg has a unique design, using colorful foam stickers shaped like flowers, hearts, and stars.
Some eggs also feature soft brush strokes of pastel paint, creating a simple yet cheerful look. This method is great for younger kids who enjoy placing stickers and experimenting with small details.

This design is more detailed and expressive, with hand-drawn patterns filling the eggs. These designs use bold black outlines and bright markers to create intricate stripes, shapes, and festive Easter symbols.
The colors are blended and layered, making each egg visually striking. This style is ideal for kids who love drawing and coloring within outlined shapes.
How to Make It
Print or draw egg shapes. Use plain white paper or cardstock and outline egg shapes for decorating.
For the first design, decorate the eggs with foam stickers, simple dots of paint, or soft pastel strokes.
For the second design, use black markers to create bold outlines, then fill in patterns with colorful markers.
Let everything dry and display. The finished eggs can be cut out and used for decorations, greeting cards, or other fun Easter crafts for kids.
Cotton Ball Bunny
This cotton ball bunny Easter craft for kids is simple, fun, and gives kids a chance to create a fluffy Easter decoration. The cotton balls make the bunny soft and textured, while the facial details bring it to life.

It uses a layered approach, starting with a brown paper bunny cutout as the base. White cotton balls are glued on to form a puffy, three-dimensional look.
The face is completed with large googly eyes, a pink pom-pom nose, and black whiskers drawn with a marker. The contrast between the soft cotton and the smooth paper creates an eye-catching effect.
How to Make It
Cut out a bunny shape. Use brown or white cardstock to create the base of the bunny.
Glue on the cotton balls. Cover the entire body with white cotton balls, arranging them to create a fluffy effect.
Add facial features. Attach googly eyes, a pink pom-pom for the nose, and draw whiskers with a marker.
Complete the ears. Cut out two large white ears with smaller pink inner sections and glue them on top.
Let it dry and display. Once dry, this bunny makes a perfect Easter decoration for a wall or table.
Pom-Pom Bunny Tails
This craft is all about simplicity and cuteness. The silhouette bunny cutouts paired with oversized pom-pom tails make these decorations charming and easy to create. The minimal design allows the fluffy tails to stand out, making them the focal point of the craft.

Each bunny is cut from pastel-colored cardstock, keeping the design light and festive. The oversized pom-poms add a fun, three-dimensional element, making these bunnies perfect for Easter displays, garlands, or table decorations.
How to Make It
Cut out bunny shapes. Use sturdy cardstock in pastel shades like pink, blue, yellow, or white. Cut the bunnies in a simple silhouette style, focusing on the signature long ears.
Attach the pom-pom tail. Choose a large, fluffy pom-pom and glue it securely to the bottom center of the bunny. Use soft pastel pom-poms to complement the cardstock colors.
Let it dry and display. Arrange the bunnies standing upright, lay them flat as table decor, or attach them to a string for a garland.
Footprint Bunny Art
Footprint bunny art is a great way to create a fun Easter keepsake while letting kids explore sensory play with paint. These two designs show how small changes in footprint placement and additional details can completely change the final look.

The footprints are placed upright, resembling a sitting bunny. The toes form the bunny’s head, while added cutout ears, small dots for eyes, and drawn whiskers complete the design. The soft pastel colors make it look gentle and delicate.

Both footprints are used to form a full bunny face. One footprint represents the left side of the face and the other the right.
The toes become part of the cheeks, and the ears are painted directly onto the paper. The facial details are drawn with a marker, making the bunny expression more animated and playful.
How to Make It
Paint the child’s foot. Use non-toxic paint in soft pastel or bold colors and press the footprint onto white paper.
For a sitting bunny: Position the footprint upright, add paper ears, and draw the face using a marker.
For a bunny face: Use two footprints side by side, paint the ears, and add drawn whiskers, eyes, and a nose.
Let it dry and display. Frame it as a keepsake or use it as a handmade Easter card.
Nature Bunny
This nature bunny Easter craft brings a fresh, organic twist to Easter art by using materials collected from the outdoors. These two designs show how twigs, leaves, flowers, and even small stones can be arranged to form a simple yet artistic bunny shape.

This design incorporates a variety of textures and colors, using different-sized twigs for the outline, green leaves for the ears, and colorful flowers for decoration.
A cotton ball tail softens the look, while small elements like a pebble nose and tiny floral details give it a playful feel.

Thinner twigs are used here to outline the bunny’s body and face. The whiskers are made from delicate stems, while tiny budding flowers and leaves add a subtle touch. The use of a small stone for the nose and a fluffy cotton tail keeps the look natural and refined.
How to Make It
Gather natural materials. Collect small twigs, leaves, flowers, and pebbles from the backyard or a park.
Arrange the bunny shape. Start with the body, using twigs to form a simple round shape, then add ears and facial details.
Create the whiskers and nose. Use small, thin twigs for whiskers and place a pebble or seed for the nose.
Add decorative touches. Place flowers, grass, or tiny leaves around the design to bring it to life.
Secure with glue. Once happy with the arrangement, glue the pieces onto a white sheet of paper for a finished artwork.
Plastic Spoon Chicks
These plastic spoon chicks are an adorable and simple Easter craft that kids can make in minutes. With just a few supplies, they can create fluffy little chicks that are perfect for Easter table decorations or festive playtime. The curved shape of the spoon makes a great chick face, and the added feathers give them a soft and lively look.

How to Make It
Use yellow plastic spoons. If you only have white spoons, they can be painted yellow for the same effect.
Attach googly eyes. Use glue to stick the eyes onto the bowl of the spoon.
Cut and glue the beak. Cut small triangles from orange paper or felt and glue them below the eyes.
Add feather wings. Glue soft yellow feathers to the sides of the spoon to make the chicks fluffy and cute.
Let them dry and display. These chicks can stand upright in a cup, be attached to Easter baskets, or used in a fun Easter-themed game.
Popsicle Stick Easter Baskets
These popsicle stick Easter baskets are a great way for kids to make their own festive baskets for egg hunts or Easter decorations. Both designs use the same basic structure but show how small creative choices can change the final look.

The first basket has a striped pastel color scheme, with alternating painted popsicle sticks forming a fun, colorful pattern. It has a soft yarn handle, making it look playful and easy to carry.

The second basket features decorative flower cutouts, giving it a springtime garden feel. The pastel popsicle sticks are accented with green horizontal sticks, creating a fence-like design.
A sturdy popsicle stick handle tied with soft rubber bands keeps it functional for carrying Easter eggs.
How to Make It
Build the basket base. Glue popsicle sticks vertically onto a square base to form the sides. Layer additional sticks for sturdiness.
Choose your decoration style. Paint the sticks in pastel stripes for a colorful look or glue on paper flowers for a floral theme.
Attach the handle. Use two popsicle sticks to form an arch and secure them with rubber bands or glue. For a softer touch, use yarn or pipe cleaners.
Let it dry and fill with eggs. Once dry, add plastic or chocolate eggs and use it for an Easter egg hunt or festive table display.
Easter Wreath
These Easter wreaths are a fun and creative way for kids to decorate their home for the holiday. Both designs follow a similar structure but show different ways to personalize the wreath with bunnies, flowers, and Easter eggs.

A wreath which has a simple, nature-inspired look, featuring paper grass along the bottom and a mix of hand-cut eggs, flowers, and bunnies.
A bright orange ribbon adds a finishing touch, making it perfect for hanging on a door or wall.

This wreath takes a fuller, more decorative approach, covering the wreath base entirely with colorful elements.
Large flowers, patterned Easter eggs, and multiple bunny faces make this version more vibrant and eye-catching. The addition of layered greenery gives it a well-balanced look.
How to Make It
Cut a wreath base. Use sturdy cardboard or thick cardstock to create a circular frame with a cut-out center.
Create Easter elements. Cut out paper eggs, bunnies, flowers, and grass from pastel-colored construction paper.
Assemble the decorations. Glue the elements around the wreath base, layering them for a fuller look.
Attach a ribbon. Tie a ribbon at the top for easy hanging.
Let it dry and display. Hang it on a door, wall, or as part of an Easter party setup.
Paper Chain Bunny Garland
Paper chain bunny garland – a fun and simple way to decorate for Easter. The pastel-colored bunnies bring a soft, festive touch to walls, mantels, or party spaces.
Kids can customize their garland by drawing unique bunny faces and arranging the colors in different patterns.

We have a classic, evenly spaced bunny design, where each bunny is linked directly to the next, forming a seamless chain. Simple black-drawn facial features add a cute expression to each bunny.

On this garland, the bunnies strung together using a colorful beaded string. Some bunny cutouts are also displayed as stand-alone decorations on a desk, showing how they can be used in multiple ways.
How to Make It
Cut out bunny shapes. Use pastel-colored paper to cut out identical bunny silhouettes.
Draw on faces. Use a marker to add simple whiskers, eyes, and a small nose to each bunny.
String them together. For a direct chain, glue or tape the bunnies’ ears together. For a looser garland, punch holes in the ears and thread a string or yarn through them.
Hang and display. Once complete, drape the garland across a mantel, doorway, or wall for a charming Easter touch.
DIY Easter Cards
Making DIY Easter cards is a wonderful way for kids to create personalized greetings for friends and family. These two approaches show how kids can either use cut-out paper designs or hand-drawn illustrations to make their cards unique.
You May Also Like

Kids can create a collage-style design using pastel paper cutouts. Bunnies, Easter eggs, and spring flowers are cut from colorful paper and glued onto the cards.
Some designs include textured elements like small pom-poms or layered grass, adding depth and dimension.

The second set focuses on hand-drawn and colored designs, with detailed illustrations of Easter eggs, bunnies, and springtime scenes.
The outlines are either pre-drawn or sketched by hand, then colored with markers or colored pencils to bring the designs to life.
Paper Plate Easter Bunnies
These paper plate Easter bunnies are a fun and creative way for kids to celebrate Easter. Each design shows how small details can give the bunny its own personality, making them perfect for both boys and girls.

The first bunny has a playful and dapper look, with a bright blue bow tie and expressive raised eyebrows. The pink blush on the cheeks adds a cute touch, and its friendly smile makes it perfect for Easter celebrations.

The second bunny has a softer, more elegant design, featuring a pastel-colored floral crown made from paper flowers and green leaves.
How to Make It
Start with a paper plate. Use a plain white paper plate as the base.
Cut out bunny ears. Use white construction paper for the outer ears and pink paper for the inner ears. Attach them to the top of the plate.
Create the facial features. Glue on googly eyes, a pom-pom or paper nose, and draw whiskers and a mouth with a marker.
For a playful bunny: Add a small paper bow tie in blue or green below the bunny’s face.
For a floral bunny: Cut out small paper flowers and leaves, then glue them to the top of the bunny’s head.
Let it dry and display. These bunnies make great wall decorations, party props, or even fun masks with a stick handle attached to the back.
Pin to save for later!


Final Thoughts
Easter crafts for kids are a wonderful way to keep them engaged and excited for the holiday. Whether they are making fluffy chicks, colorful eggs, or adorable bunny masks, each project provides an opportunity to get creative, develop fine motor skills, and make lasting memories.
With just a few supplies and a little imagination, kids can create beautiful Easter decorations, gifts, and keepsakes. So gather your materials, set up a craft station, and let the Easter fun begin.
More Ideas You May Love
Easter Bunny Coloring Pages Free Printable


Easter Word Scrambles for Kids and Adults