When the days are long and school is out, there’s nothing better than filling up the time with summer crafts for kids that spark imagination and keep little hands busy.
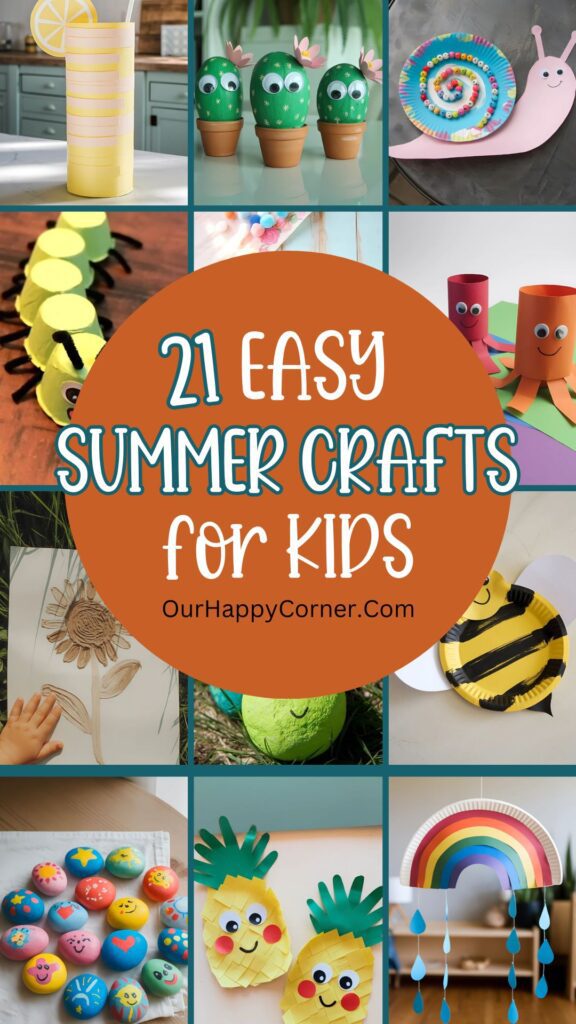
Whether you’re trying to entertain your toddler during a slow afternoon, planning activities for a playdate, or just want to encourage screen-free fun, these simple and colorful crafts are perfect for it all.
As a mom (or aunt, or grandparent – you name it!), I know how helpful it is to have go-to ideas that don’t require a ton of prep or pricey materials.
These crafts use things like paper plates, toilet paper rolls, and construction paper, plus a healthy dose of creativity.
From ocean animals to few muddy masterpieces, these summer projects are equal parts adorable and doable.
Why Summer Crafts Are So Worth It
Summer crafts aren’t just about keeping kids entertained (though that part’s a lifesaver!). They’re also:
Great for fine motor skills – Think cutting, gluing, stringing, and painting.
A break from screens – Enough said.
A chance for self-expression – Kids love to make it their own and they totally should.
An easy way to create keepsakes – You’ll want to save a few of these.
Plus, there’s something special about crafts that feel seasonal. Sunshines, popsicles, and rainbows just hit differently in July.
Looking for even more fun ideas to keep the kids busy? Be sure to check out our summer bucket list for kids filled with simple activities and memory-making adventures.
What You’ll Need
While each craft has its own instructions below, here are some staples you’ll want to have on hand:
Paper plates (a summer MVP)
Construction paper (colorful and versatile)
Toilet paper rolls and egg cartons
Glue sticks and white glue
Kid-safe scissors
Paints or markers
Googly eyes (because everything’s cuter with eyes)
Ribbon, yarn, or string
Beads, pom-poms, and pipe cleaners (optional but fun!)
Tips for Crafting With Kids
Crafting with kids can be so fun, but let’s be honest, it helps to have a few tricks up your sleeve:
Prep first: Cut out any tricky shapes ahead of time if your child is younger.
Set up a craft space: A plastic tablecloth or sheet of butcher paper can save your sanity.
Let go of perfection: Their crab might have 7 legs and upside-down eyes. That’s the point!
Work alongside them: Sometimes kids just want you to join in for a few minutes.
Celebrate their work: Displaying their art gives it meaning. Even the muddy ones!
And if your little one loves quiet time activities too, don’t miss our free printable summer word search puzzles, they’re great for road trips, rainy days, or winding down after crafting.
Ready to dive in? Below you’ll find our favorite crafts, broken up by theme.
Easy Summer Crafts for Kids
Torn Paper Rainbow
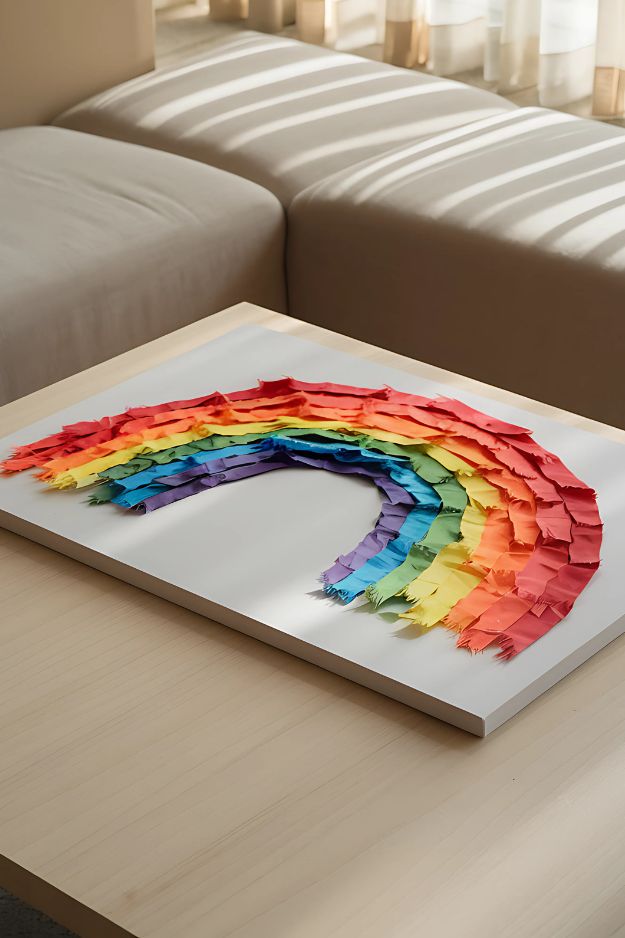
This torn paper rainbow is such a fun and colorful way to brighten up any summer afternoon. It’s simple enough for little hands, but the result is so cheerful it’s perfect for hanging up on the fridge or a playroom wall.
What we love most? There’s no need for perfection, kids can tear and arrange the paper however they like, and it still turns out beautifully.
How to Make It
Start with a blank sheet of thick white cardstock or a canvas board.
Tear strips of colored paper (red, orange, yellow, green, blue, and purple) into short pieces, don’t worry about making them even.
Starting with red at the top, glue each color in an arch shape, layering the paper slightly as you go.
Continue with each color of the rainbow until the arc is complete.
Let it dry, then proudly display your child’s creation.
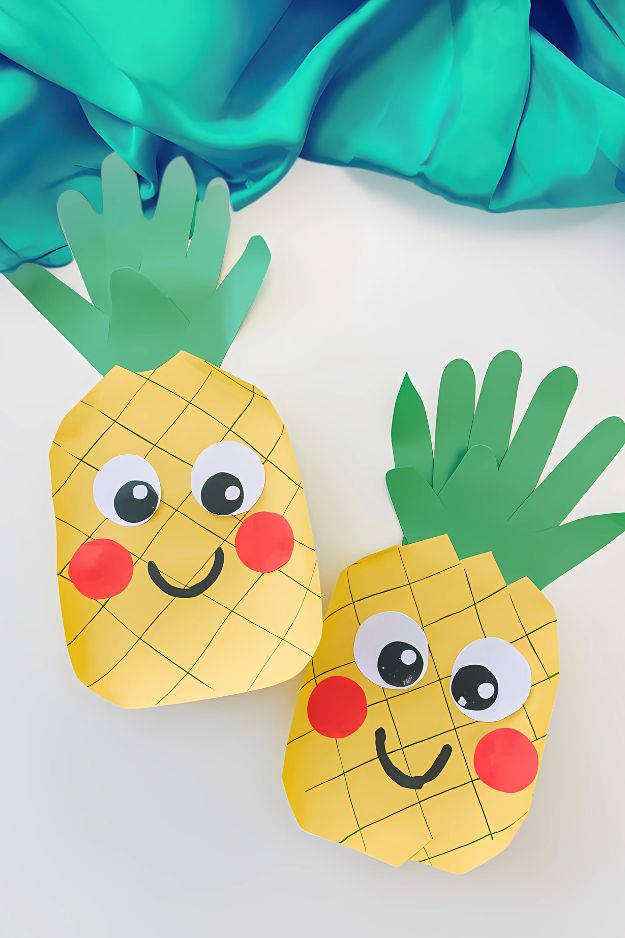
Handprint Pineapple
These cheerful pineapples are full of personality and perfect for a quick summer craft session. The handprint leaves give them that extra dose of charm, while the drawn crisscross pattern keeps the design simple and clean.
It’s a fun way to blend drawing with cutting and pasting, great for little hands just starting to explore different materials.
These pineapples take the fun up a notch with a textured, layered look. By gluing yellow squares across the base, kids can create a 3D effect that looks both playful and impressive.
The handprint leaves and big cartoon eyes give each pineapple its own quirky vibe, no two turn out exactly the same.

How to Make It
Cut out a large oval or pineapple shape from yellow paper.
Option 1: Draw a crisscross grid with a black marker to mimic the pineapple texture.
Option 2: Cut yellow squares and glue them overlapping to create a layered look.
Trace your child’s hand on green paper twice, cut them out, and glue to the top as the leafy crown.
Add big paper eyes, round red cheeks, and a happy smile.
Let everything dry, then hang them on the fridge to bring some summer cheer indoors.
Painted Treasure Rocks
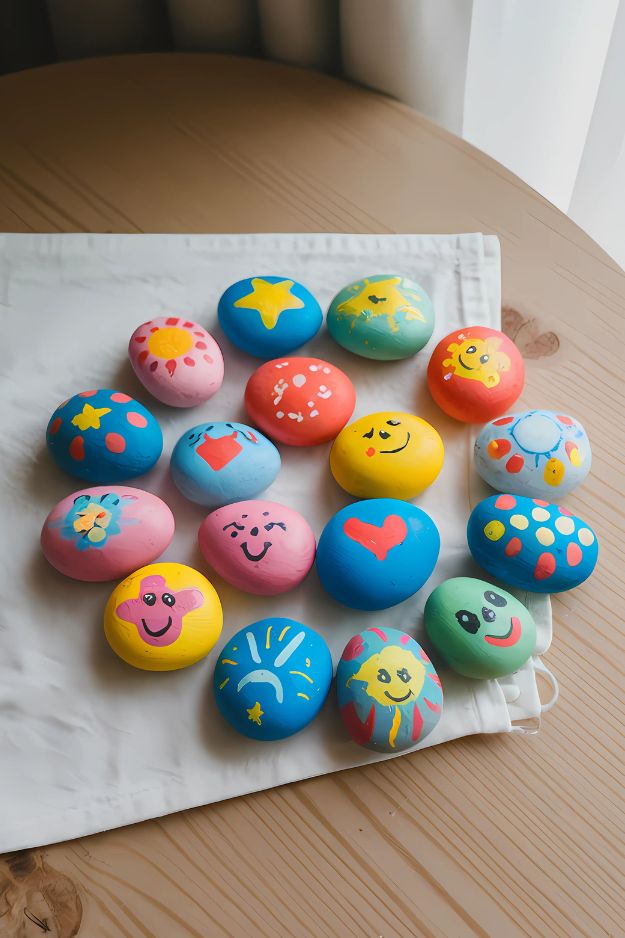
These painted treasure rocks are always a hit. Kids love the freedom to design their own happy faces, suns, stars, and patterns, and the best part? No two rocks ever look the same.
They’re easy to make, super colorful, and can be used for everything from garden decor to story prompts and even scavenger hunts.
How to Make It
Start by collecting smooth, flat rocks (you can find them outdoors or purchase from a craft store).
Wash and dry the rocks to prep the surface.
Let kids paint the entire rock in a solid base color first, like blue, yellow, pink, or green.
Once dry, decorate with fun summer designs: suns, hearts, flowers, stars, smiley faces, or anything they imagine.
Use paint pens or thin brushes for the details. Optionally, seal with clear acrylic spray to preserve the colors.
Let dry fully and display them on a shelf, use them in games, or hide them around the yard for a rock hunt.
Pet Cactus Rocks
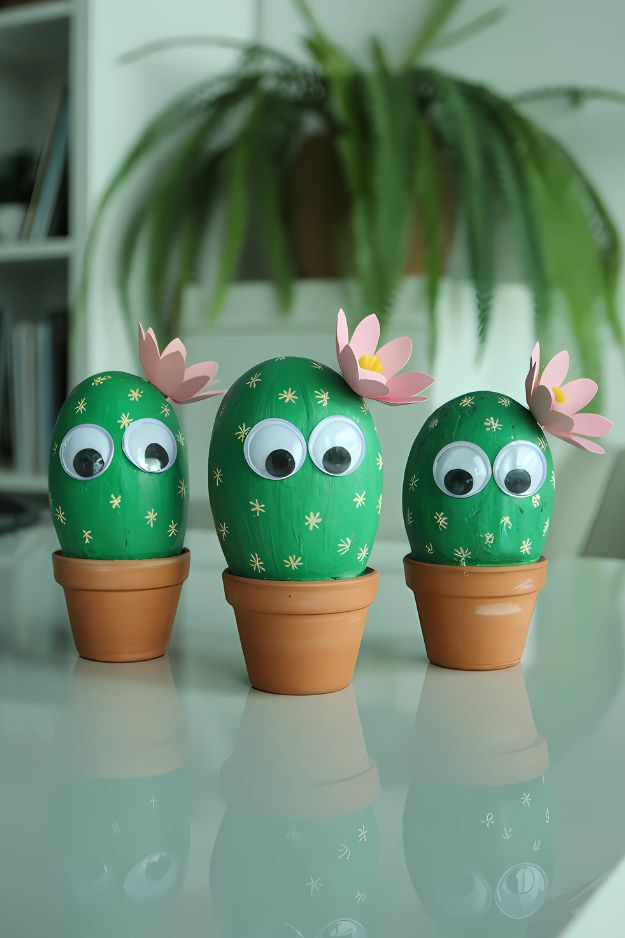
These pet cactus rocks are equal parts adorable and low-maintenance, no watering required. Kids will love giving their little “cactus buddies” personality with big googly eyes and bright paper flowers.
It’s a great mix of painting and pretend play, and they make such a fun addition to a bedroom shelf or windowsill.
How to Make It
Choose large, smooth rocks and paint them green. Let dry completely.
Add small cactus-like details using a fine brush or paint pen, little “x” shapes or dotted stars work great.
Glue on oversized googly eyes to give each cactus some character.
Cut pink paper flowers and glue them to the top for a blooming effect.
Place each rock in a small terracotta pot and let them “live” on a sunny table, windowsill, or desk.
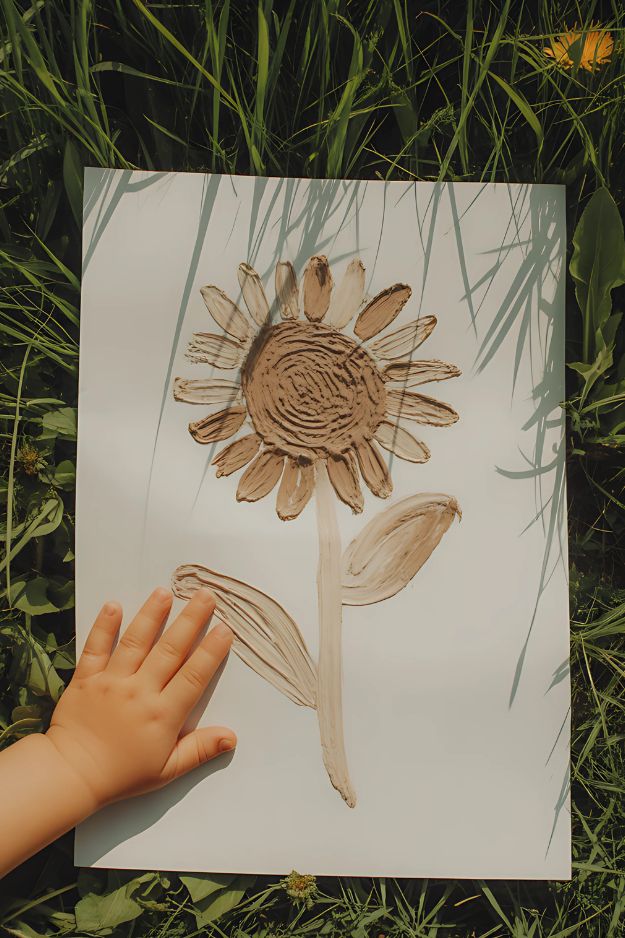
Mud Painting
There’s something wonderfully earthy about painting with mud, and this sunflower captures that rustic charm perfectly. With swirling texture in the center and bold petal strokes all around, this nature-made artwork feels like it belongs right in a field of wildflowers.
It’s a sensory-friendly craft that brings kids closer to nature while sparking their creativity.
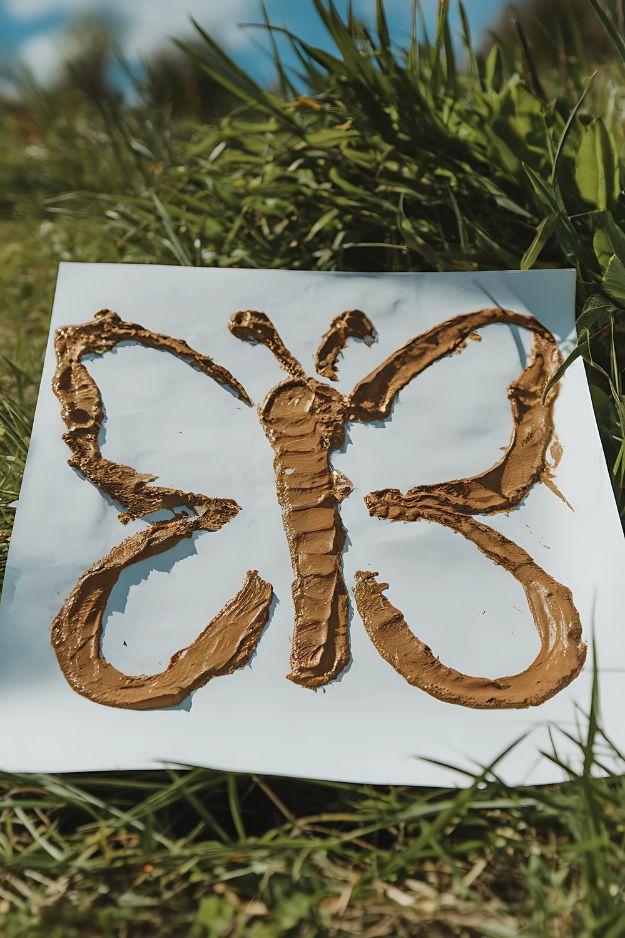
This butterfly is bold, textured, and full of movement, all thanks to mud. The thick, curved wings and patterned body give this piece a sculptural feel that kids will love.
It’s proof that even the simplest natural materials can turn into beautiful summer masterpieces when placed in the hands of a child.
How to Make It
Head outside with a bowl or cup and scoop up some clean mud (just dirt and water mixed to your desired consistency).
Place a sheet of white cardstock or thick paper on a flat surface (or clipboard for support).
Kids can use fingers, a stick, or a paintbrush to “draw” images with mud, flowers, butterflies, animals, anything.
Encourage texture: swirl the mud, pat it for thickness, or trace outlines to create dimension.
Let it dry completely outdoors, then bring it in to hang or display as a nature-inspired work of art.
Rock Caterpillar

Meet your child’s new garden friend, the rock caterpillar. With a line of bright, colorful stones and a cute little face leading the way, this craft is perfect for outdoor-loving kids.
They’ll enjoy picking out their favorite colors and lining up the rocks just right. It’s an easy project that doubles as playful garden décor or a backyard buddy.
How to Make It
Collect several smooth, round rocks of similar size for the body and one slightly larger for the head.
Paint each rock in bright summer shades, lime green, sky blue, teal, or any favorite color.
Once dry, glue on large googly eyes to the front rock and draw a smile underneath with black marker or paint.
Arrange the rocks in a curving caterpillar shape on the grass or along a garden bed.
Optional: use strong glue to attach them to a wooden board or flat surface if you’d like a more permanent piece.
Paper Plate Jellyfish
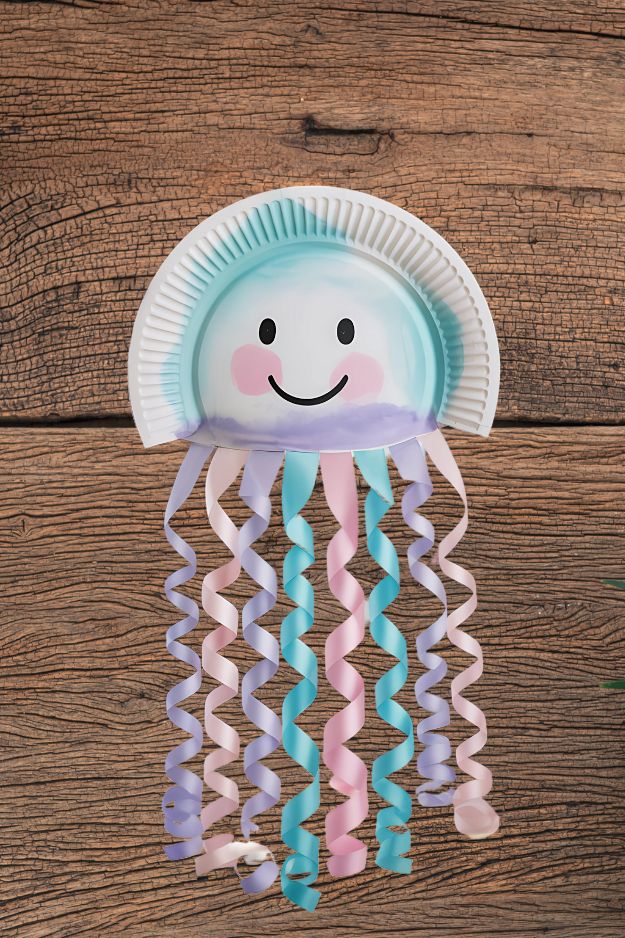
Who knew a paper plate could make such a cute little jellyfish? This pastel jellyfish is sweet, silly, and packed with personality, just look at those curly ribbon tentacles.
It’s a wonderful summer craft for kids to explore colors and textures, and it’s also a great opportunity to practice cutting and gluing skills.
How to Make It
Cut a paper plate in half to form the jellyfish body.
Paint it in soft colors, light blue, lavender, or even a mix for a dreamy effect. Let dry.
Draw or glue on eyes and a big smile. Add pink circles for cheeks if you’d like.
Cut several strands of pastel ribbon (or paper strips) and curl them slightly using scissors.
Glue the ribbons to the straight edge of the plate to create tentacles.
Hang your jellyfish up with string, tape it to a wall, or let it float along a curtain rod, it’s sure to brighten the room.
Toilet Paper Roll Octopus
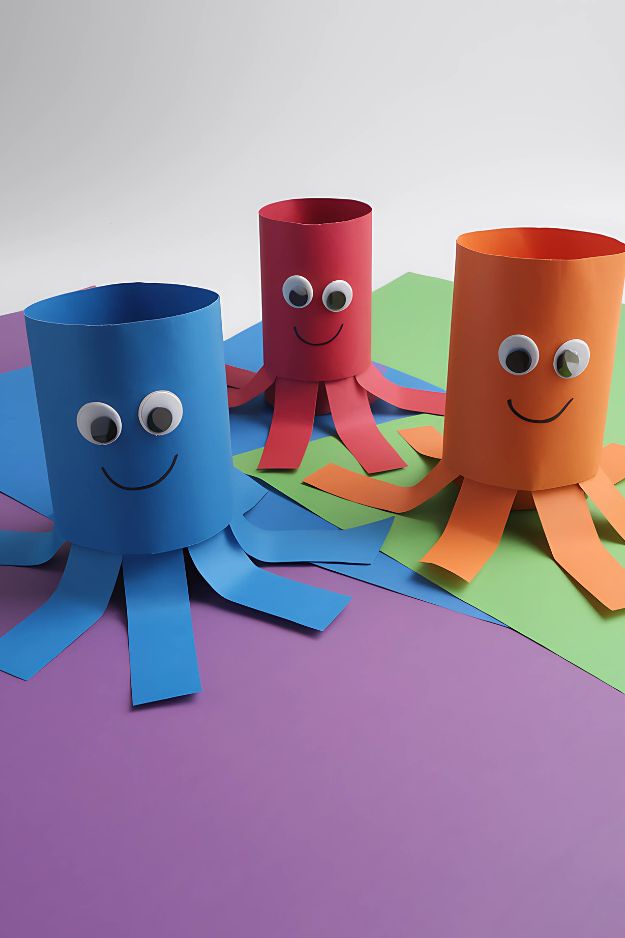
These happy little octopuses are full of wiggles and charm. Made from simple toilet paper rolls and construction paper, they’re a great way to turn recyclables into a fun, hands-on summer activity.
Kids can pick their favorite colors, give each sea creature a goofy face, and proudly line them up as their own underwater crew.
How to Make It
Wrap an empty toilet paper roll in a piece of colored construction paper (or paint it if you prefer).
Cut another strip of the same paper and make eight equal “legs” by snipping upwards, stopping halfway.
Gently curl or fold the legs outward so the octopus can stand.
Glue the legs around the bottom of the roll.
Add two big googly eyes near the top and draw on a wide smile.
Repeat in different colors to create a whole octopus family.
Rocking Paper Plate Crab

This paper plate crab is a total crowd-pleaser and it rocks, literally. With its bright red body and bouncy little legs, it’s full of character and fun to make.
Kids will love giving it googly eyes and seeing it gently wobble when tapped. It’s a perfect beach-themed craft to add a little movement to your art table.
How to Make It
Fold a paper plate in half and paint it red (or use red plates to skip the painting step).
Cut out six legs and two large claws from red construction paper.
Glue the legs and claws to the inside edges of the folded plate so they stick out when it’s standing.
Add two large googly eyes on top, either glued directly or mounted on short strips of paper to stand up.
Draw a big, friendly smile with a marker.
Once dry, place it upright and give it a gentle tap, it’ll rock back and forth just like a happy little crab.
Paper Plate Fish
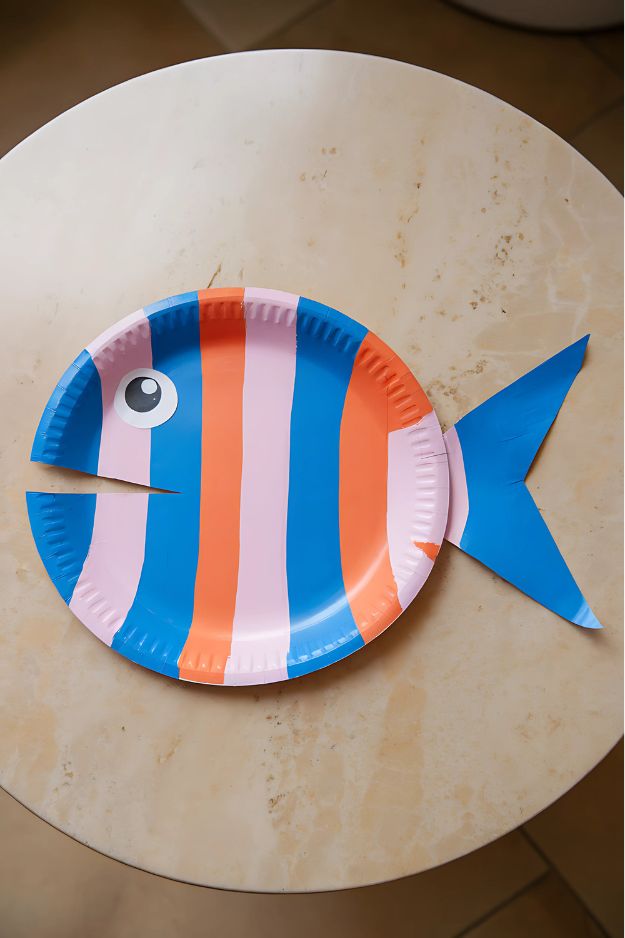
Simple, bold, and oh-so-fun, this paper plate fish is a splash of creativity. With its bright stripes and triangle tail, it’s a great introduction to cutting and painting for kids.
The best part? Every fish can look different depending on the colors and patterns your child chooses. It’s a fun way to let them create their own little ocean swimmer.
How to Make It
Start with a white paper plate and cut out a triangle on one side to form the fish’s mouth.
Use that cut triangle and cardboard to glue onto the opposite side as the tail.
Let your child paint stripes, spots, or any patterns using fun summer colors, like blue, pink, and orange.
Add a large eye with white and black paper circles or a googly eye for extra charm.
Once dry, hang your fish on the wall, or tape it to a stick and take it on a pretend ocean adventure.
Jellyfish Cupcake Liner Craft
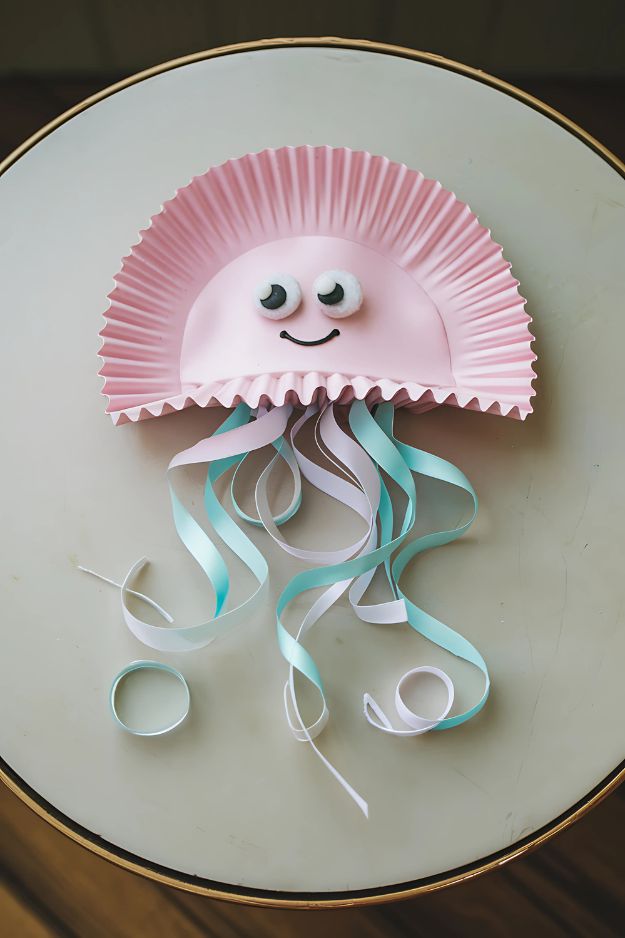
If you’re short on time or supplies, this jellyfish made from a cupcake liner is the perfect little project. It’s proof that even the simplest materials can turn into something adorable.
With its curly ribbon tentacles and sweet smile, it’s great for younger kids and easy to personalize with different liner colors or fun facial expressions.
How to Make It
Flatten a large cupcake liner (or use a few stacked for extra sturdiness).
Fold it in half to form the dome-shaped jellyfish body.
Glue on two googly eyes or cotton ball eyes with black dots, and draw a smile underneath.
Cut several strips of curling ribbon or paper in soft colors like mint, baby blue, and white.
Attach the tentacles to the inside edge of the liner so they hang down from underneath.
Let it dry and then tape it to a wall or string it up for a hanging jellyfish parade.
Sunshine Craft
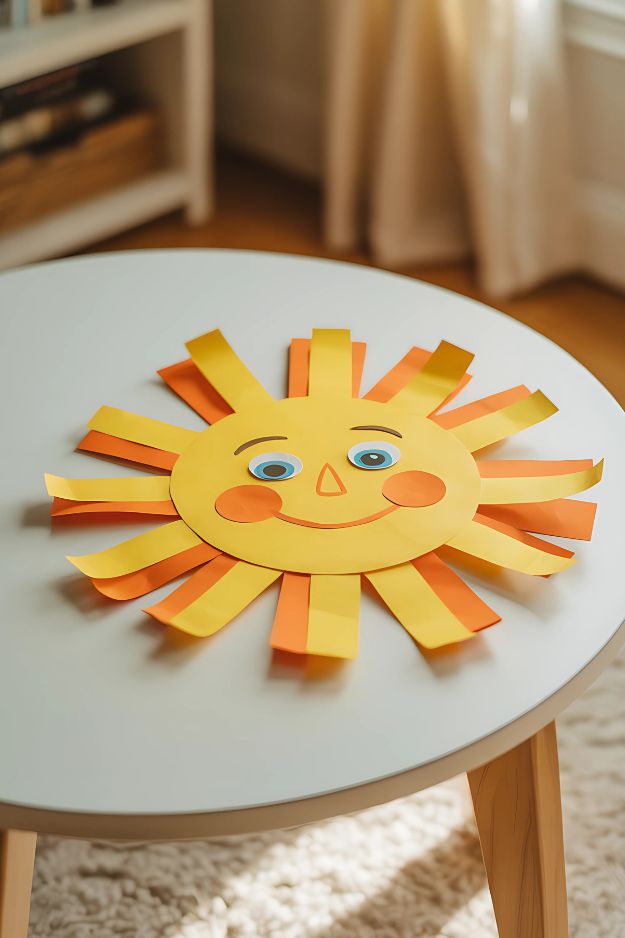
Nothing says “summer fun” like a big, smiling sun. This sunshine craft is bursting with personality and warmth, and it’s a fantastic way for kids to practice their cutting, gluing, and facial feature placement.
With bold yellow and orange rays, this craft will light up any space, just like the little hands that made it.
How to Make It
Cut a large circle from yellow paper to form the sun’s face.
Cut strips of yellow and orange paper and glue them around the back edge of the circle, alternating colors to create sun rays.
Add large paper eyes, rosy cheeks, and a big smiling mouth. Kids can even draw on eyebrows or add a cute nose like the one shown here.
Let everything dry, then display it on a wall, window, or door for a happy dose of sunshine indoors.
Lemonade Craft
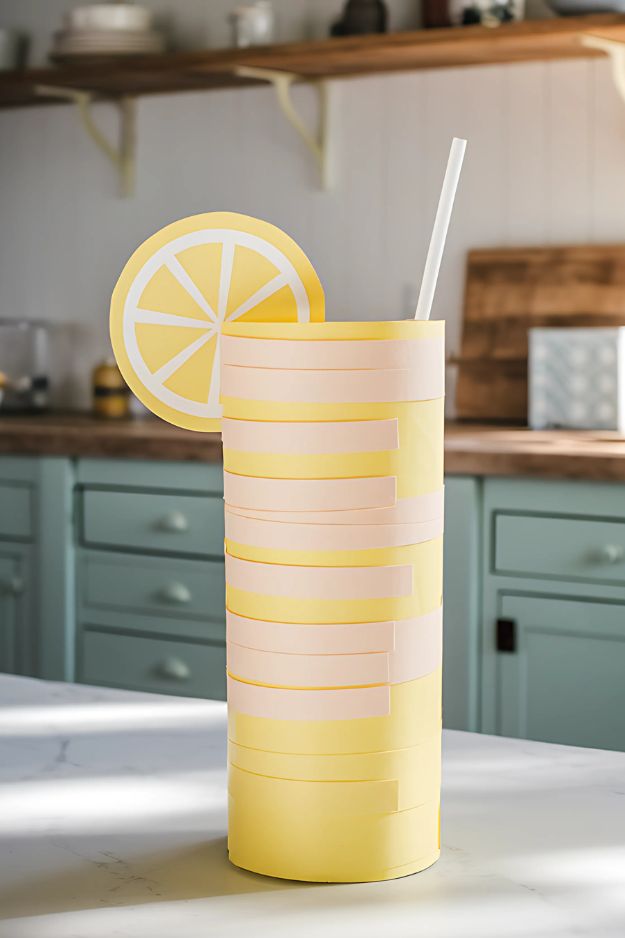
Here’s a fun twist on a summer favorite, make your own glass of lemonade using a toilet paper roll. With just a few paper strips, a straw, and a paper lemon wedge, kids can turn this everyday item into a playful drink that’s perfect for pretend summer picnics.
It’s quick, cute, and a creative way to reuse recyclables.
How to Make It
Take an empty toilet paper roll and wrap it in yellow paper to cover the base.
Cut strips of light pink and soft yellow paper and glue them around the roll to create the look of layered lemonade.
Cut out a lemon slice from yellow and white paper (a circle with triangular “slices” works great) and glue it to the rim like a garnish.
Tape a paper or real straw inside the roll to complete the look.
Let dry and display on a play kitchen shelf or use it as part of a pretend lemonade stand.
Popsicle Name Craft
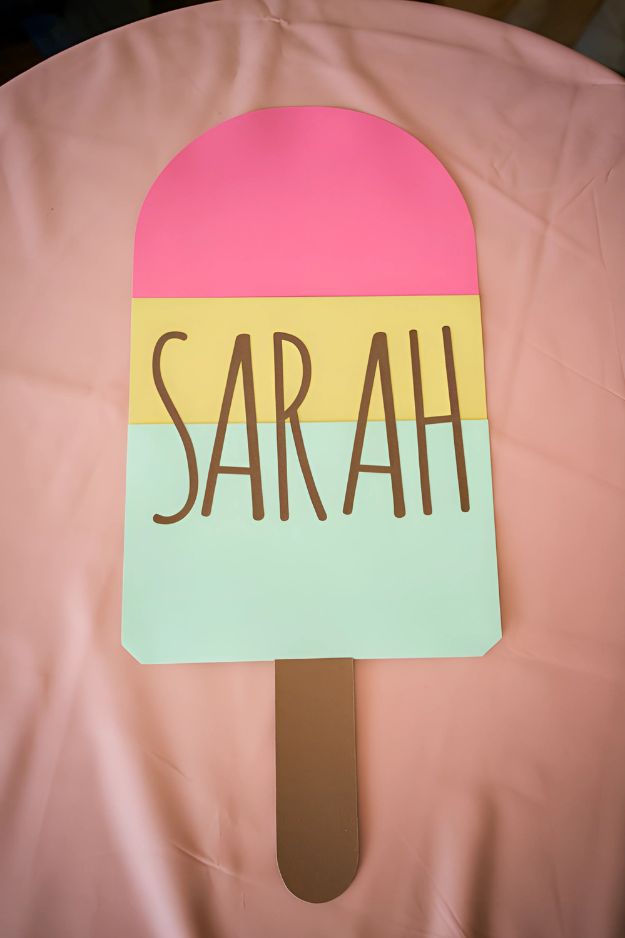
Cool down craft time with a popsicle that’s as unique as your child. This popsicle name craft is bright, bold, and totally customizable.
Whether you’re working on name recognition, decorating a summer party, or just having fun with paper shapes, this cheerful treat-themed project is a fun way for kids to put their name front and center.
How to Make It
Cut a large popsicle shape from cardstock or construction paper. Use three sections for color blocking, pink, yellow, and mint (or your child’s favorite colors).
Glue the layers together to form a tall popsicle design.
Cut and glue on a brown popsicle stick shape at the bottom.
Use large letters to write the child’s name across the middle section. You can draw, stencil, or use cut-out letters.
Display it on the wall, use it as a name tag for summer events, or turn it into a classroom door decoration.
Surfboard Name Craft

Bring the beach to the craft table with this colorful surfboard name project. Whether your child is dreaming of catching waves or just loves the surf vibe, this fun and sporty name craft lets them show off their creativity, and their name, in true summer style.
It’s eye-catching, easy to make, and totally customizable with any color combo or design flair.
How to Make It
Cut a large surfboard shape from colored cardstock, blue, teal, or whatever bold color your child likes best.
Add a paper stripe down the middle in a contrasting color (like pink, orange, or white).
Cut out and glue your child’s name across the center using bold block letters (or draw them with markers).
Decorate the board with paper shapes or drawn designs, think waves, stripes, zigzags, or palm leaves.
Let dry, then hang it on the wall, door, or bedroom bulletin board for a cool, summery touch.
Watermelon Paper Plate
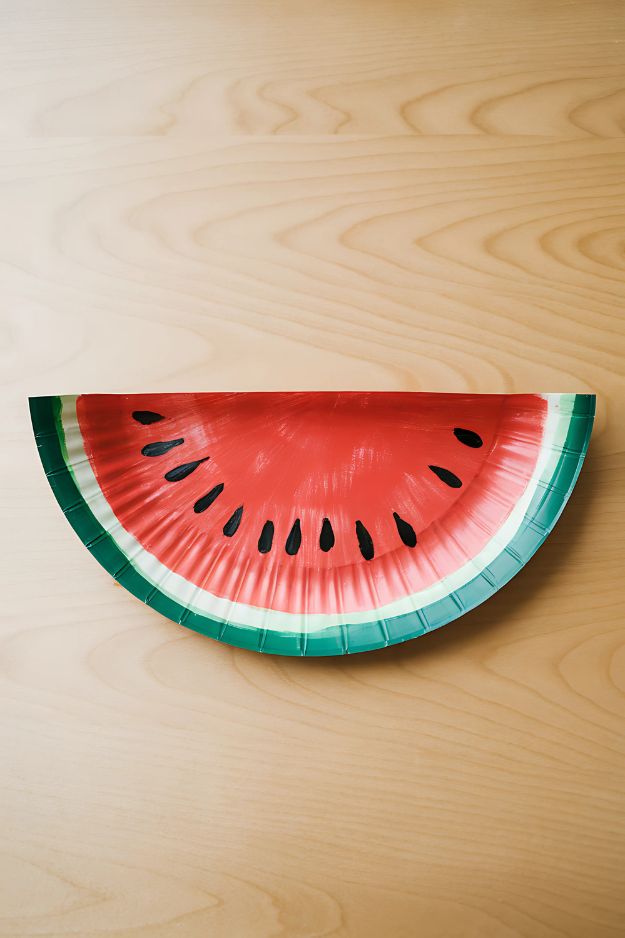
Sweet, simple, and bursting with color, this watermelon paper plate craft is a summer classic. It’s perfect for younger kids who love to paint and works great as festive decor for summer picnics or classroom walls.
Plus, it’s easy enough to make in batches if you’re crafting with a group.
How to Make It
Fold a white paper plate in half and cut along the fold to create two half-circles.
Paint the inside red for the fruit, then add a white band near the edge and a green stripe for the rind.
Once dry, use black paint, a marker, or paper cutouts to create watermelon seeds along the red area.
Let the slice dry completely, and display it as is, or attach a string to hang it like a summer banner.
Want a twist? Write a child’s name in the center or turn it into a fan by attaching a craft stick to the back.
Paper Plate Snail
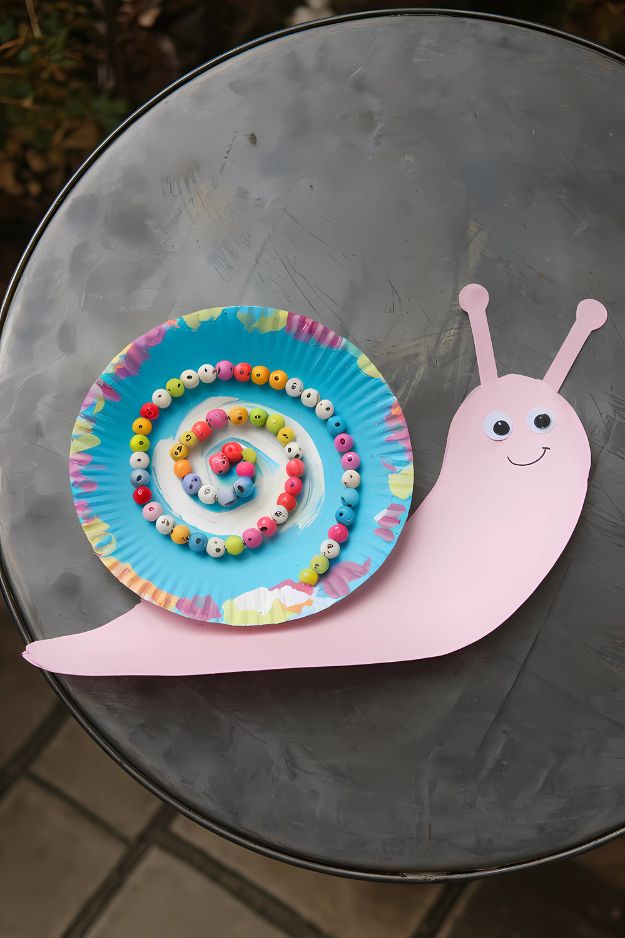
This cheerful paper plate snail is as fun to make as it is to admire. With its rainbow bead spiral and painted shell, kids get to explore both color and texture.
The smiley pink body gives it such a lovable personality, and the beads make this a great fine motor skill activity too.
How to Make It
Paint a paper plate in bright or pastel colors to form the snail’s shell, let dry completely.
Cut a snail body from pink or colored construction paper and glue it to the bottom half of the plate.
Draw on a happy face and glue on googly eyes to bring your snail to life.
Using white glue, create a spiral shape on the plate and place colorful beads along the glue line to decorate the shell.
Allow it to dry flat, then proudly display your snail on a shelf, window sill, or classroom wall.
Egg Carton Caterpillar
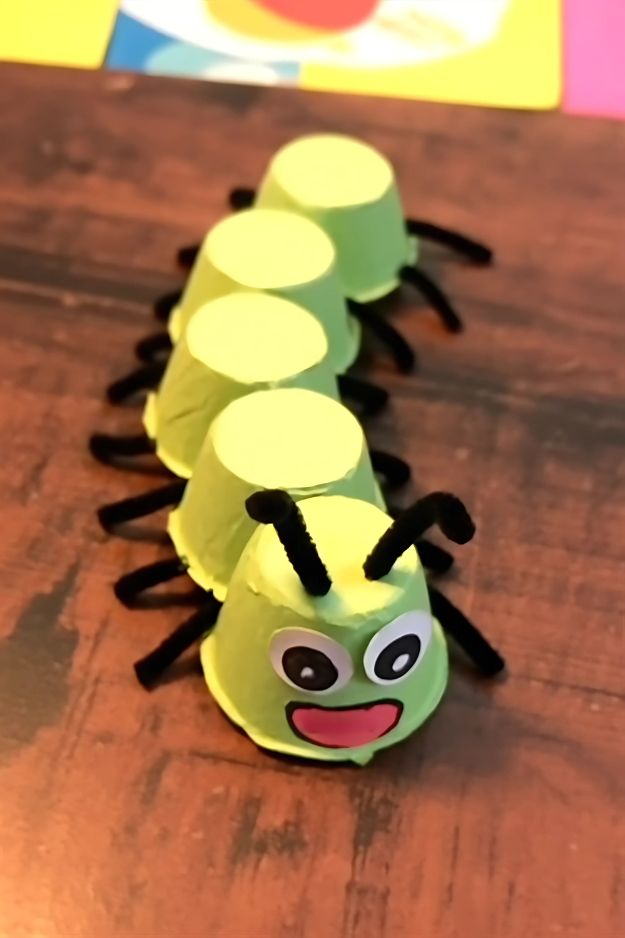
This egg carton caterpillar is full of wiggles, color, and character. It’s a fun recycling project that turns an everyday item into a cheerful little bug.
With pipe cleaner legs, a silly smile, and bouncy antennae, kids will love giving their caterpillar its own personality, and maybe even a name.
How to Make It
Cut a strip of four connected cups from an egg carton and turn it upside down.
Paint the entire caterpillar in your favorite color, green is a fun choice for that garden feel.
Once dry, glue on two googly eyes to the front cup and draw or glue on a big smile.
Insert short pieces of black pipe cleaners for antennae and glue or tape them inside the front section.
Add more pipe cleaner pieces on the sides of each section to form legs.
Let everything dry, then wiggle your new bug friend along the table or windowsill.
Paper Plate Bee
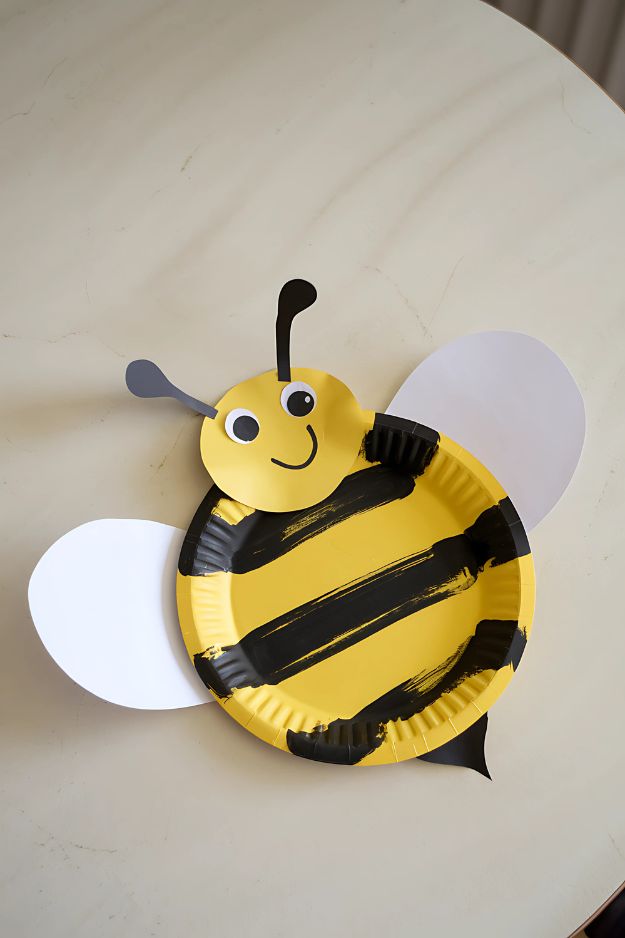
This cheerful paper plate bee is ready to buzz into any kid’s craft day. It’s bright, friendly, and made almost entirely from paper, making it an easy go-to project for summer afternoons.
From painting the stripes to cutting out wings and antennae, kids will have a blast turning a simple plate into a happy little pollinator.
How to Make It
Paint a yellow paper plate (or use pre-colored) with bold black stripes to create the bee’s body.
Cut two wings from white paper and glue them to each side of the plate.
Use black paper to create a small stinger and glue it to the bottom.
Cut out a bee face from yellow paper and glue it on top, adding googly eyes and a drawn-on smile.
Finish by gluing black antennae (paper or pipe cleaner) to the top of the head.
Let dry and hang it up to brighten your playroom or classroom wall.
Sunshine Mask
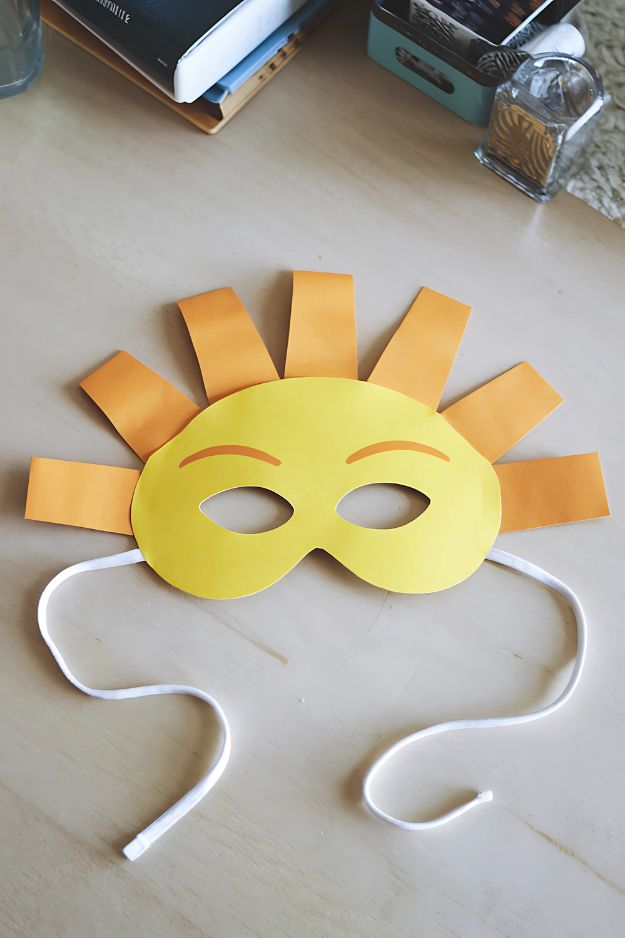
Let your little ones become rays of sunshine, literally. This sunshine mask is simple, colorful, and so much fun to wear. It’s great for imaginative play, summer parties, or just bringing some sunny cheer to the house.
The bold rays and bright colors are easy for kids to help cut and assemble, and the string ties make it wearable for all kinds of summer fun.
How to Make It
Cut a basic eye mask shape from yellow cardstock or construction paper.
Glue orange rectangular strips around the top edge of the mask to form sun rays.
Add eyebrows, eyelashes, or little facial accents with markers or cut paper for extra expression.
Punch holes on each side of the mask and tie on a piece of string, ribbon, or yarn so the mask can be worn.
Let your child try it on and shine like the sun all afternoon.
Paper Plate Rainbow Mobile

This paper plate rainbow mobile is a beautiful mix of movement and color, perfect for adding a bit of magic to any room or craft corner. It’s easy to hang, fun to assemble, and kids will love watching the little raindrops dance in the breeze.
Whether it’s sunny or stormy outside, this craft brings all the weather fun indoors.
How to Make It
Cut a paper plate in half to form the base of the rainbow.
Cut and glue colored paper strips or arches (red, orange, yellow, green, blue, indigo, and violet) in rainbow order onto the plate.
Cut out blue raindrop shapes from construction paper and attach them to short lengths of string or yarn.
Tape or glue the strings to the back of the paper plate so the raindrops dangle beneath the rainbow.
Punch a hole at the top and tie on a string for hanging.
Display it near a window or ceiling and let it sway gently like a summer sky after rain.
Final Thoughts
Whether your child loves painting, cutting, gluing, or all of the above, these summer crafts for kids are sure to bring big smiles (and probably a little glitter) into your home. Let them get messy, explore, and make it their own, that’s where the magic happens.
Save your favorites, pin them for later, and come back anytime you need a burst of crafty inspiration. Happy summer and happy making!